07-08 Forester sport front end conversion! All you need and nothing you don't!
For many 06-08 Forester owners the allure of swapping to a a Sports bumper from the factory standard bumper. Maybe it’s the difference in styling, the rarity or the fact that it adorns the Forester STi from Japan. I was always a big fan of the Forester Sport and Sti, so after I purchased my 06 Forester my mind began to wander and want to make the switch.

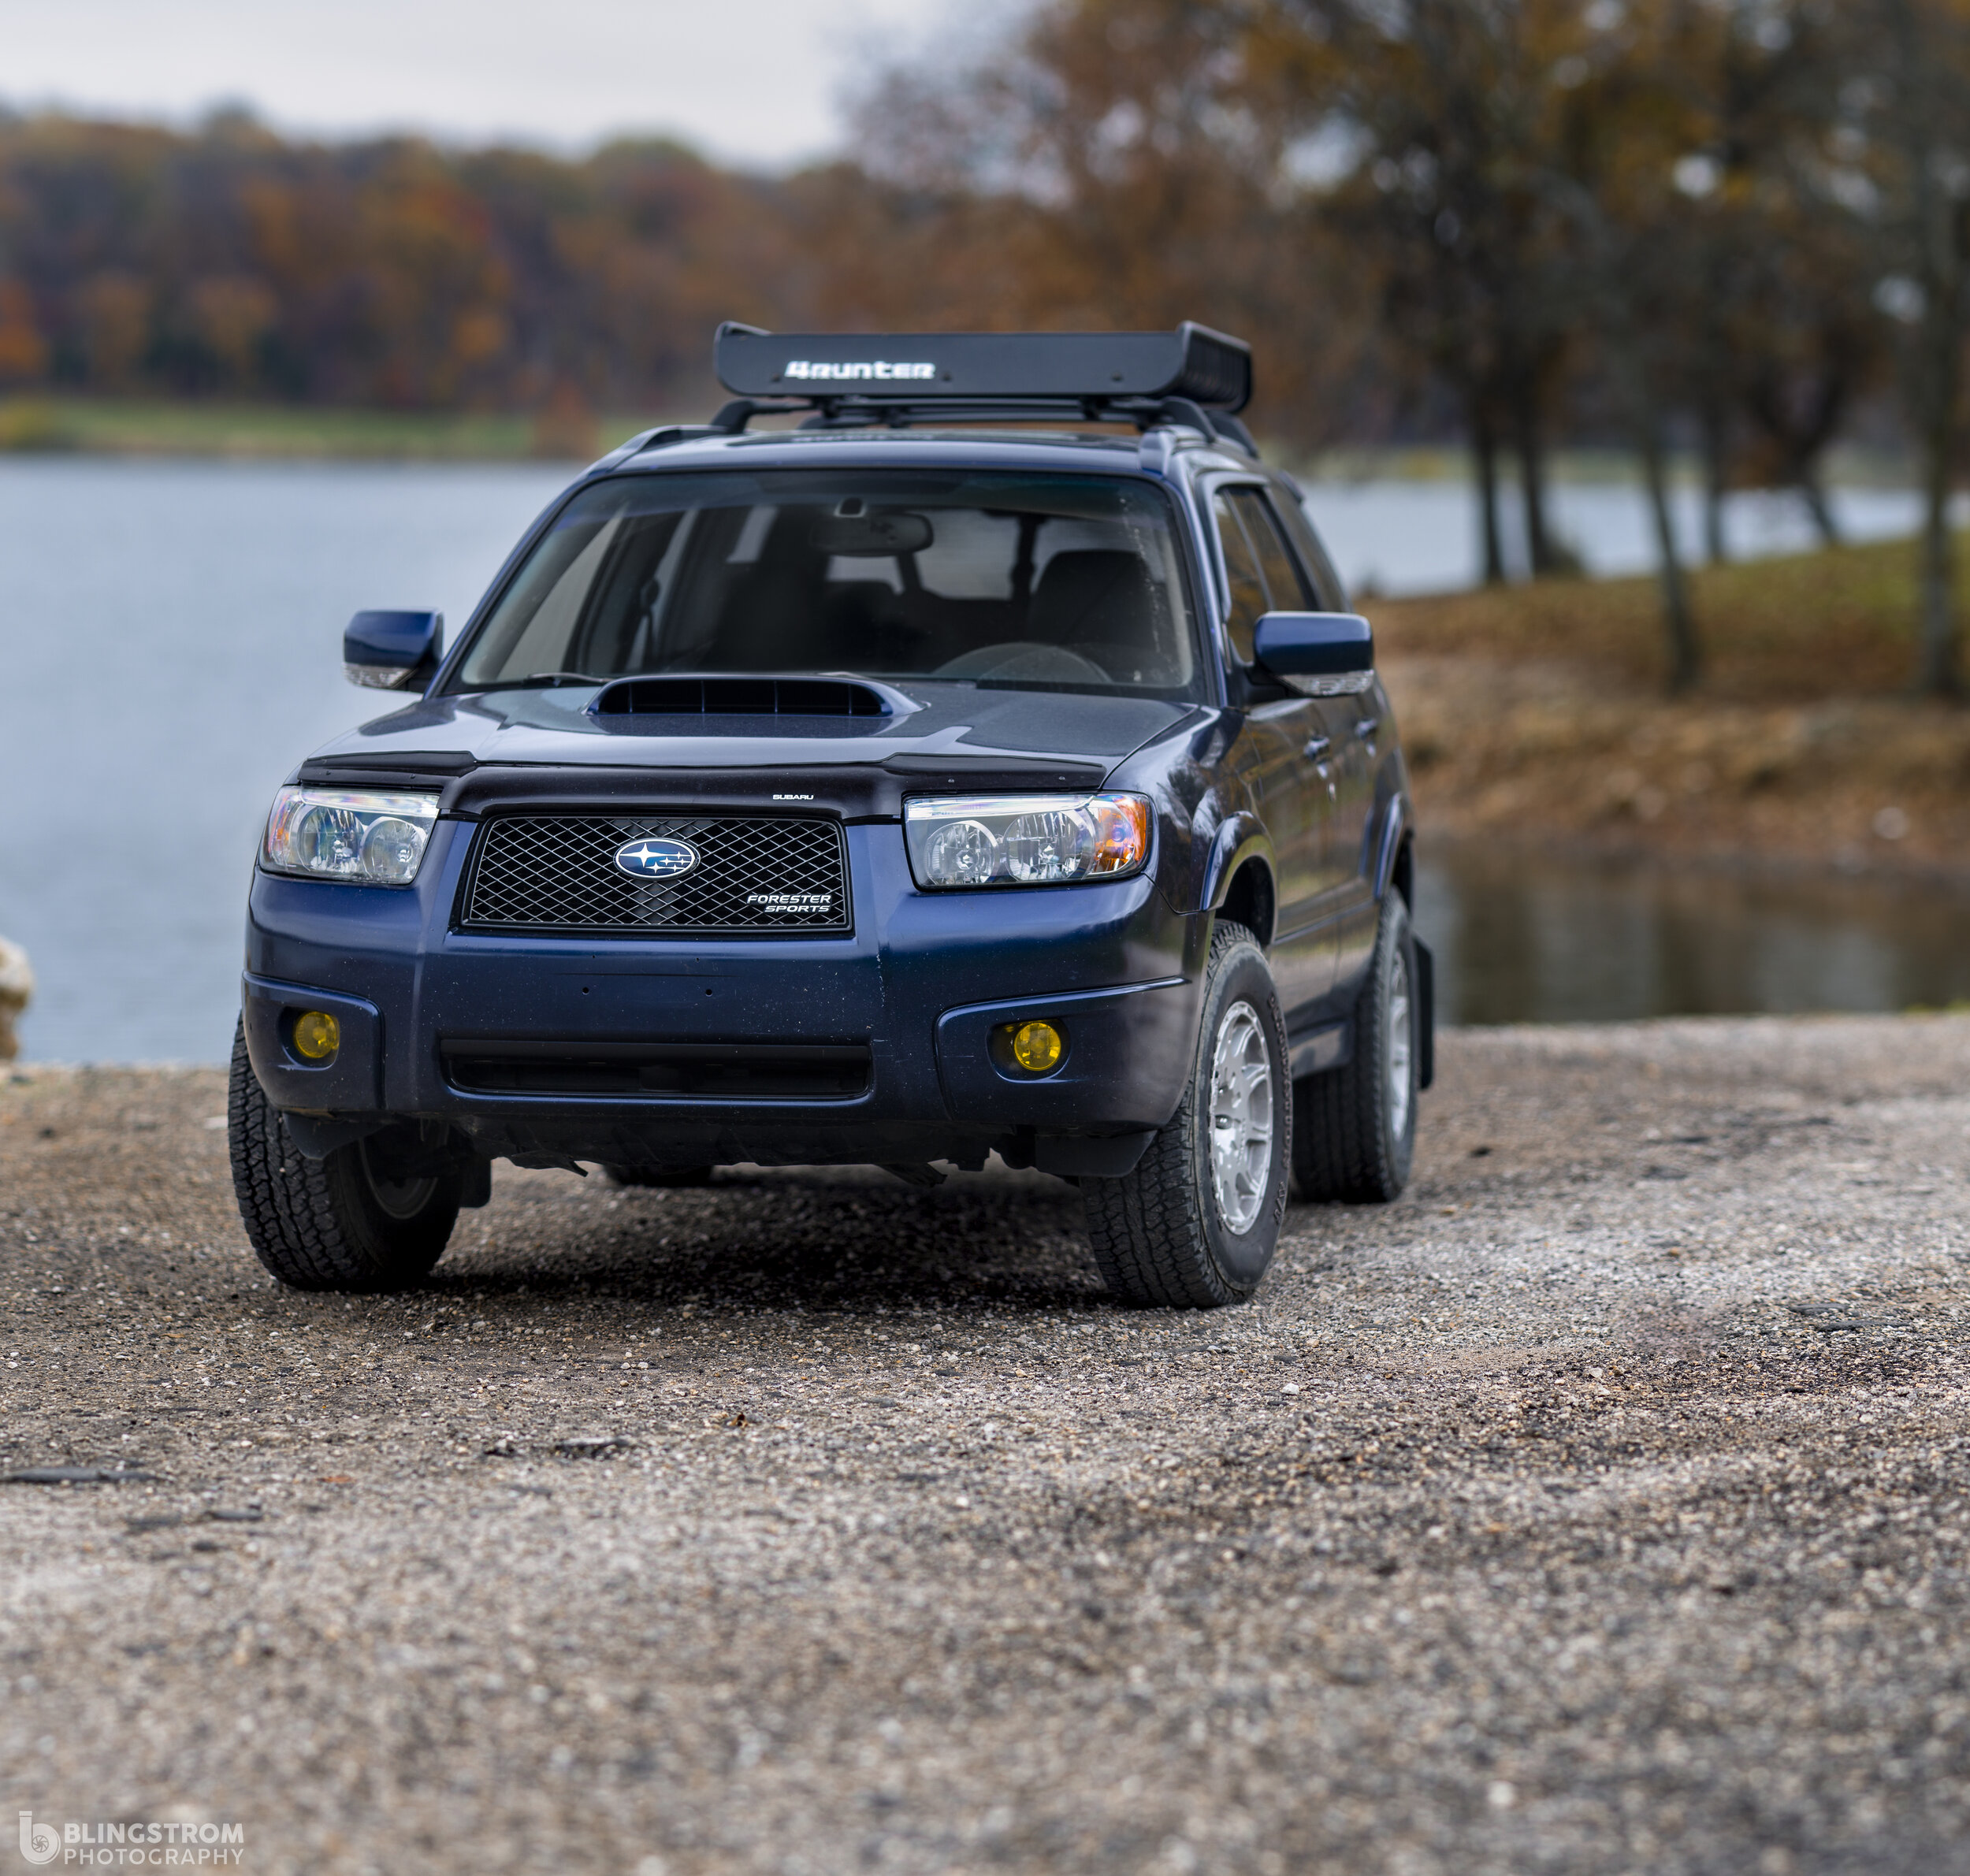
Meet the new setup..
The front end conversion from a standard Forester to a Sports model includes, the longer more aggressive front bumper(bye fog lights). A fancy grill with a different pattern alongside the blacked out headlights. Our final items are the inner fender liners which have a slight difference in shape near the bumper. One item that seems to go back and forth as a necessity, the splash guard, which for me isn’t necessary because of my skid plate. But we touch on it below for those curious.
Time Frame
With everything in your garage you should be able to complete this job in about two hours, determined by how many clips/bolts break. The toughest job in my opinion is the inner fender liners, as the clips can be stubborn/broken and it is a bit tough as one person to get everything lined up and apply all the clips.
Tools
For the bumper and grill we will only be using a a clip tool remover or flat head screwdriver. If you are going ahead and swapping out the fender liners you will need to add a 10 mm socket and ratchet to that set, these will also make removal and replacement of the headlights a breeze.
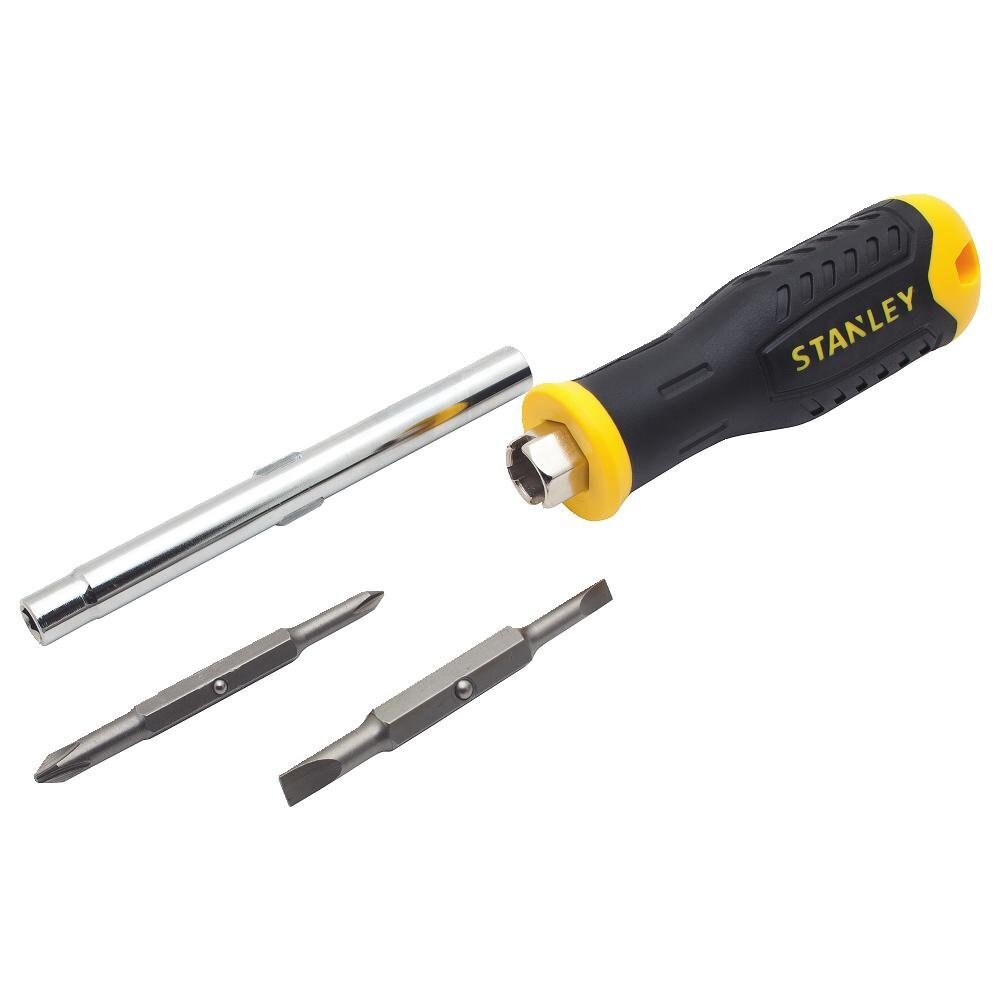
I always seem to have either a tons of flatheads or a bunch of philips screwdrivers… This keeps that from happening!

We won’t need all of these sockets, unless someone replaced a few with non-native Subaru bolts. Grey pneumatic 3/8 socket set. Milwaukee 3/8 electric ratchet, GearWrench 3/8th ratchet.

A good set of trim tools helps minimize pint and body damage when popping those pesky body panels a part. Utool trim tool set is also a hilarious name.
Parts

Sport headlights black out the lower portion and just add a bit of style.
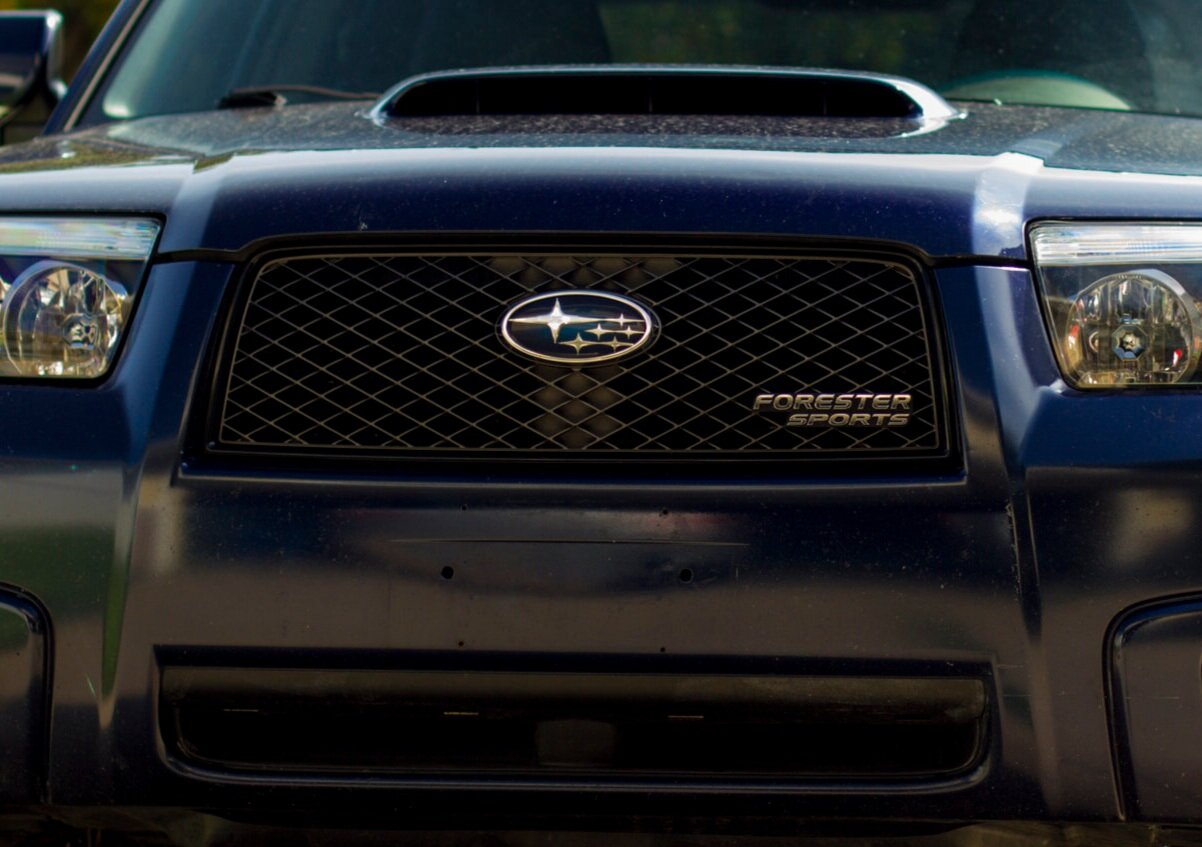
The front grill gives the car add something special to the front even with the standard Forester bumper is really changes the overall appearance.

The big change comes with the bumper! You lose fog lights for vents and now the bumper is a bit wider/longer.

If you are trying to keep water out of where it shouldn’t be, after adding the bumper you will add the fender liners to do just that.
Links and part numbers are listed at the bottom of this post!
Overview of install
Full install guides can be found in the links below!
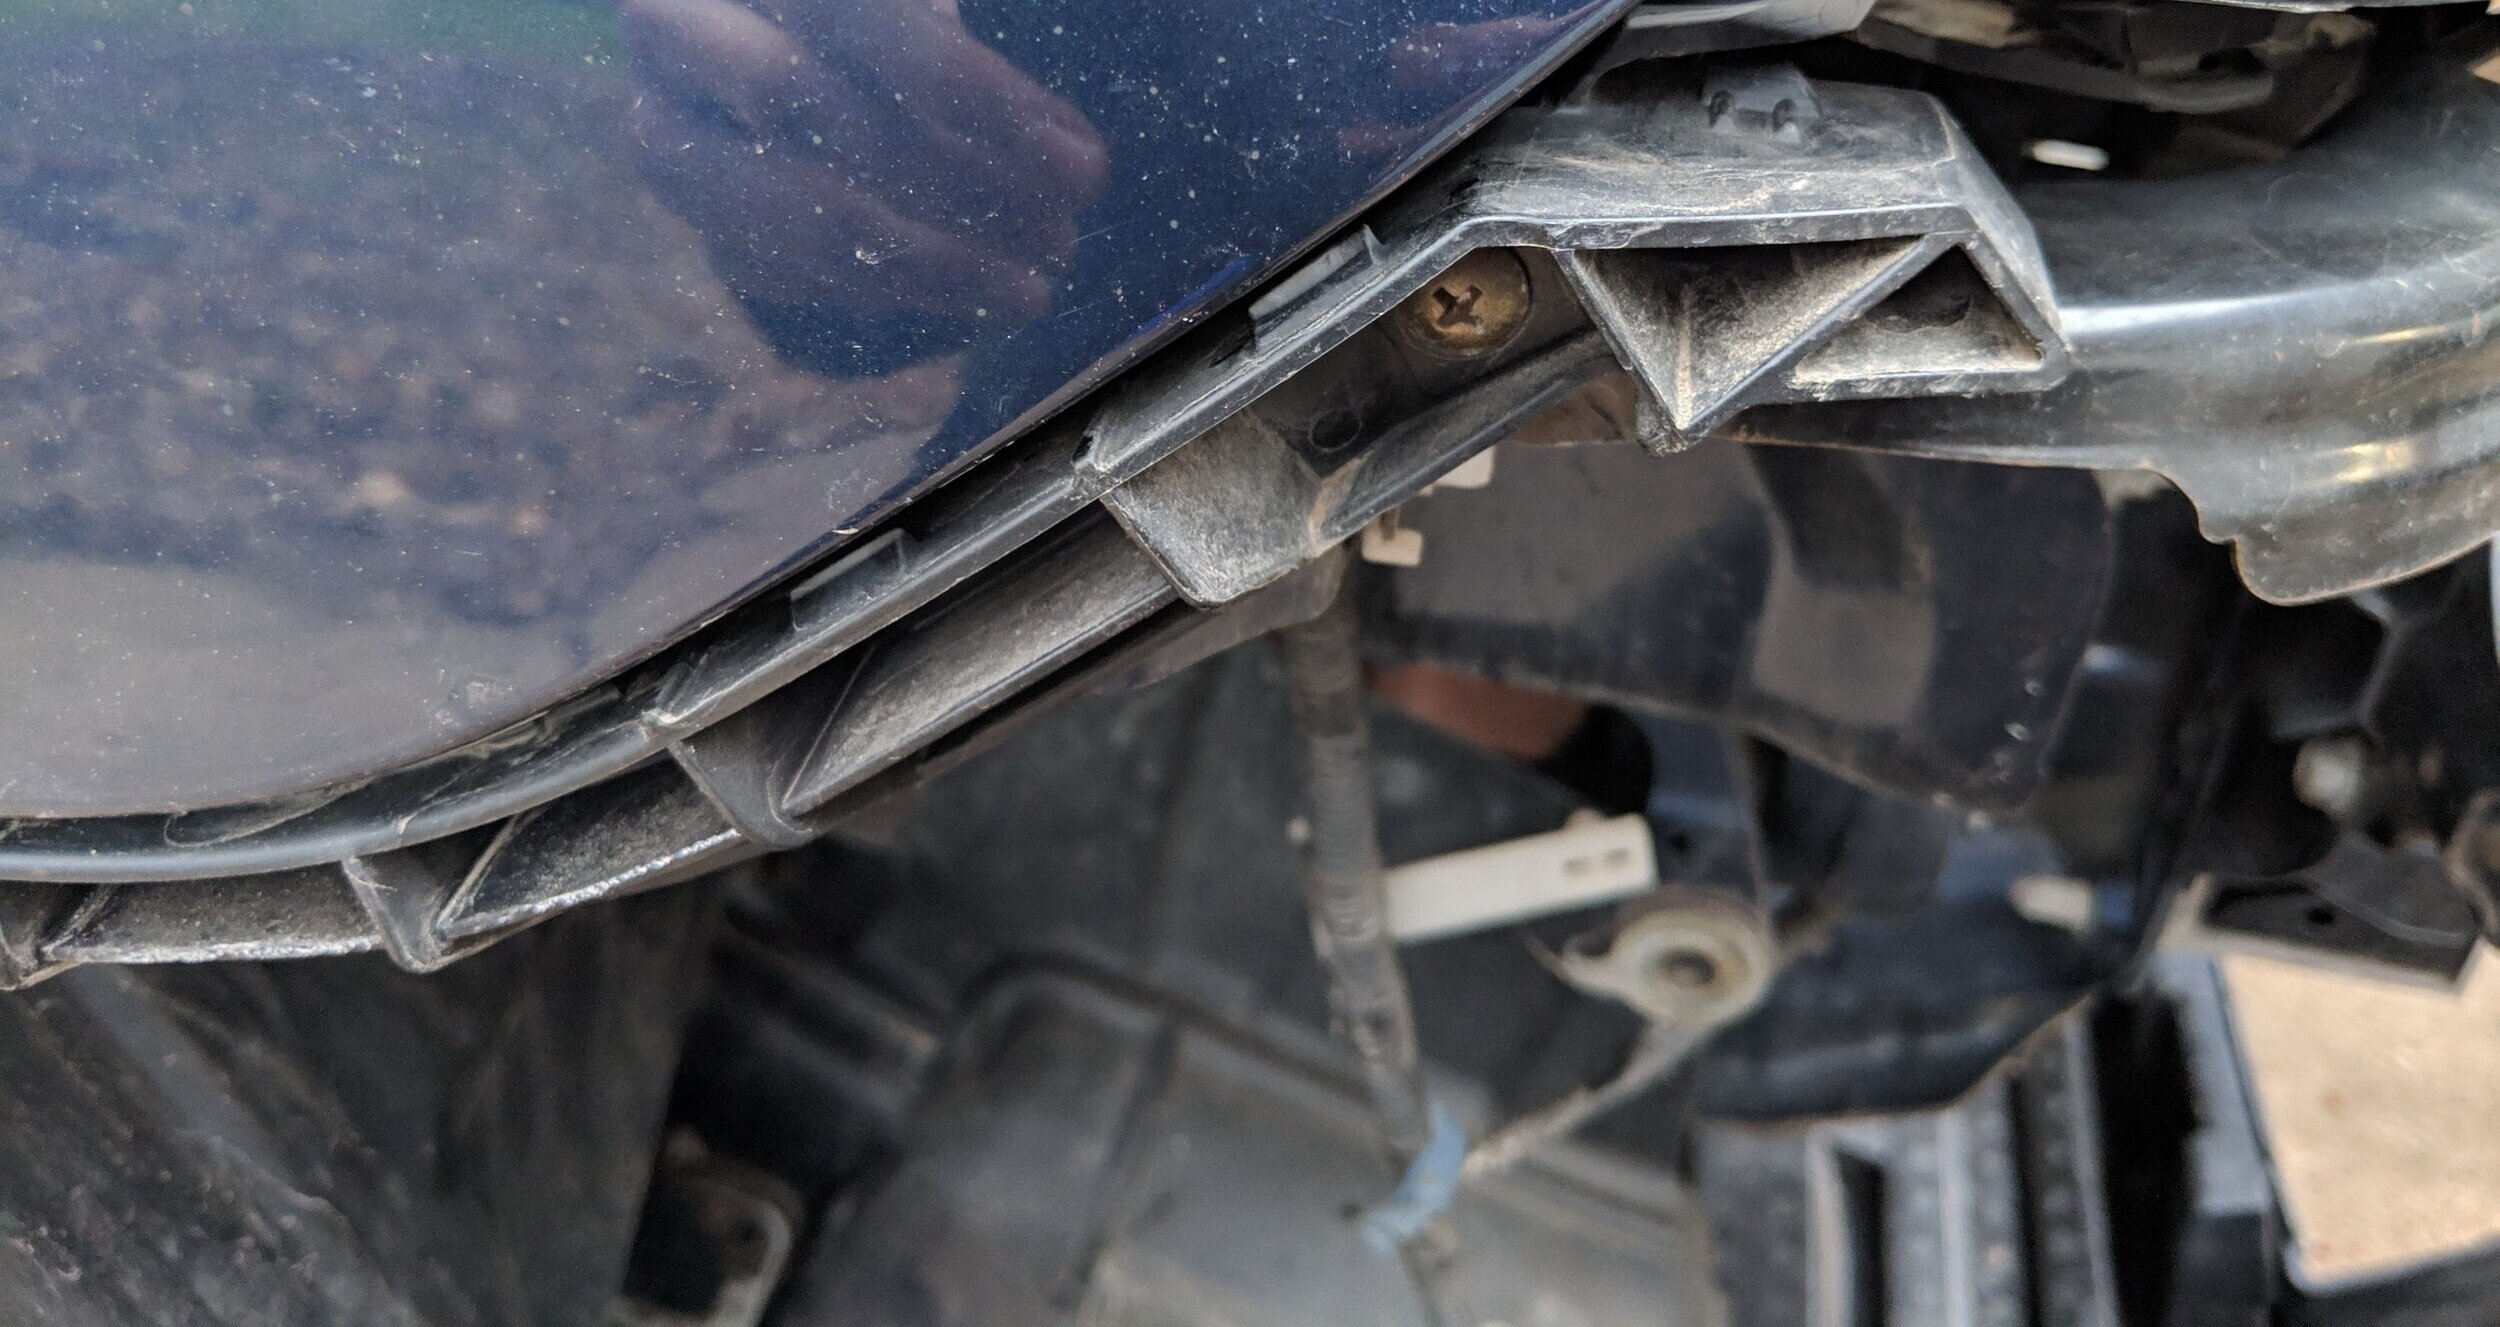
For the full conversion we will start by removing the front bumper. This will start with opening the hood and taking out the clips that sit just behind the grill. With these undone you can move to the clips that adhere the bumper to the fenders.

These are among the first you can remove from your bumper to begin your bumper removal.
With those out of the way you can move to the side lips that attach behind the fender liner.
Having all those clips removed you can start pulling the bumper off from the fenders. Underneath the headlights the bumper snaps into place, with steady pulling pressure head towards the grill to unclip it completely.

Clip just inside the inner fender liner that holds the fender and bumper together.
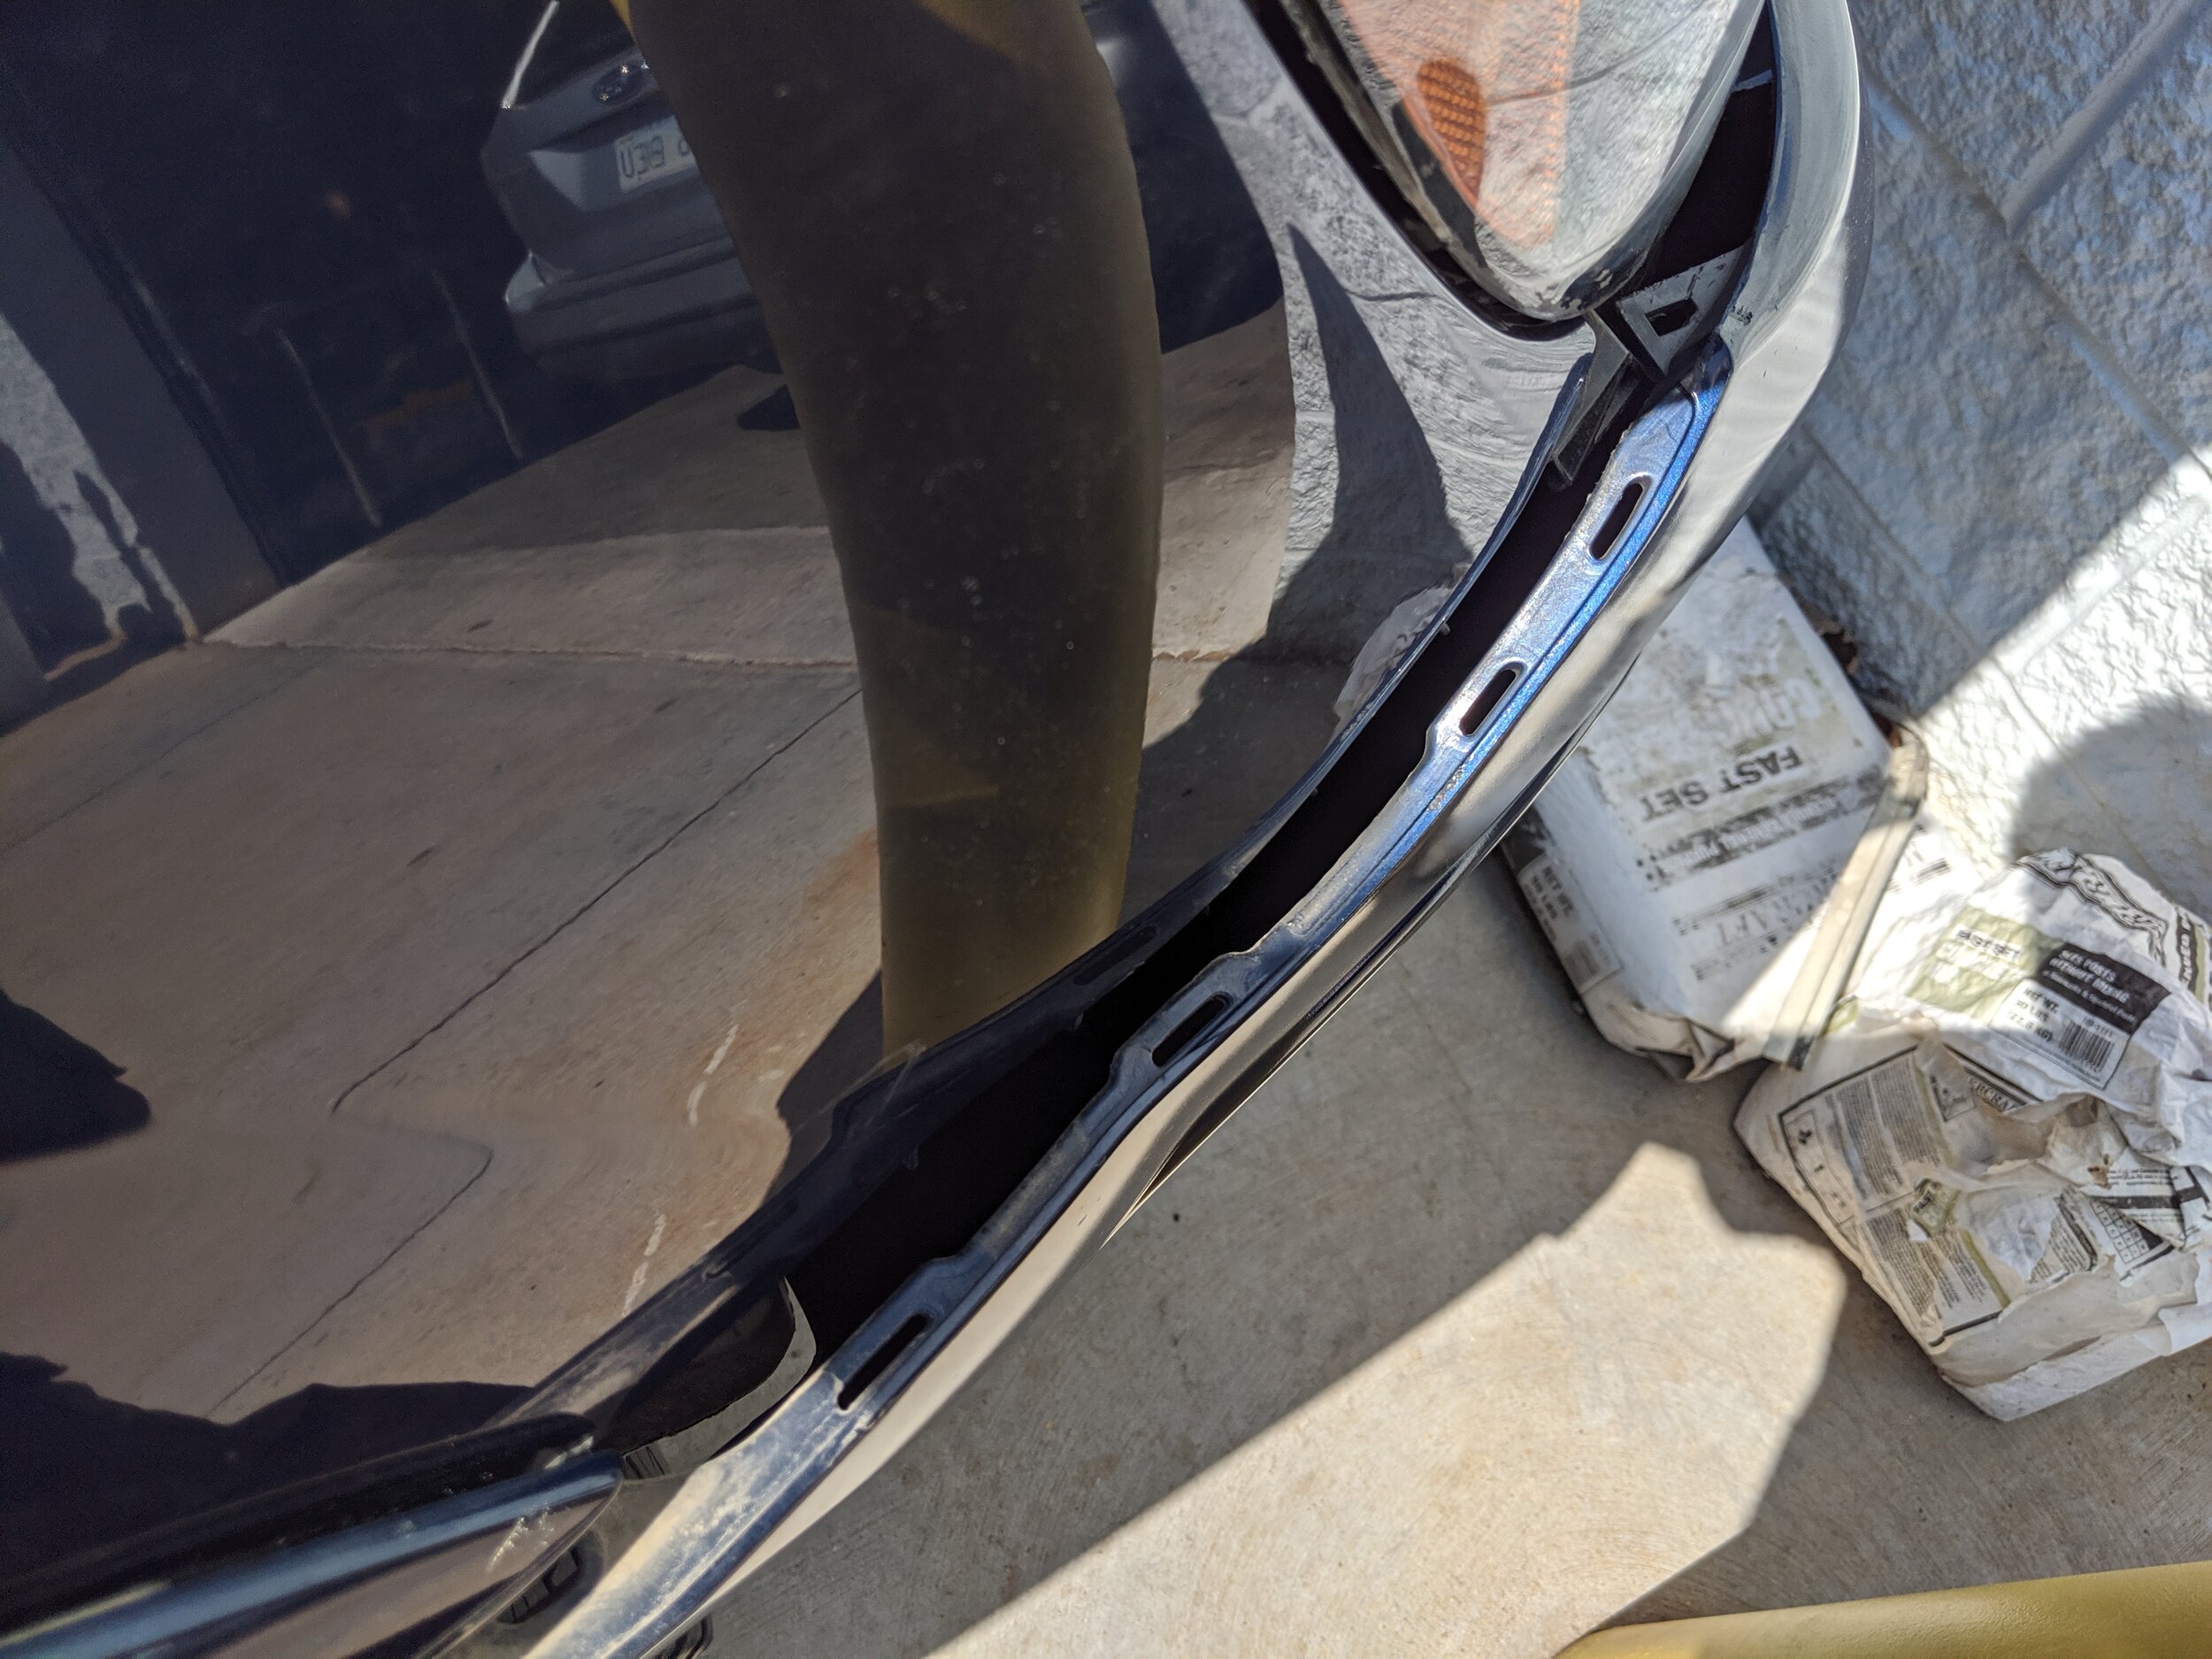
These holed tabs snap into a bracket that is located below the headlight and hold them tightly together.
This is a great time to remove the clips that hold the grill to the bumper and transfer it over to your new Sports bumper. The lower portion of the grill will snap into place when pushed in completely. Then you an install the upper clips and be done with it.
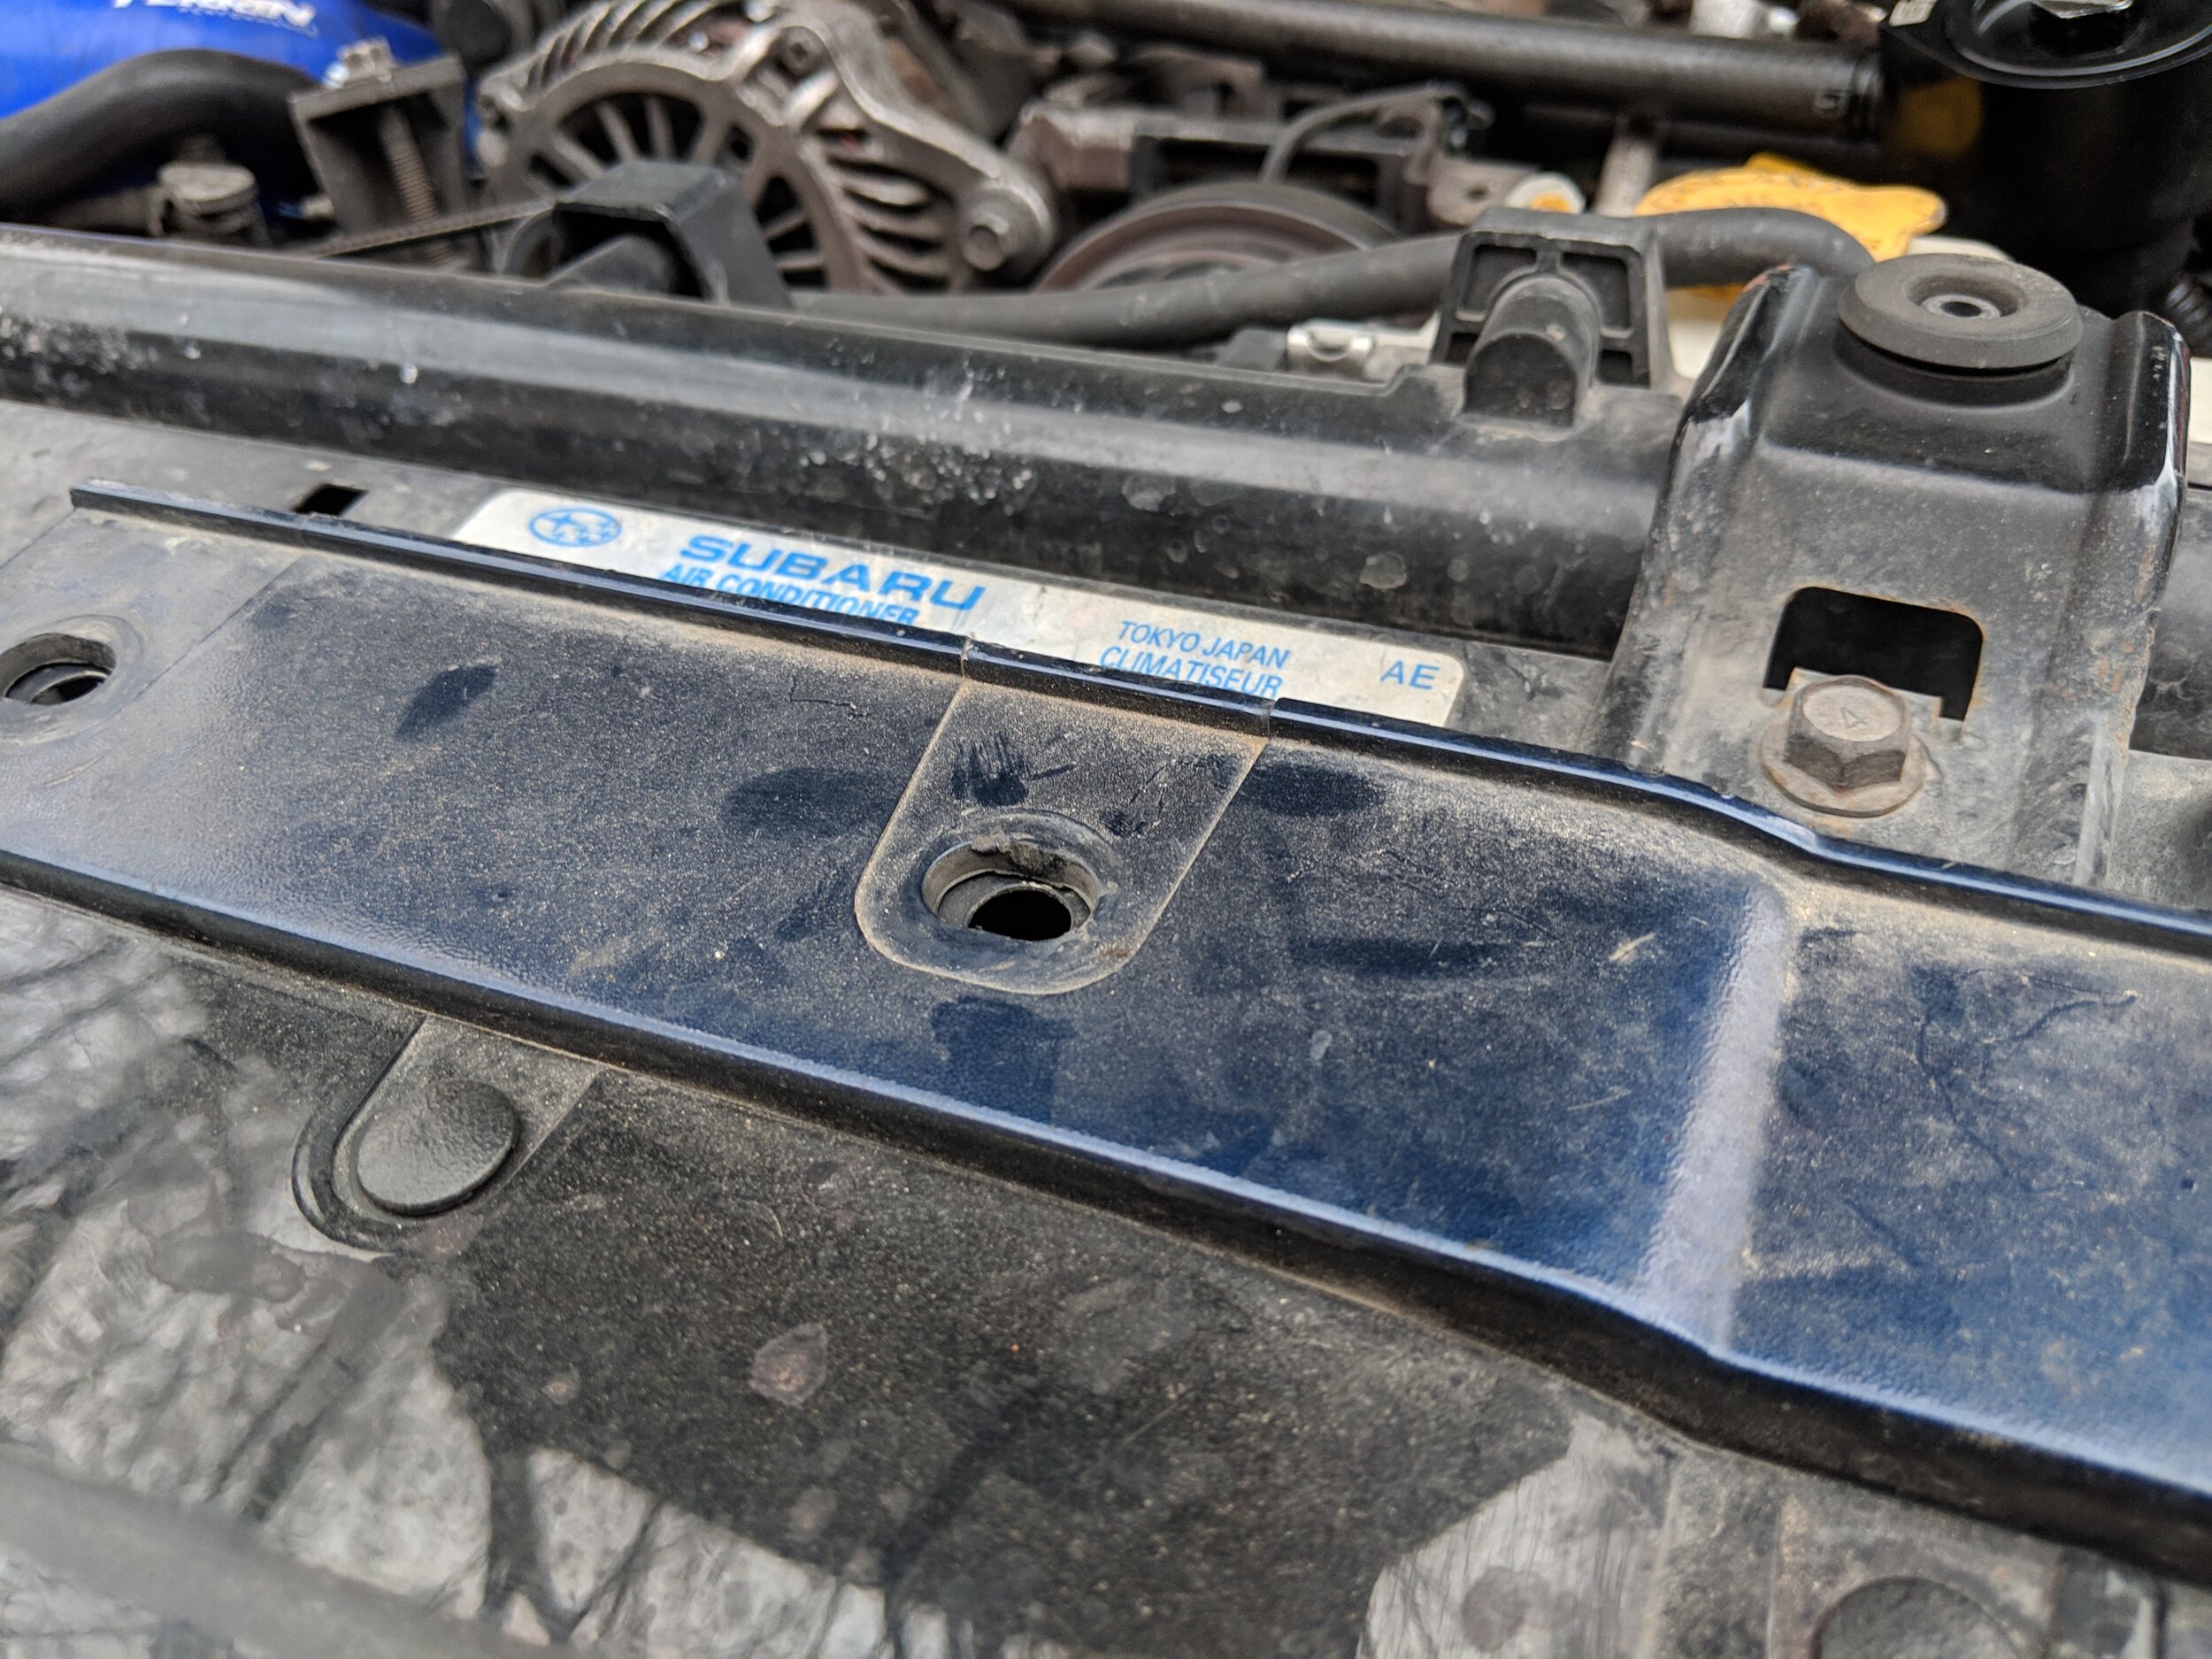
Now that the bumper is off you can see the brackets and bolts that hold the headlights on to the vehicle. Thee are two inner bolts near the grill, one bolt on the top near the fender and one below the light and near the fender too.

Bumper down! If you still have a nice looking front bumper I would recommend placing a box or piece of cardboard down to keep it off the pavement.

There are two bolts located on the inside of the headlights to remove.
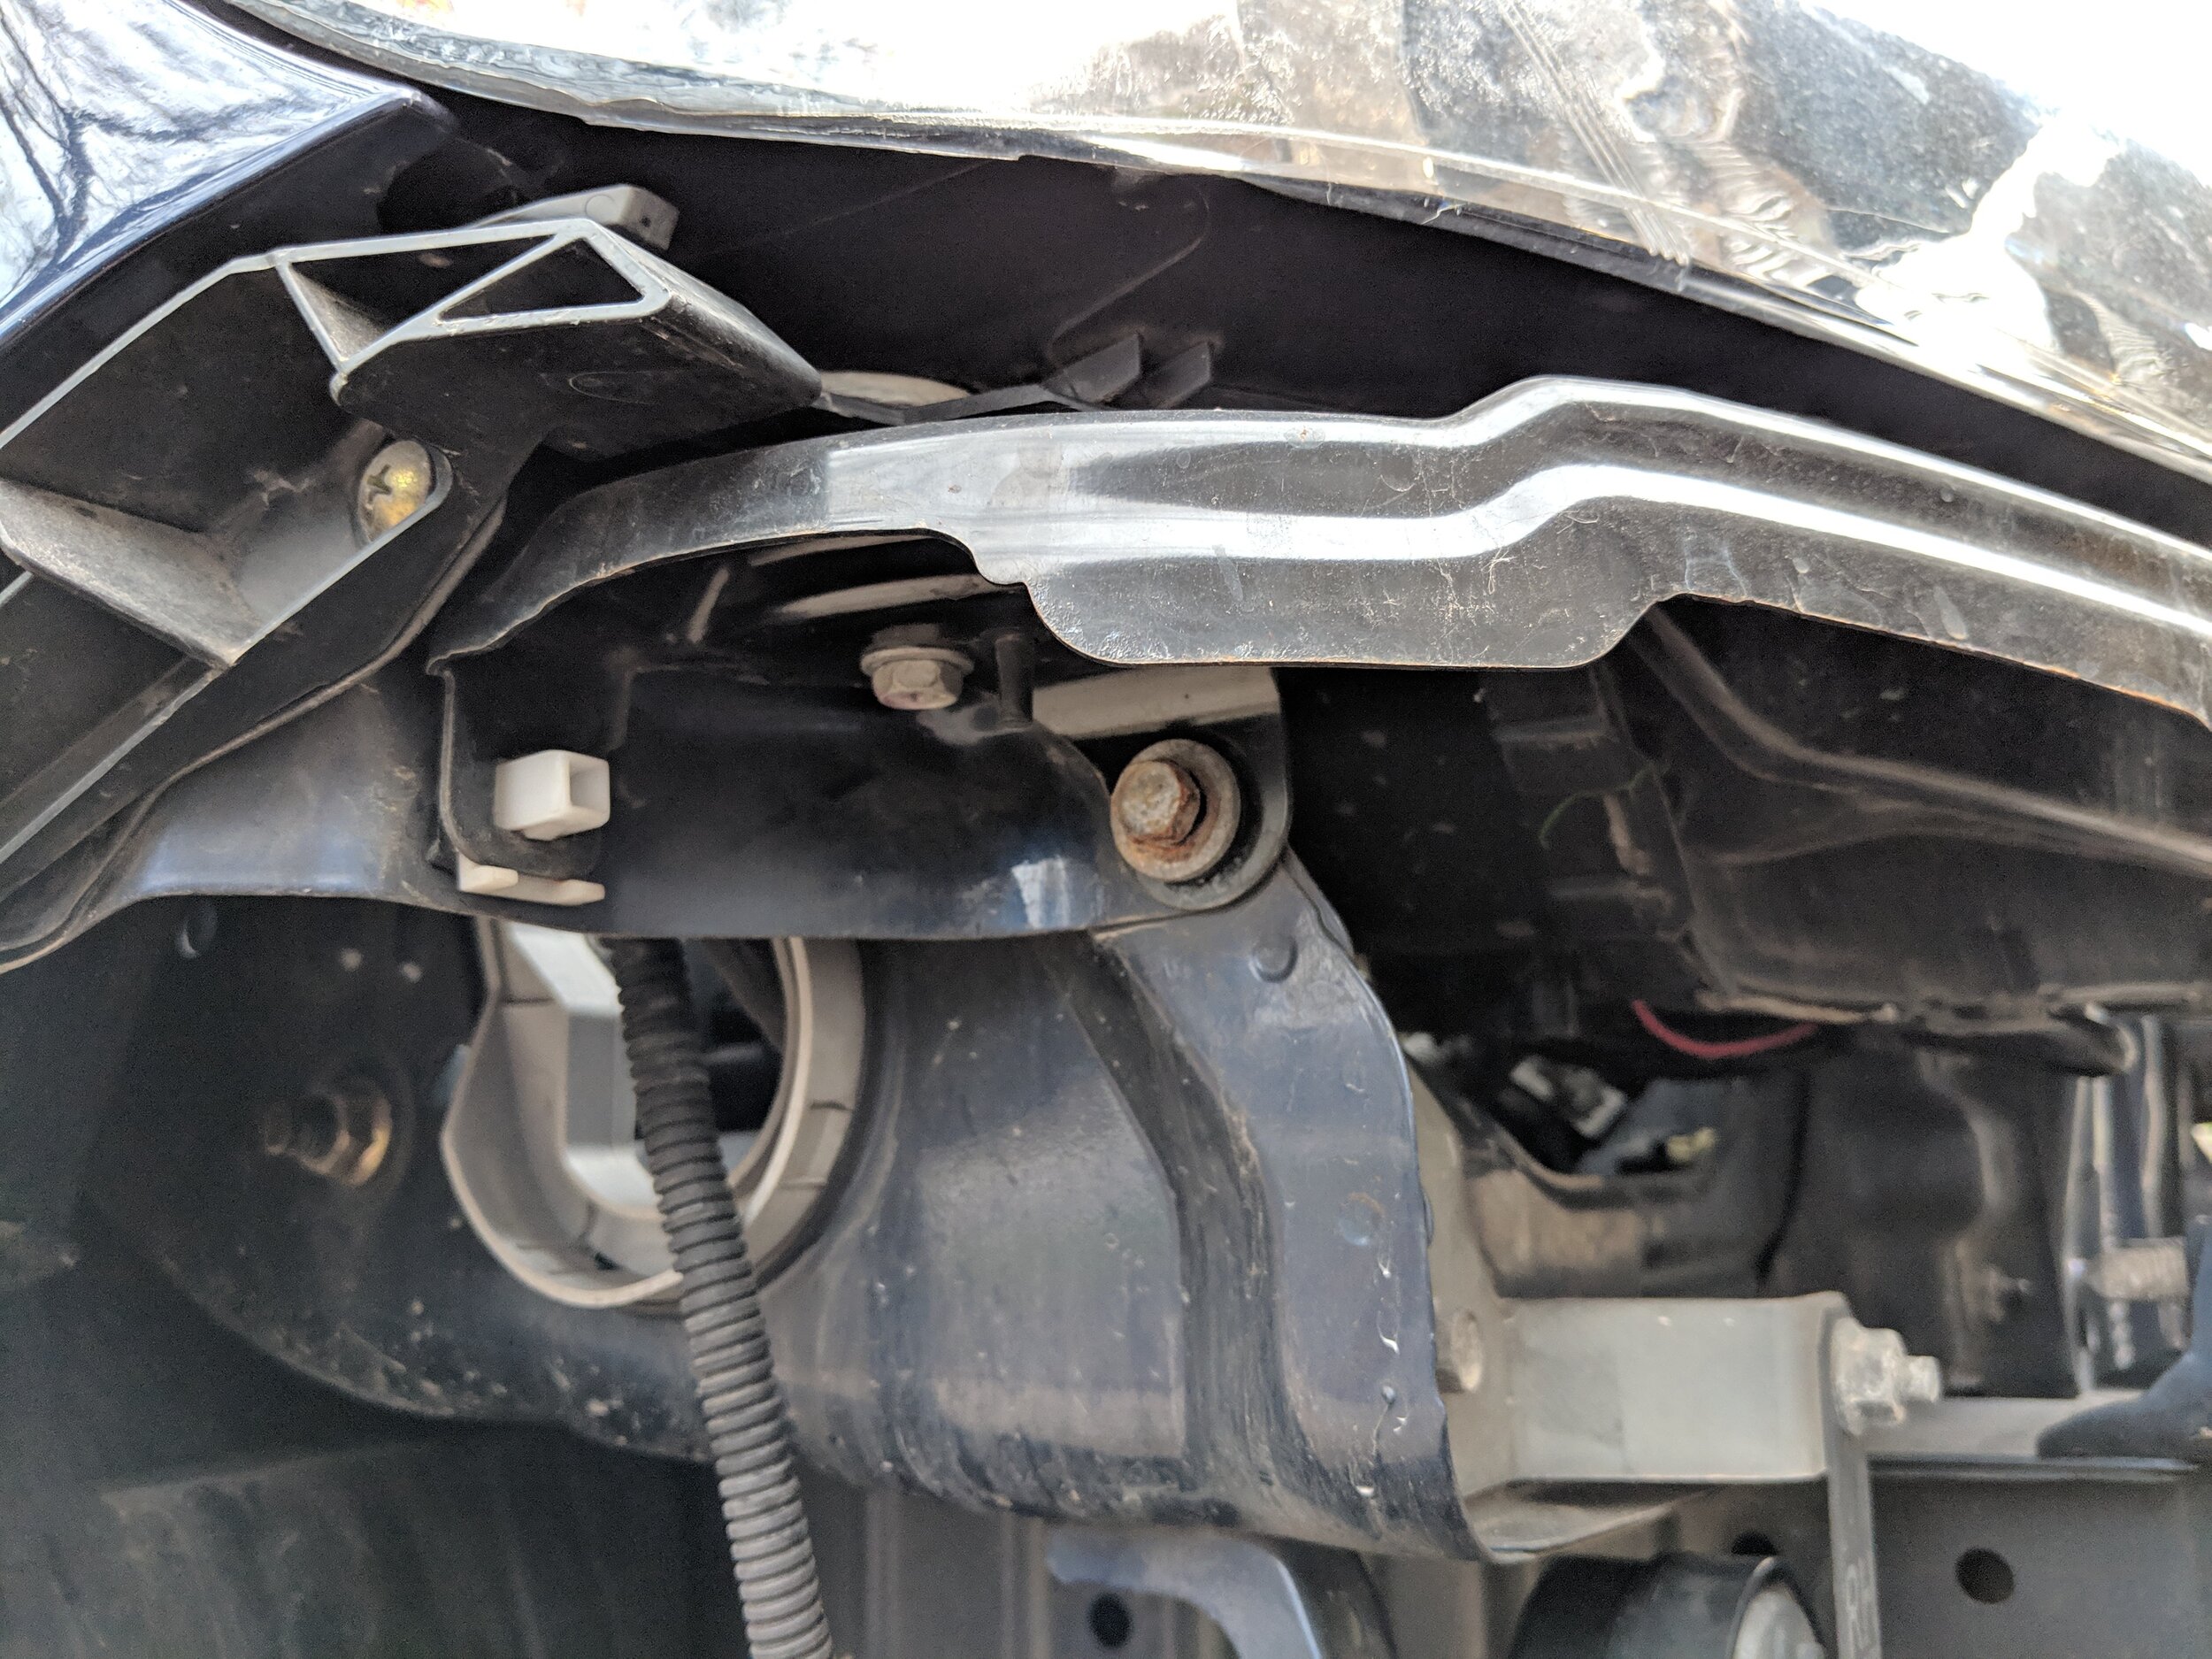
The slightly rusty bolt needs to come out and the white clip and out come the headlights.
Sliding the headlights out you will find one major connection in gray to undo, this will take care of the majority of the connection. The two final connections are located by the fender and run the sidemarker and turn signal lights, undo those and you can remove the headlight assembly. Now you can easily install your new blacked out headlights, for most older Foresters this is one of the best upgrades as it rids you of the old faded and waterlogged headlights.

With your headlights in you can now head to your favorite wavy grain field and snap off a few shots for Instagram!
We will now take advantage of the bumper being off, if you had fog lights you can unplug those and wrap up the wiring in a safe place in case you reuse it later. You will find that the sports bumper utilizes the exact same mounting locations and points. Snap all of your clips in place and slide them into the clip built into the bumper and headlights bracket.
This bracket helps hold the bumper flush.

It’s been fun but it’s time for something new…

Under the headlight sits another bracket to keep the bumper from coming off.

Shiny!
Having the bumper in place you can install your newer grill. Just like the bumper the grill will be installed in all the same mounting locations. The bottom will snap into the lower portion of the grill opening and the top uses clips to stay put. Your front end is now complete!

But what if you are interested in the proper fender liners for keeping water out of the delicate electrical components and wiring that runs in the bumper and fender areas.

Passenger inner fender liner part number and..

Driver’s side.
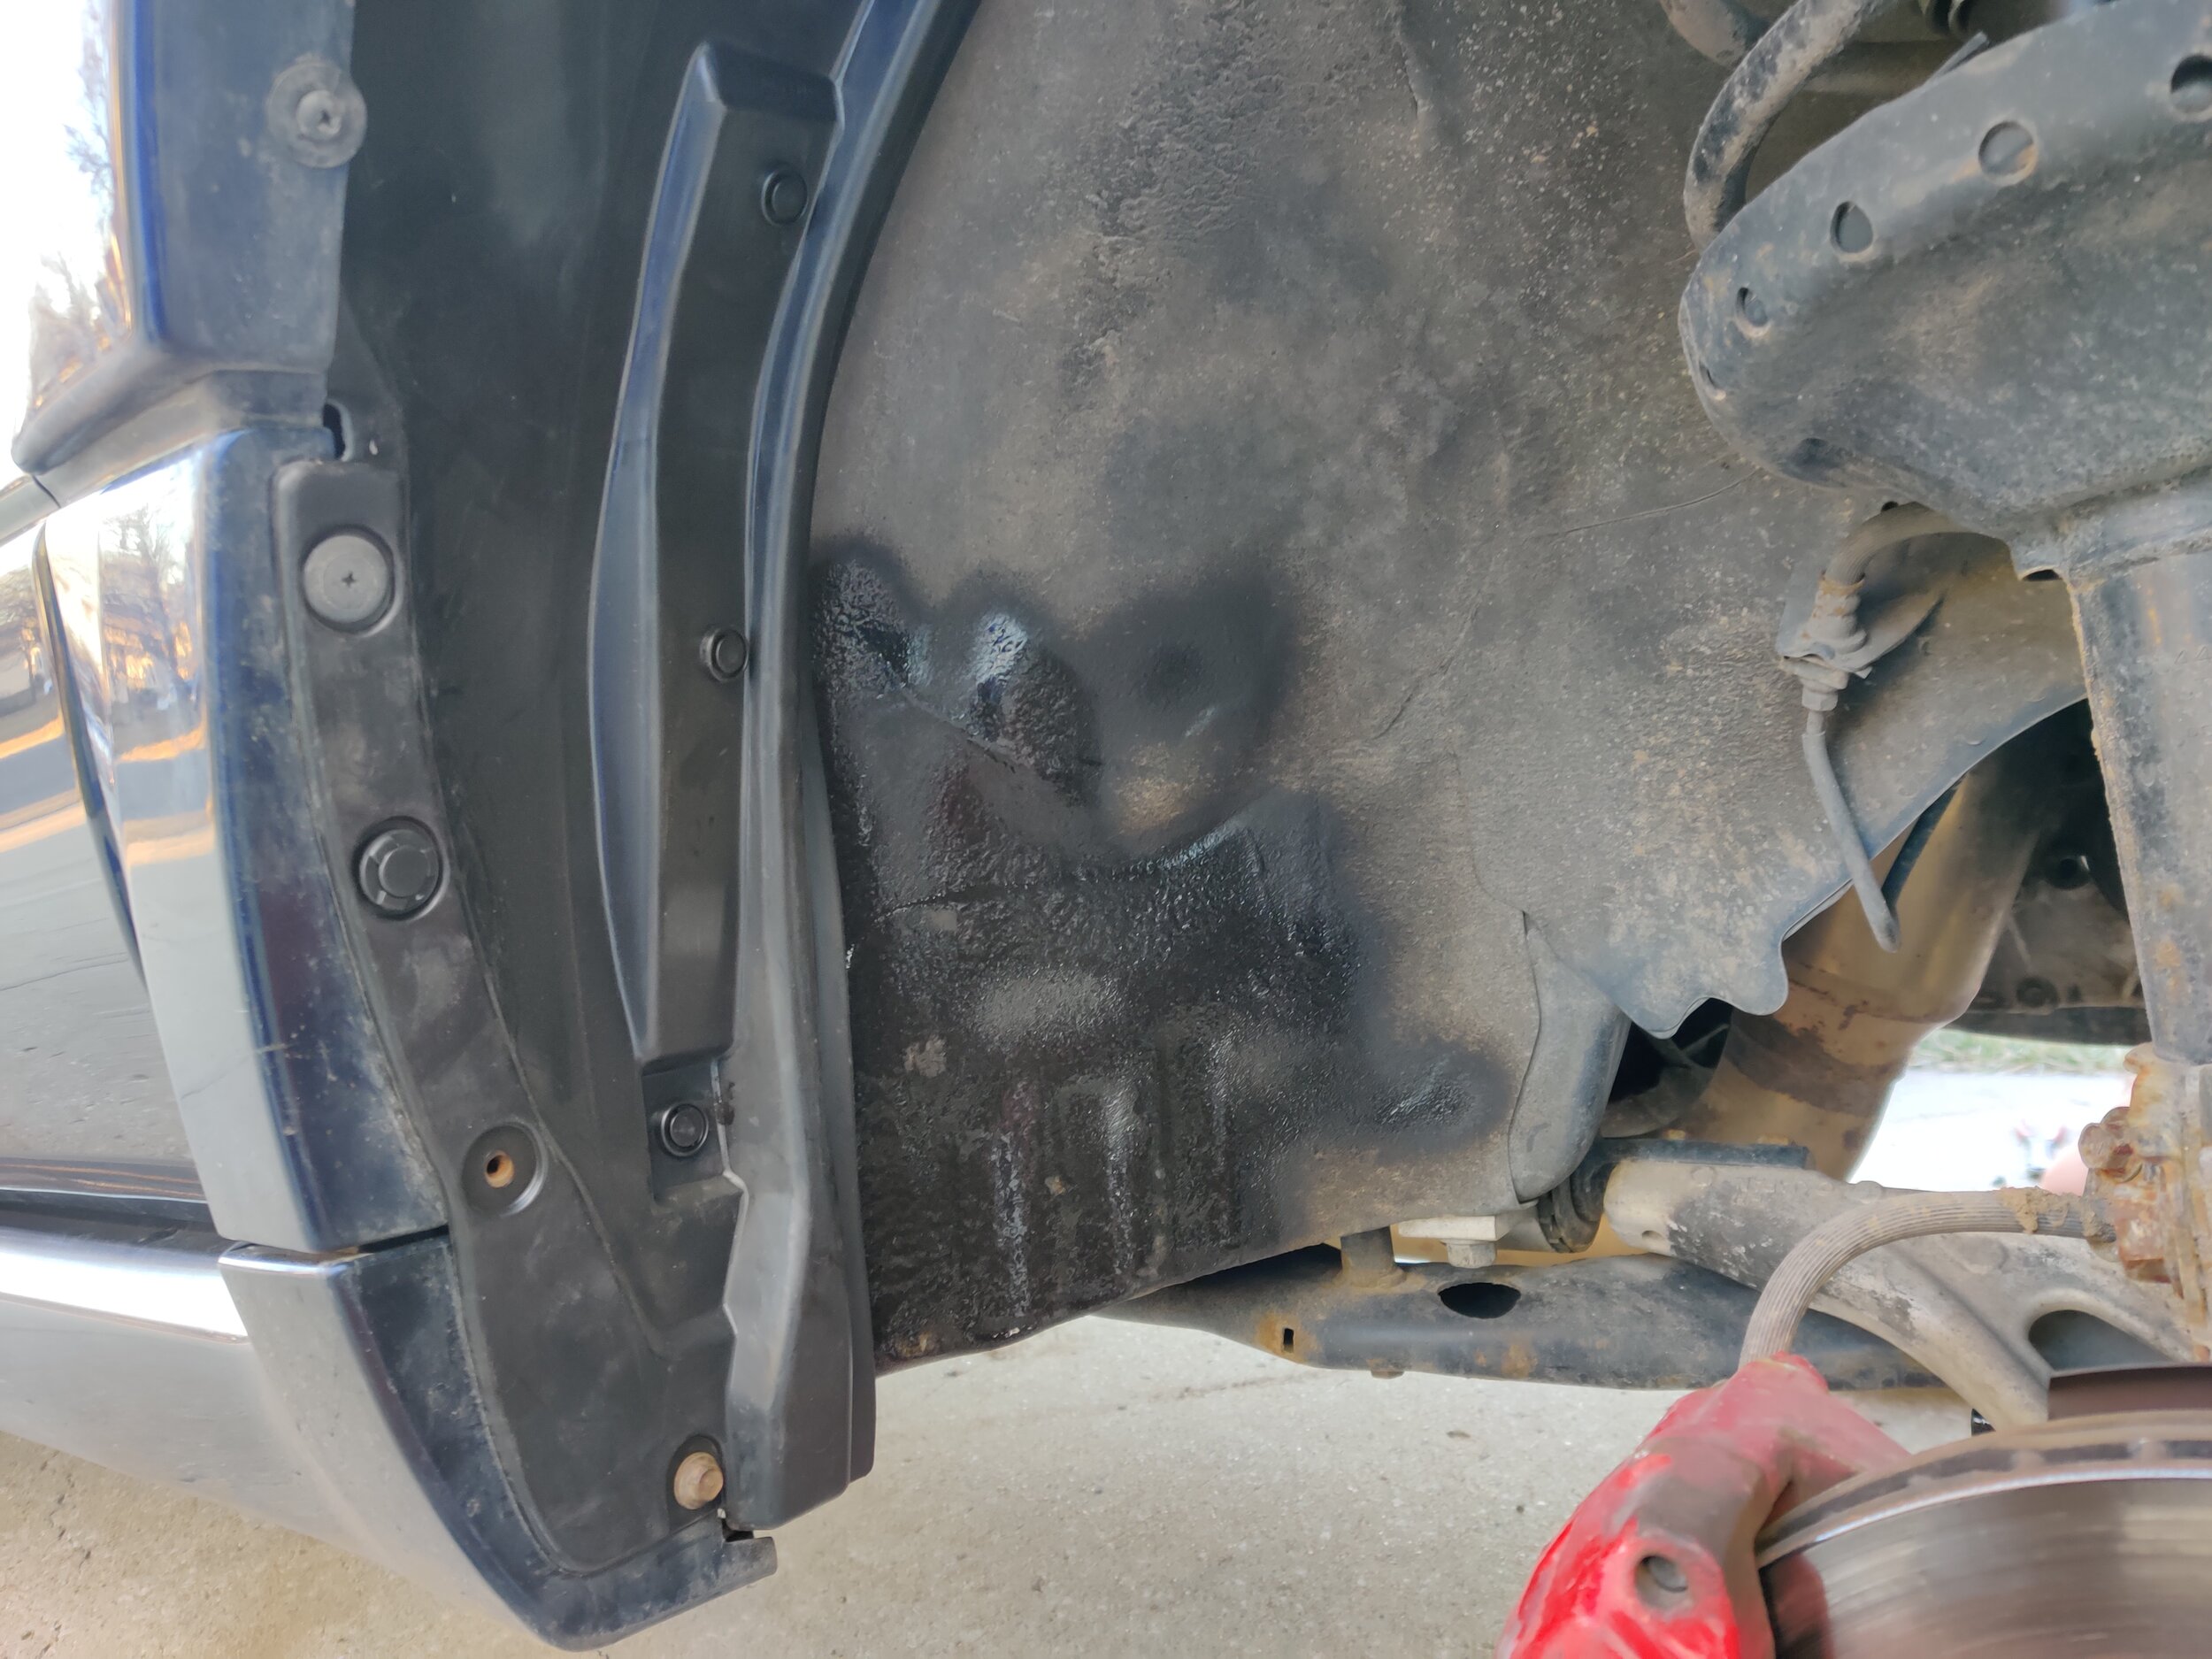
To remove your old fender liners you will find a two bolts that hold the mudflaps and liners to the backside of the front fender. With one final bolt at twelve o’clock in the fender well, just in front of the strut. Next up are the various clips that snap it into the body.
Getting everything bolts up.

Double checking clearance.. still had to trim them.
There are very fine differences between the standard liners and the Sports liners. The Sports bumper is a bit wider on the side, so additional plastic is added to it. Along with the wider sides the front juts out a couple inches further, the Sports fender liners will bridge this gap where the standard fender liners leave plenty of open area. If you had an old fender liner or similar flexible plastic material you could build these extensions yourself, the extra length and width is additional piece of plastic and that is what makes the difference between the two fender liners. Unfortunately you cannot just purchase the piece and install them yourself.

Here is what makes the difference between the standard Forester liners and the Sports liners.
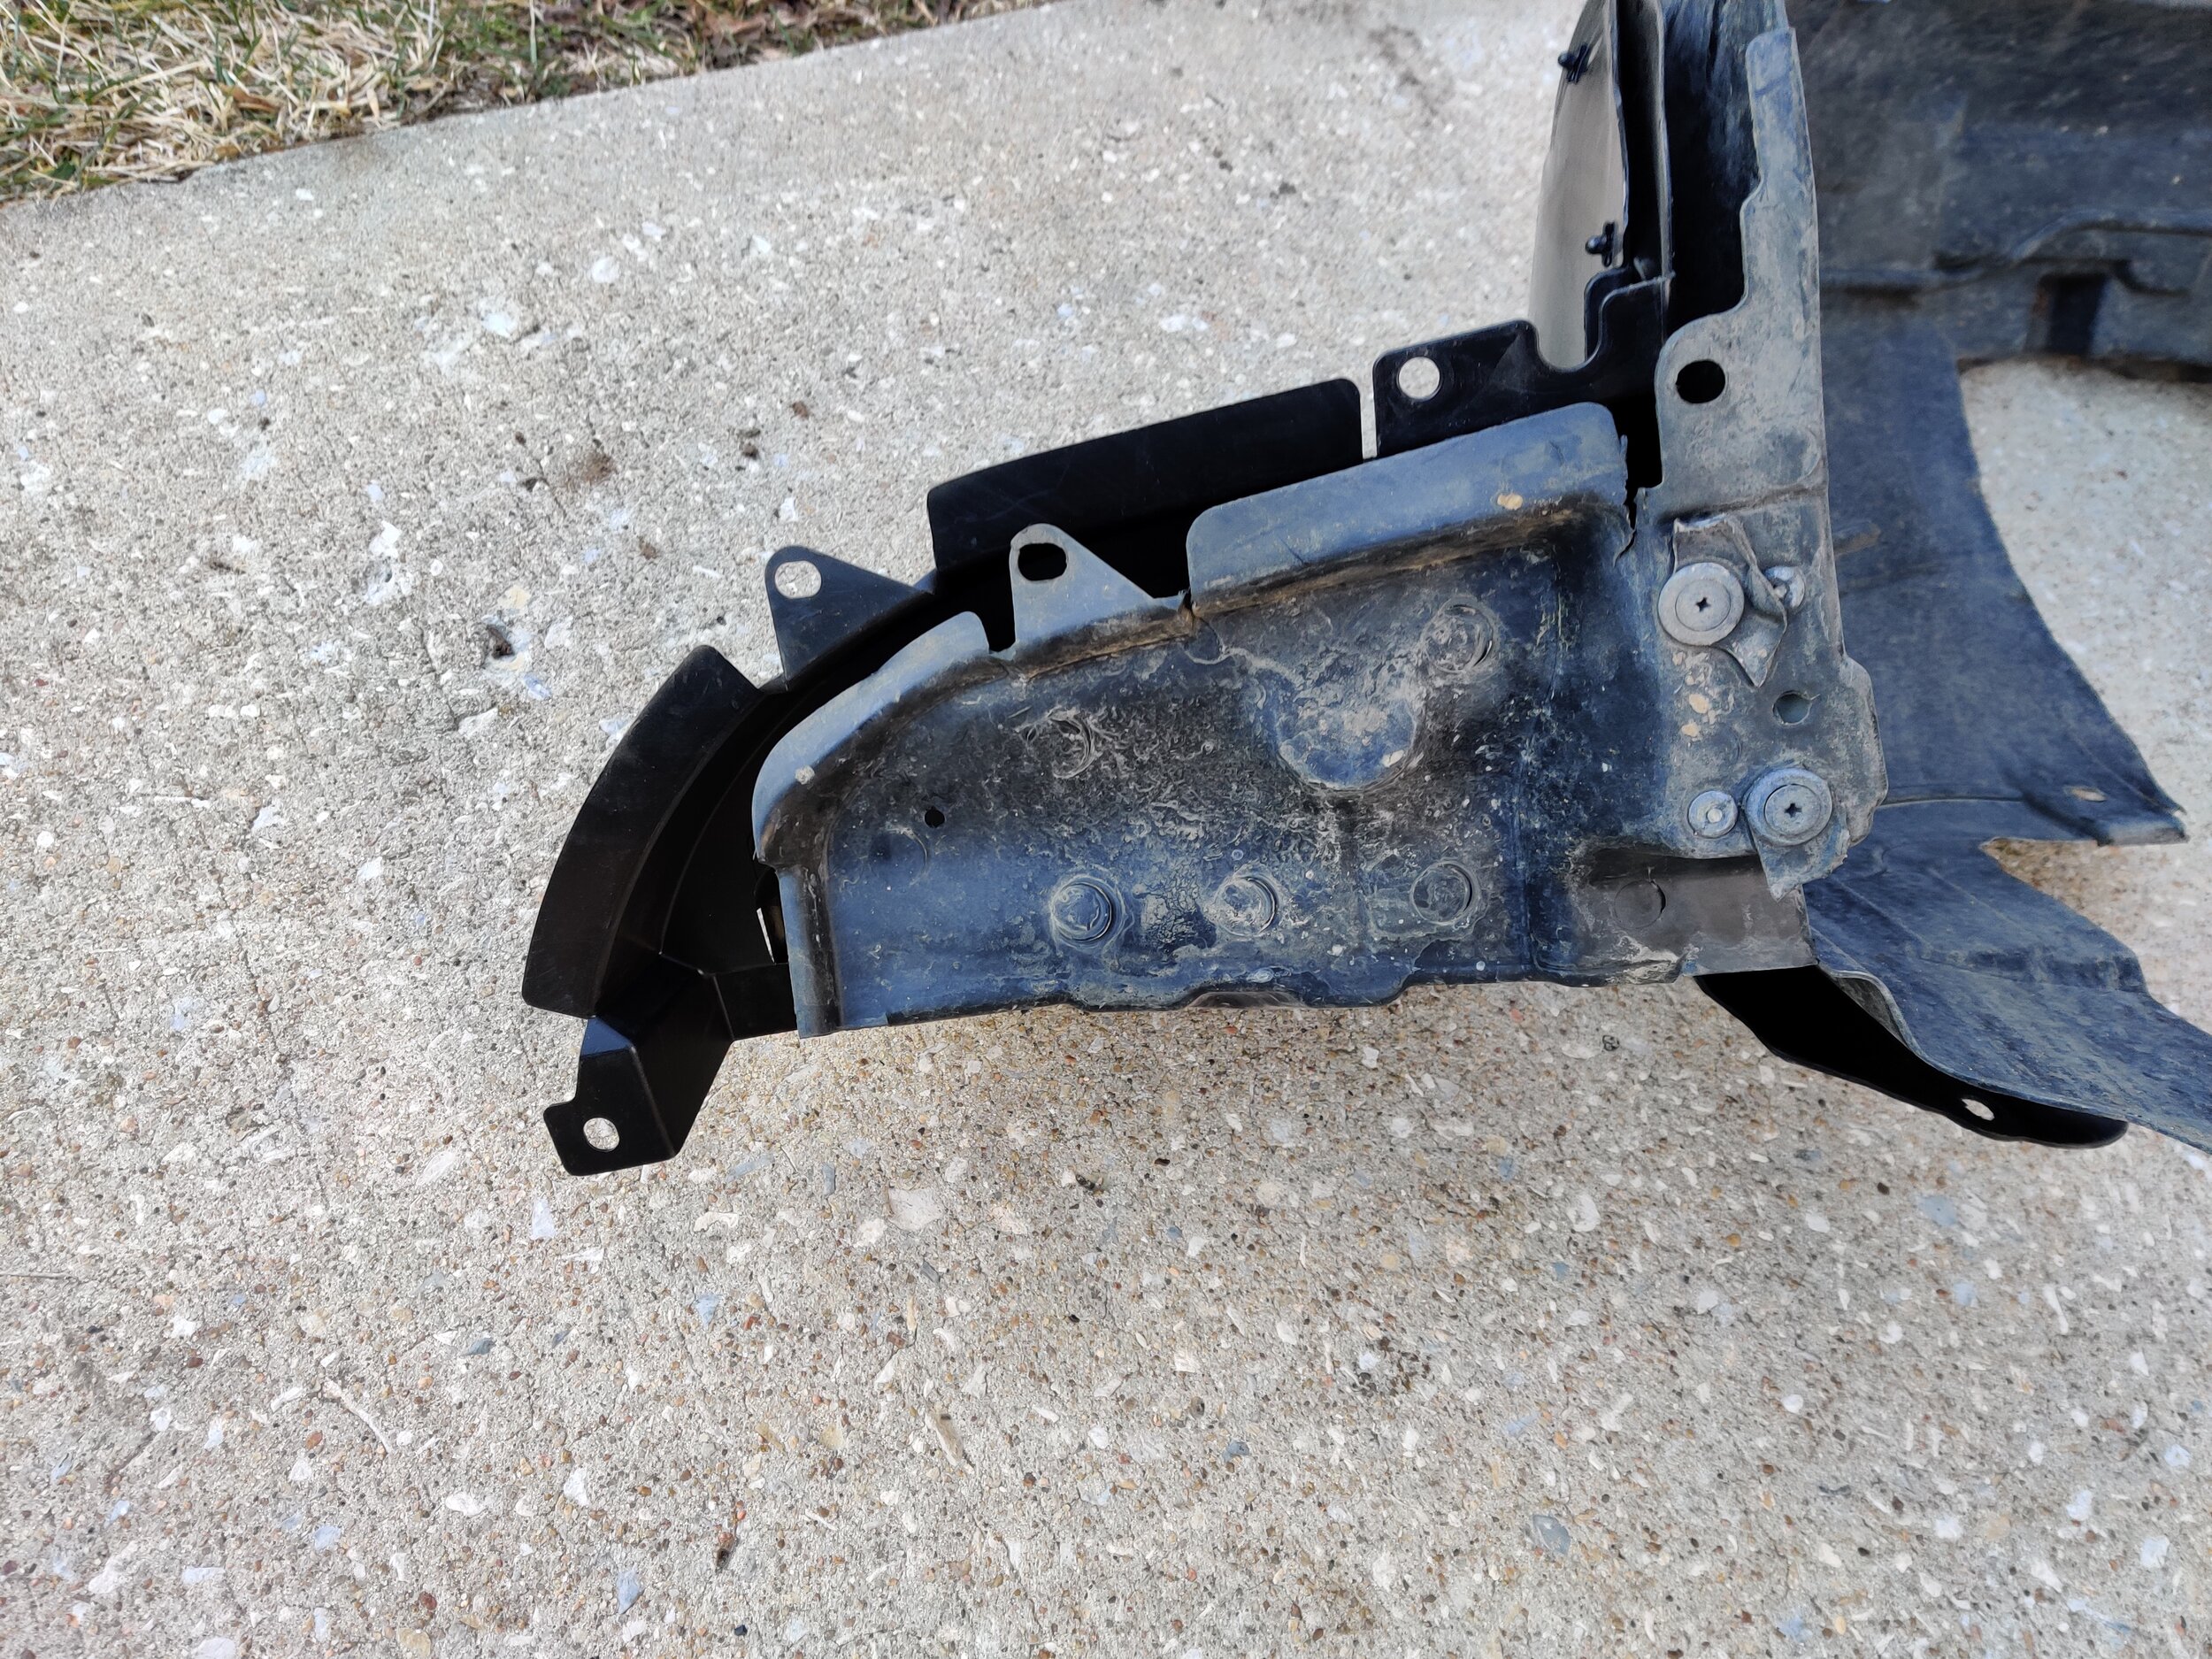
Just a bit more plastic around the edges.. You could really probably make these out of anything.
After finding out a few of the differences between all these other parts you might be left wondering about the under engine splash shield, does it need to be swapped out? Well I have some good news in that department, it doesn’t! The part number for the XT and XT sports under cover is the same.

The same DIY skid plate still fits on my Sports bumper. But if you have the factory plastic unit… You will also be fine.
Now with this information you can decide what works for your Forester! Just the grill, bumper with a flat black standard XT grill and fender liners, headlights and the grill.. There are quite a few combinations, find a setup that makes you happy with the finished product!
I myself went from just the headlights, then adding the grill. Then after a few years replacing the bumper with a Sports version and adding the fender liners to complete the setup. Take your time and find your perfect setup!

I’ve had quite a few various set ups, maybe there is a better combination out there..
Related reading!
06-08 Forester headlight removal
Making room for 235/70R15s tires on your SG Forester
Homemade skid plate from an old sign!
Amazon part links
Depo Sport headlight Driver’s side
Depo Sport headlight Passenger’s side
Driver’s lower side vent/grill
Passenger’s lower side vent/grill
Amazon tool links!
Milwaukee 3/8 electric ratchet
Subaru part numbers!
Passenger’s sport headlight: 84002SA200
Driver’s sport headlight: 84002SA210
Sports front bumper: 57704SA090
Front bumper lower vents/grills Driver: 57731SA180
Passenger: 57731SA190
Fender liner Driver’s: 59110SA032
Passenger’s: 59110SA022
Sports front grill: 91121SA140