Subaru fuel pump replacement! Is it time for an upgrade?
For most of us fuel pump replacement is just part of the check list for most modified Subarus, especially if you are getting ready to to ride the E85 river. But it can also just be part of maintaining these cars as they continue to age Like most Subaru projects this guide can easily help perform this task on a large spectrum of years, this guide will take you through my 2005 Sti.

Since we are dealing with fuel we need to take precautions, first off work in a well ventilated area for your health and keep clear of any open flames. I would highly recommend you wear a proper respirator and run your car down on fuel as far as you can. If your fuel level is over half be ready for it to come spilling out when you open the fuel tank, the less fuel the less mess and stress.
Time frame
For your first time I’d expect this to take around an hour to an hour and half with limited tools and skill. If you have quality tools and skills you can easily get this done in under 30 minutes.
Tools
Tools are fairly standard with your typical socket set and ratchet and an assorted set of pliers. A torque wrench will be your friend so you don’t break off your fuel tank studs. Along side these tools you would want a nice set of pliers to remove all the hoses that the attach the fuel pump.


Parts
There are plenty of aftermarket fuel pumps for you to pick up, I’ve had great luck with DeatschWerks 255 lph for my power goals but speak with your tuner if you are looking for large power goals. If you are working on drive by wire Subaru you likely have an internal fuel filter that is worth your time while you are in there. You can also delete it for an under the hood filter for easier serviceability but we will look at that in another post.


If you are removing the in tank fuel filter you want the right replacement hose and this is it. Fuel Hose 5/16"Nylon Reinforced SAE J30R10


How to
As stated before make sure you are in a well ventilated area free of open flames for you and your cars safety. Running the car as low on fuel as you can is best, I prefer to light up the low fuel light before diving in. With all these boxes checked you can open up your rear door and begin to remove your rear lower seat by unbolting two 12 mm bolts located just below the seat. Once those bolts are out you can rotate the bottom of the seat up and pull it on out.

Well ventilated open area! Open the garage and get a fan blowing

Hop in the back of your car and lets get started… First to come out is the lower seat mounts. There are two bolts to be removed one on each side of the car.

Once you have those bolts removed you can pull the seat bottom out. There are hooks that hold it in place to the back portion of the seat, s you may want to lift up the front portion of the bottom seat and rotate it out.

Rear seat bottom has been removed and now you can get on to the upper portion of the back seat. You can also see the center seat belt being wrapped around the seat, it will need to be moved to remove the upper portion.
We will now move to the upper portion of the rear seat. You will find two or three bolts down under the seat back that hold it in place. After those bolts are removed you can pull upwards on the seat back and remove it. This part can be tricky as the upper seat back enjoys getting stuck in these brackets that hold them in, just be persistent.

There are two of these bolts on each side of the car, they are easy to locate and need to be removed.

This middle bolt location would be the last bolt and the seat back is ready to remove.

You will want to slide the seat back up and off the chassis mounting on the car.
Having the rear seats removed opens up plenty of room and now you can remove the bracing the supports the upper rear set, those are easily taken care of by removing four bolts. Last up will be a small noise isolator, it is held in by plastic clips that can be removed with a trim tool and out it comes. Now you will have open access from the cabin to the trunk.

Then you will find these support brackets and noise isolation panel. The eight gold bolts you can see all need to be removed and those brackets come right out.

The noise isolation panel is held on by a bunch of push clips, remove those and it can leave the car.
Heading into the car and sitting on the passenger side you can pull up the trunk carpet to expose the trap door for the fuel pump. Four screws holds the trap door on and you can remove the noise isolating foam and set them to the side.

This is the what you will be greeted by after removing the black plastic panel. There is a trap door that allows you access to the fuel pump.

Fuel pump access is just four screws away.

With the door and foam out of the way you can now see the top of your fuel pump assembly.

Electrical connector will need to be disconnected.
Now you will staring at the top of the fuel pump hangar and with your pliers you can remove the spring clips on the hoses. You will want to have a few towels to soak up any excess fluid as you remove the hoses. Alongside those you will have one quick connect that can be tackled with a set of pliers too, once both sides are pressed in you slide it down. our last connection which is the electrical connection.

Using your favorite pair of pliers you can remove these spring clips and now the hoses are ready for removal.

Putting pressure on both sides of the orange portion of this connector will allow it to slide on off
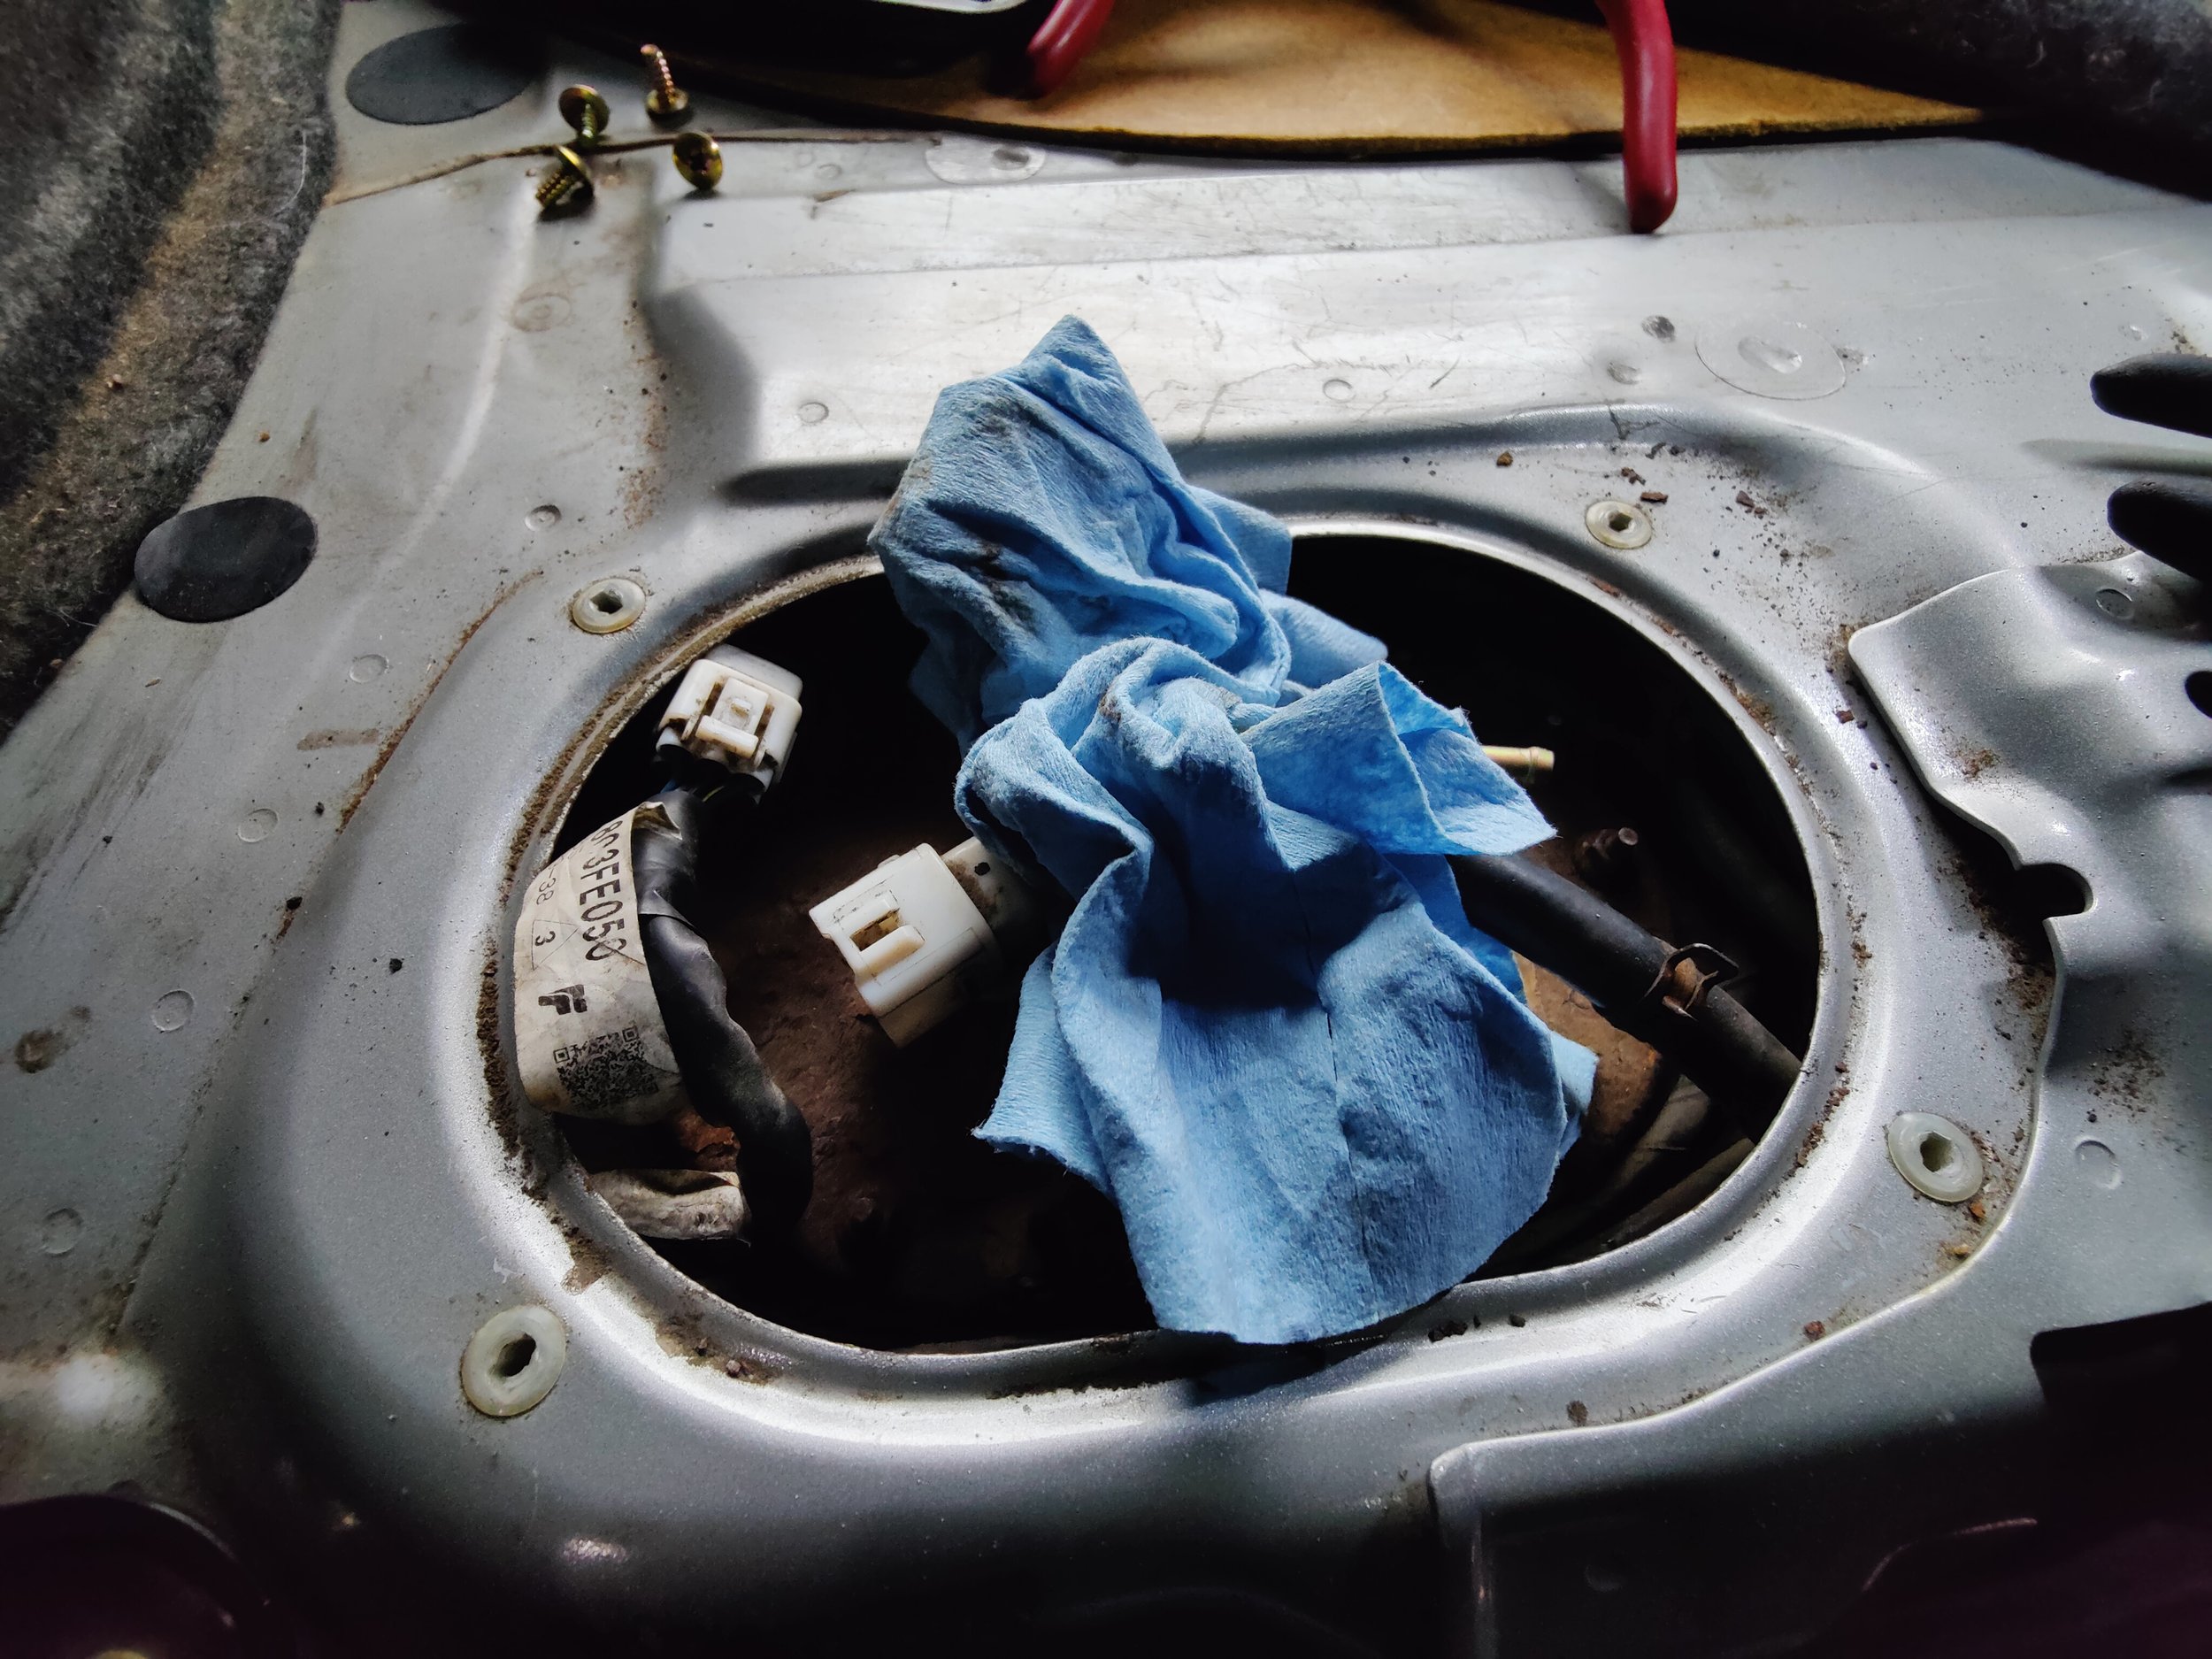
Have a towel on hand for when you remove the hoses as fuel is very likely to spill out. This will allow you to keep your fuel mess to a minimum.
If you have an air gun this would be a great time to clean off the top of the hanger from debris and rust. Then we can push all the connector and the hoses off and away from the hanger. These will attempt to ruin your day when you are trying to pull the hanger out of the tank, so be ready to fight them.

If you haven’t cleaned off the top of the assembly, now is the time. You will also want to push all the hoses and connectors under the chassis to clear the way when the assembly starts coming out.
You can now remove all the 8mm nuts that hold the hanger to the tank and set them in a safe place. It is time to bring the fuel pump and hanger out of the tank which can be quite tricky. As you start to pull up on the hanger the fuel pump will need to rotate the assembly to keep it from getting caught on internal portion of the tank. While removing it be quite careful not damage the level float it can get caught on its way out.

All eight mm nuts should be removed and carefully moved to a safe spot.

I like to use a box with some mats or towels in it to transport the fuel pump out of the car. You will need to twist the fuel pump assembly to get it come out, you will see soon that their are many items that hang off the assembly and all of them will attempt to get caught up as you pull it out.
Once the fuel pump assembly is out you can locate the wiring connector to the to the pump and disconnect it. If you have a anti surge tank aka the black and while box on the bottom of the fuel pump you will want to unclip the two halves and remove it. Next up is removing the clip that holds the hose onto the fuel pump which effectively holds the fuel pump down in the hanger along with the rubber spacer on the bottom. Now the fuel pump can be removed.
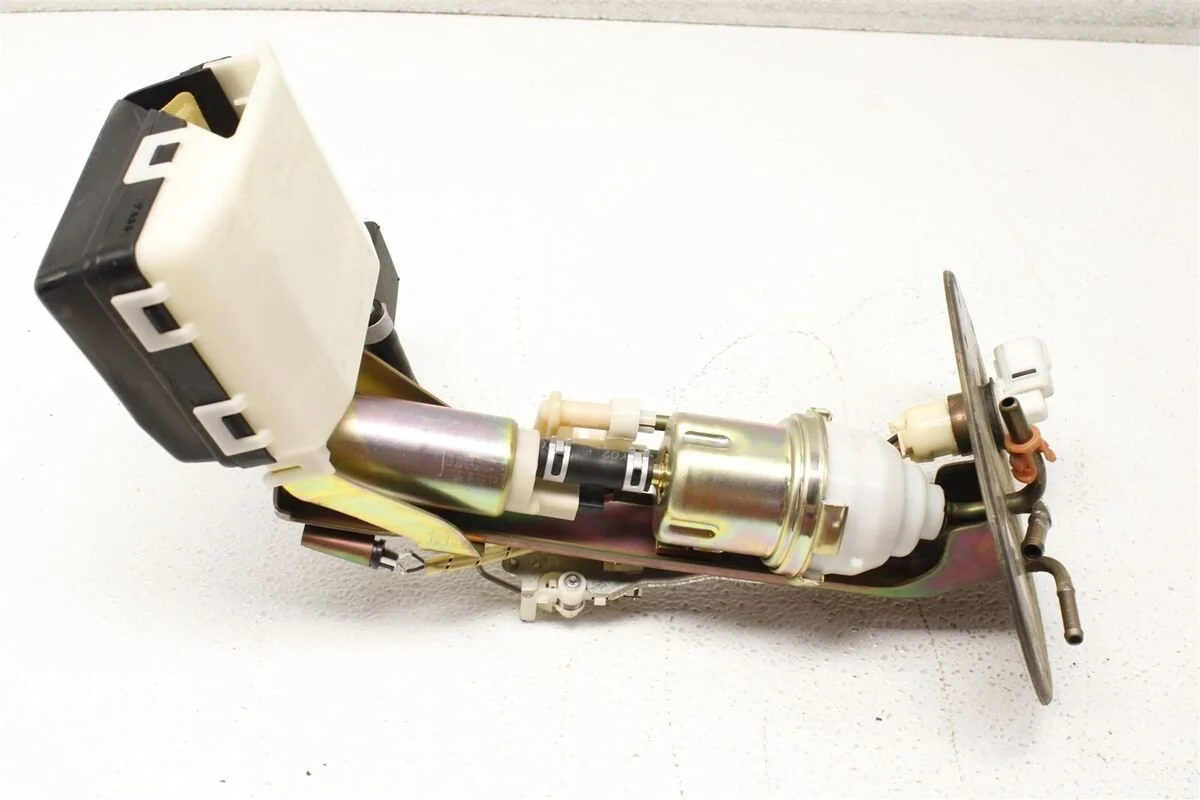
This is how the Oem fuel pump assembly looks, mine has be previously modified so I wanted to add this for those that are curios. The gold and white portion near the top is the fuel filter which has been deleted from my setup prior to this.

I like to work out of this box that is full of towels for easy clean up.

This is the factory internal fuel filter casing. It will need to be unbolted prior to removal.
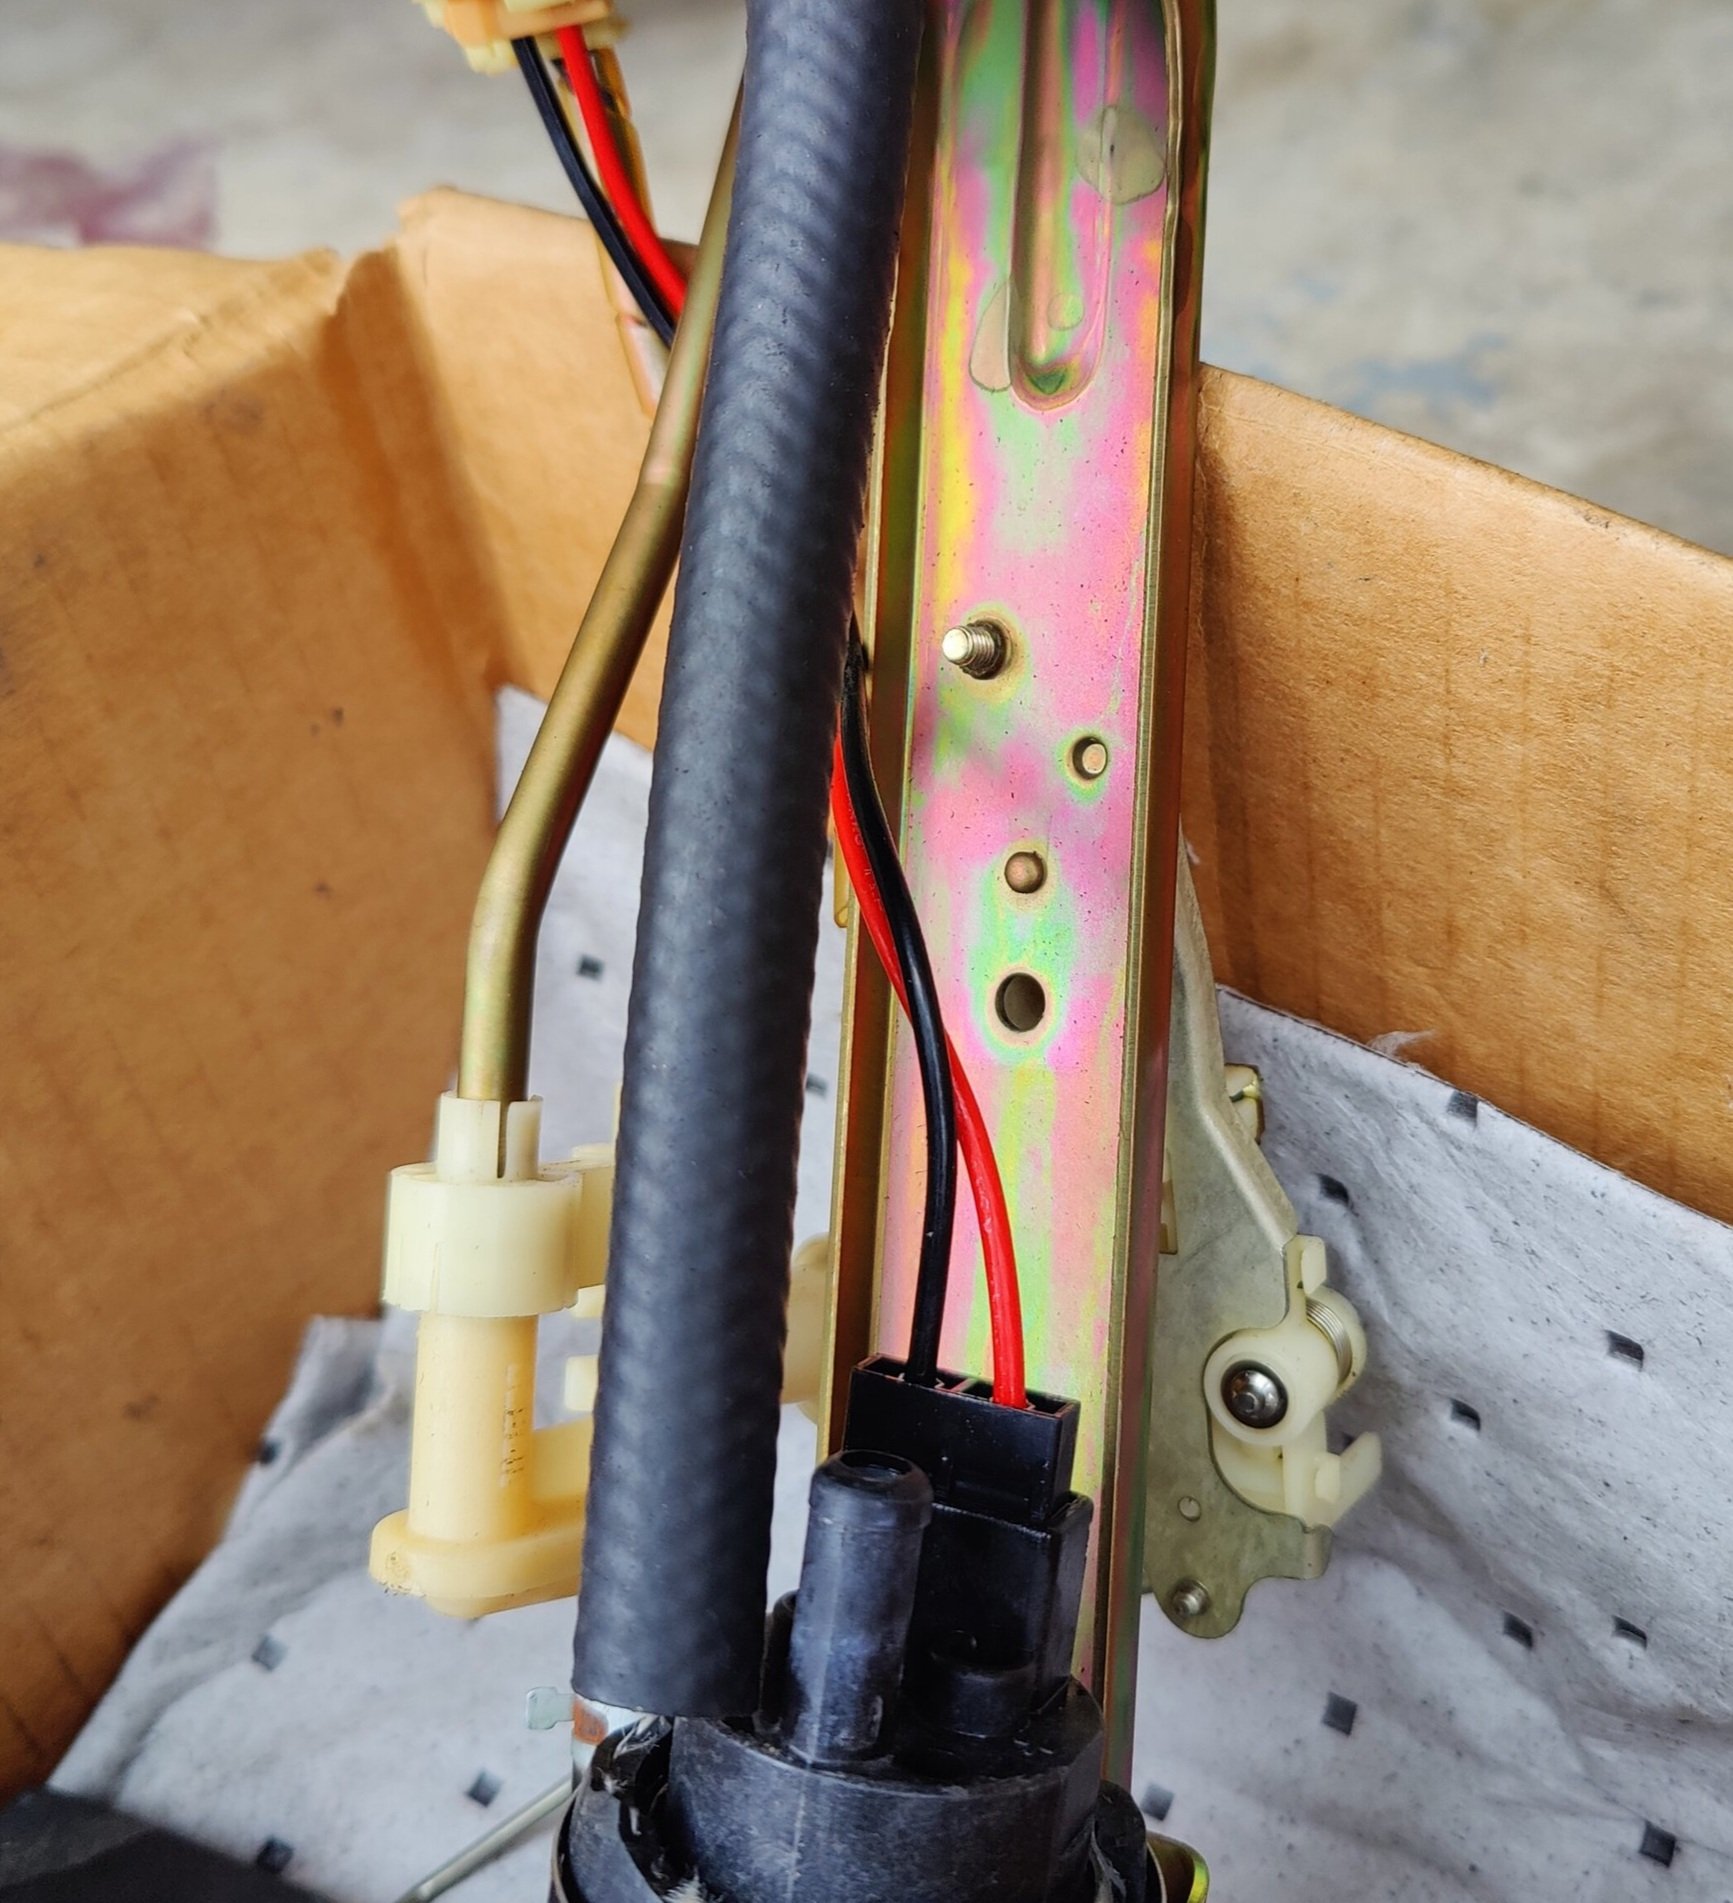
Here we can see the bolt hole for the fuel filter housing located on the metal assembly and located just above the fuel pump connector.
If you want to replace your in tank fuel pump you can pull it right off the hanger and replace it with a hose that is capable of withstanding 63 psi of fuel pressure. If not you can also just replace the filter unit with a new filter. The in-tank filter is pretty pricey so I decided to replace it with under hood inline filter which you can find out how to do this here.

You will need to remove the anti-surge box to get the fuel pump out,

This rubber portion needs to be removed first and this is done by removing the portions that clip into the white upper portion of the box.

Lower rubber portion is removed.

Two clips hold this plastic upper portion on assembly remove thos and the fuel pump will be ready to be removed.

Here is the lower fuel pump spacer that holds the pump in to the assembly.

You can now connect the fuel hose and electrical connector to the
With either your new hose or filter in it’s place you can go ahead and pop on the new fuel pump. When replacing the fuel pump you will need to transfer the pick up sock over to the new pump. It is just held on with a metal washer that holds it tight to the intake of the pump. Then you can put the anti surge tank back on and double check your clamps and electrical connections as the pump is ready to go back home.

Check that all your bolts are tight and that the everything is where it needs to be before returning the fuel pump to its home. This is also a good time to go ahead and replace the fuel assembly seal.
All that is left to do is to reverse the removal process and get it back into the car. I highly recommend testing the fuel system before you close everything up so you don’t have to take everything back apart searching for the source of a fuel leak. If you find no subsequent leaks you can now get it ready for a short drive to test that everything is running properly.
Amazon parts link
DW200 fuel pump kit for 93-07 Impreza, 97-07 Forester and 90-07 Legacy.
Fuel Hose 5/16"Nylon Reinforced SAE J30R10
Amazon tool links
Grey Pneumatic 3/8th socket set Ares extension set Gearwrench 3/8ths ratchet set