Subaru fuel filter switcharoo! Taking our fuel filter back to the engine bay.
I’m sure there was a good reason to install fuel filter inside of the fuel tank… possibly Subaru was thinking it would make it easier to shave your engine bay without pesky fuel pump under the hood. But maybe you are like me and would like to easier be able to change your fuel filter and also save yourself a little bit of money in the long run. If so follow along with this guide to put your filter back where it should be.

Fuel filter box reminds you of the eighties… weren’t things better then? Like when fuel filter didn’t reside in the fuel tank.
Time frame
If you are replacing your fuel pump this can be done at the same time and might tack on 20 minutes as everything is out in the open under the engine bay. If you are diving into the fuel tank, add on another hour or less.
Tools
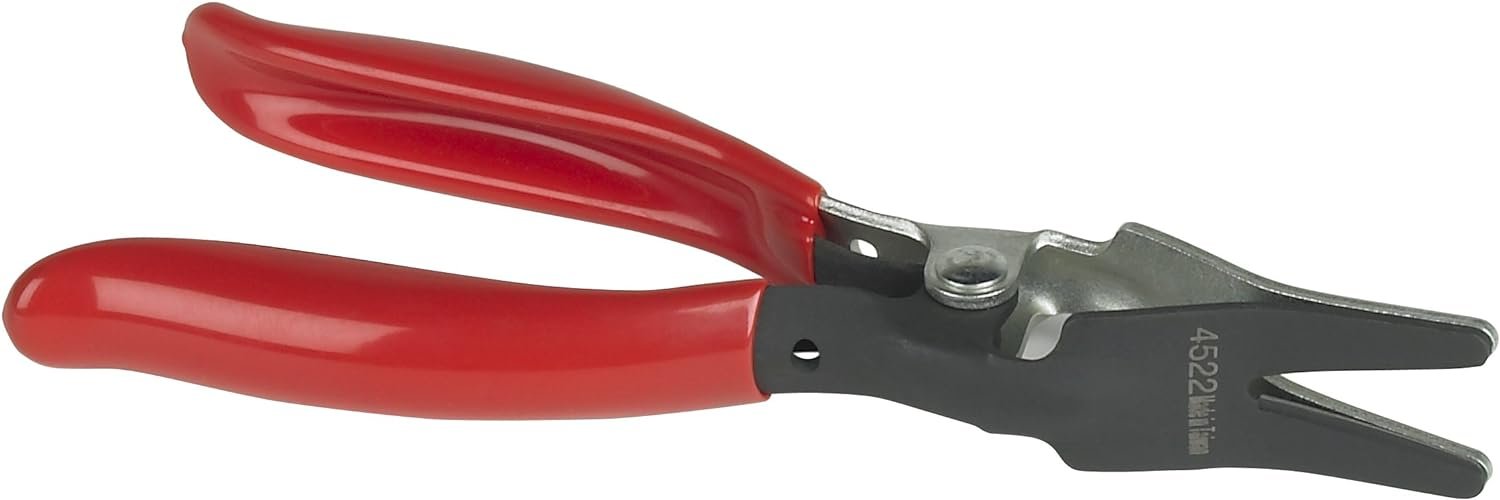
This tool list is pretty short but one tool can be extremely helpful which is this fuel hose removal tool shown below. The rest of the list is your normal rachet and socket set. Alongside these picking up a set of automotive shop towels can help keep your area clean.


Parts
The necessary needs here will be the bracketry that holds the fuel filter within the engine bay. Here are the full list of parts. Back within the fuel tank you will want to replace the fuel filter housing with a piece of hose that can withstand your fuel pressure, this means a hose that is capable of at least 65 Psi of pressure.

Subaru oem fuel filter I’d highly recommend going with the factory filter as the fittings on aftermarket versions aren’t always the same. This makes installing hoses a pain.

Fuel filter band clamp 42053AA000

Fuel filter bracket 42050AA020

Fuel filter rubber cushion 42031AA040
Installation
The first step of this job is getting to the fuel pump and removing the outgoing internal fuel filter within the tank. I covered this on a previous how to that you can find right here, how to change your Subaru fuel pump. Once you have completed those steps we can begin with the under hood work.

If you need help with removing the factory in tank fuel filter head over there first.
If you are completing this job right after your fuel pump work your fuel system should be depressurized. If not I recommend allowing the vehicle time to depressurize so you won’t have as much fuel pressure when you open the system. Always work in a well ventilated area while keeping your work place of open flames or sparks.
Heading under the engine bay we will find our fuel lines that connect to the manifold on the driver’s side for LHD vehicles. There are two lines on these EJ models, one will be your fuel feed line and the other is your return line. You will find two fuel dampers which help alleviate noises and pulses throughout the fuel system. This is a good time to remove the windshield washer reservoir to make your work area more open. .

Lets get the windshield washer fluid reservoir out of the way so we can make some headway!
The line that runs to the top of the fuel lines on your manifold is the feed, we will need to remove this upper fuel damper. After removing the fuel line clamps you can now remove the fuel damper. Even if the system has been depressurized it is a good idea to have some towels to soak up any extra fuel that comes out once the hoses are disconnected.

This is what you are looking for, this is the feed line damper that needs to be removed.

Even with little to no fuel pressure in the system there always some fuel that pours out, keep your shop towels on hand for clean up duty.
Having the fuel damper removed the location for the fuel filter is clear. To make this look truly Oem we will add on our pieces to hold the fuel filter in place. On the strut tower you may have either a bracket or just bolt holes, either way you use these to mount the new fuel filter bracket.

A bracket that holds up the engine harness is normally located here, remove that.
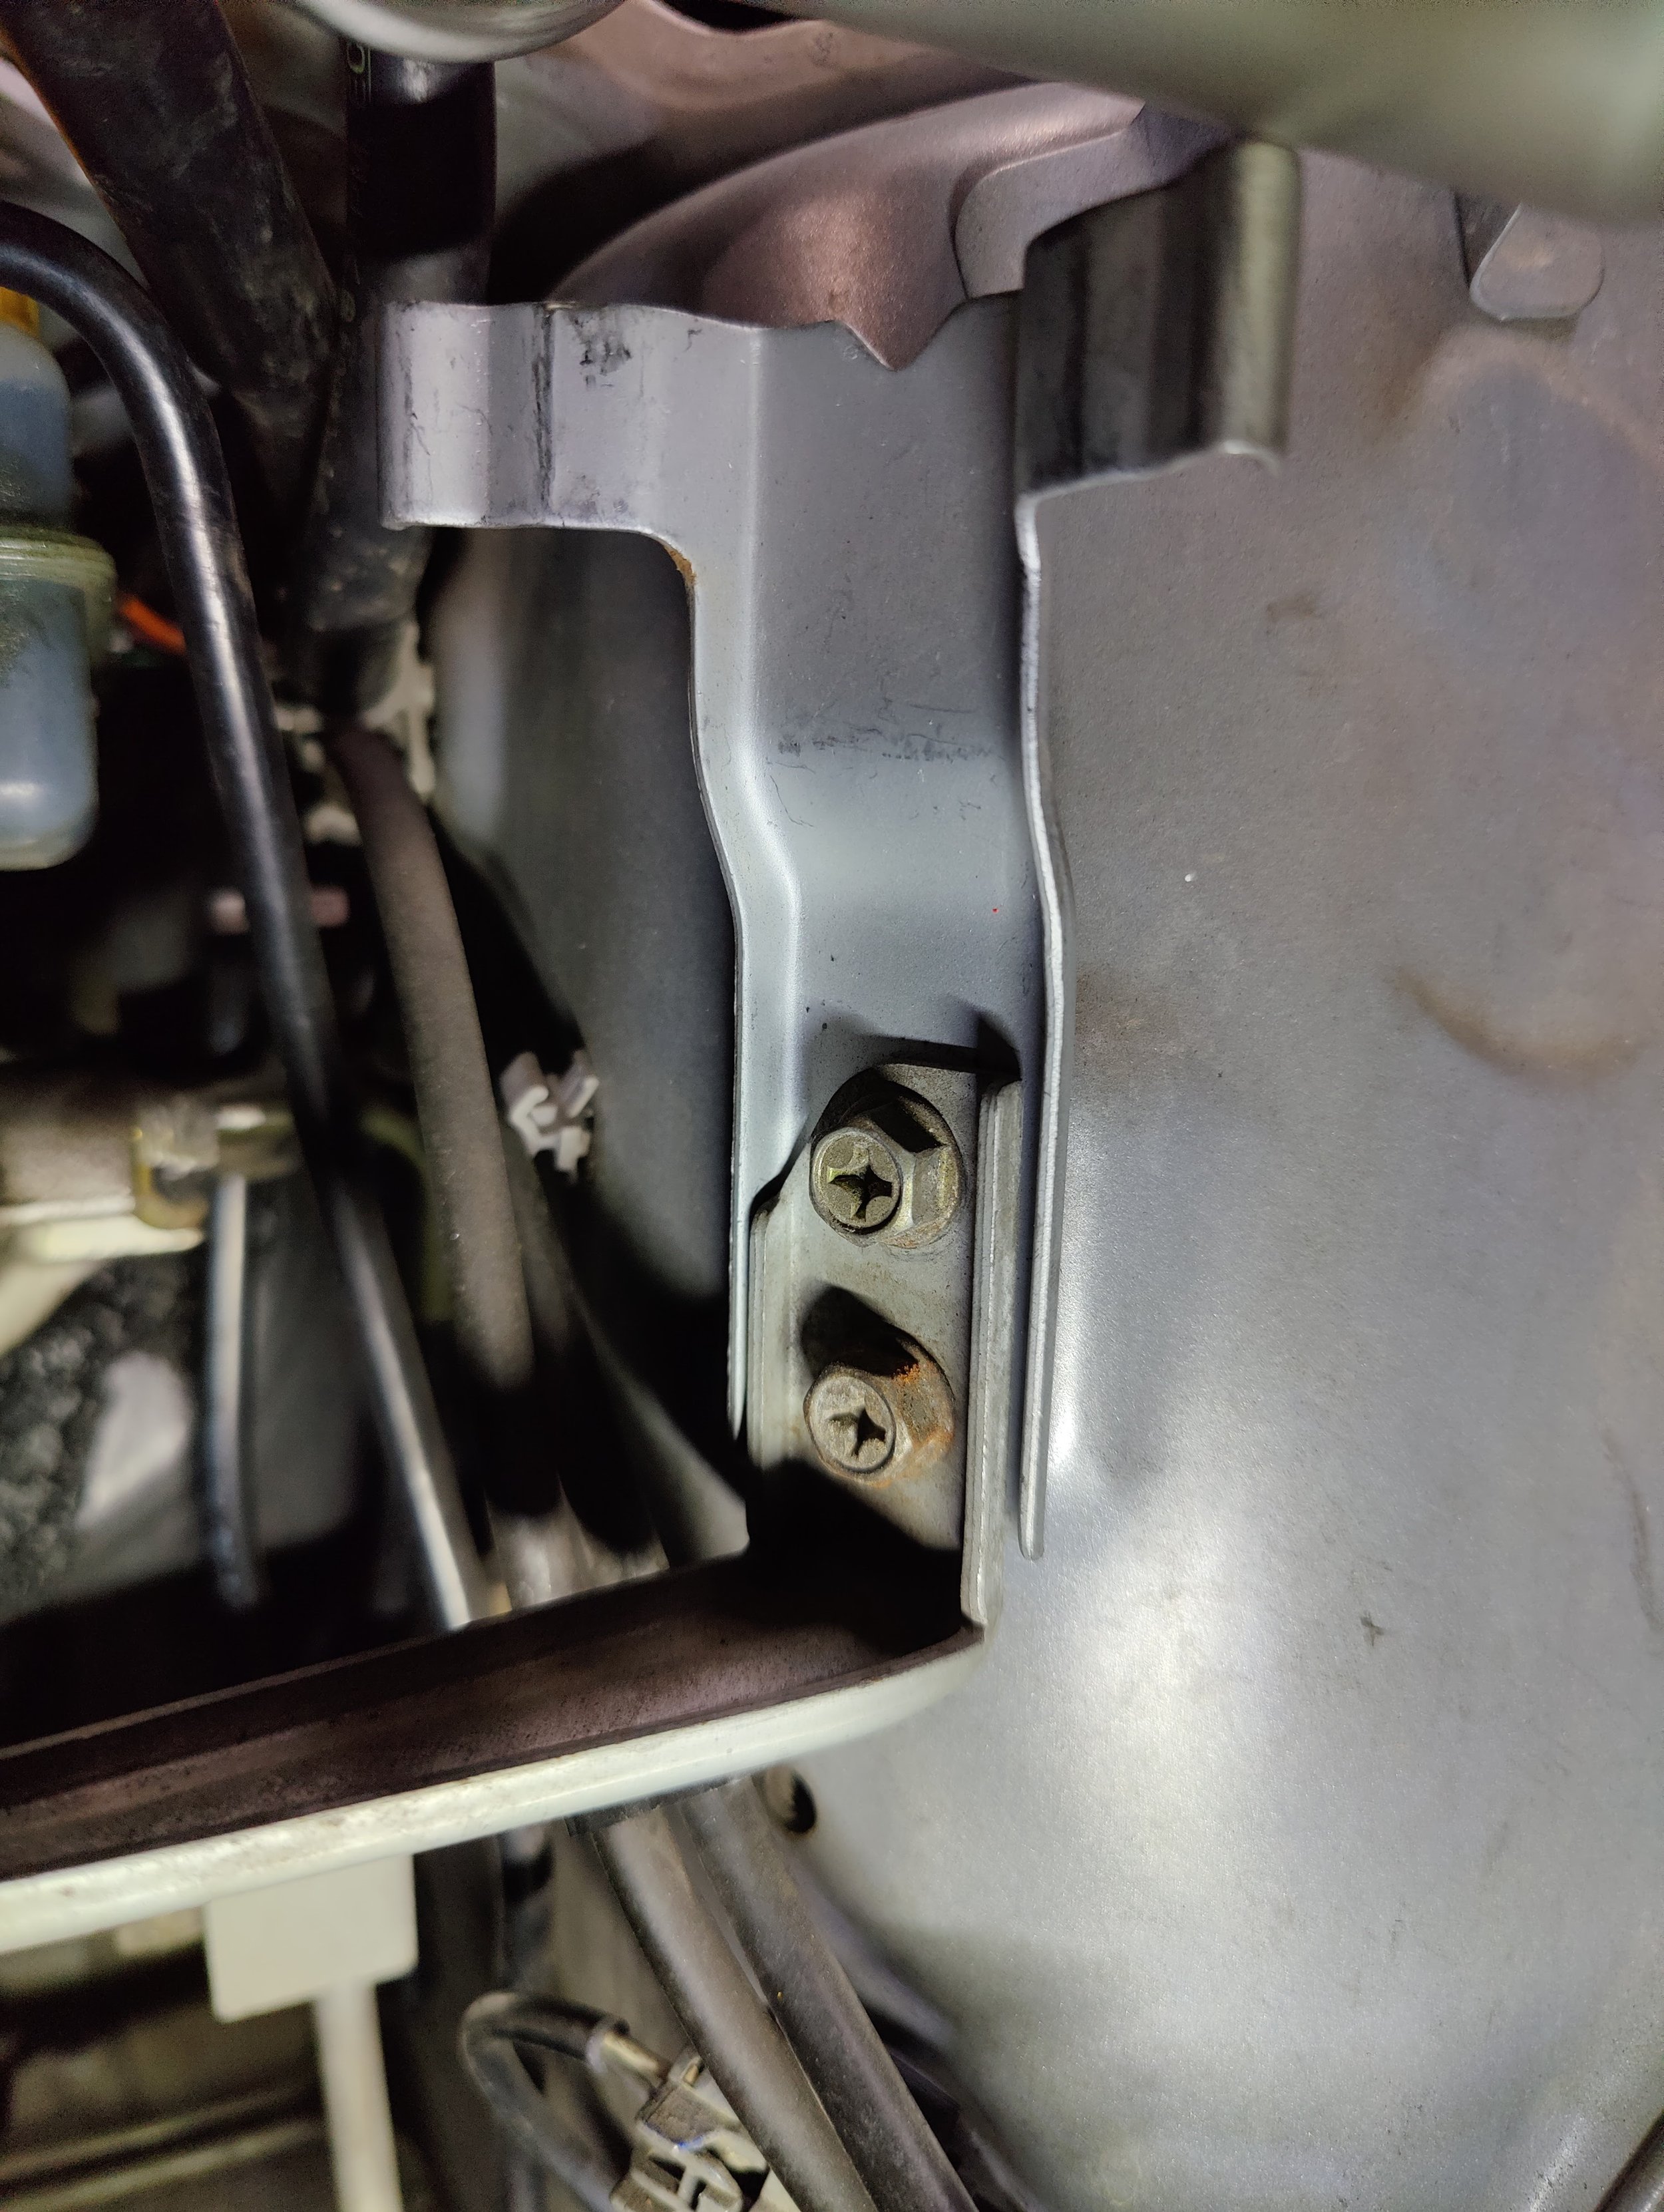
Now you can add the new fuel filter bracket and put the wire harness bracket back on.
With the fuel filter bracket mounted up you can now add your new fuel filter in the fuel dampers old location. The fuel filter will give you the directions of fuel in and fuel out, place your filter accordingly. Now you can slide the fuel filter cushion over the fuel filter and set it in the mount.
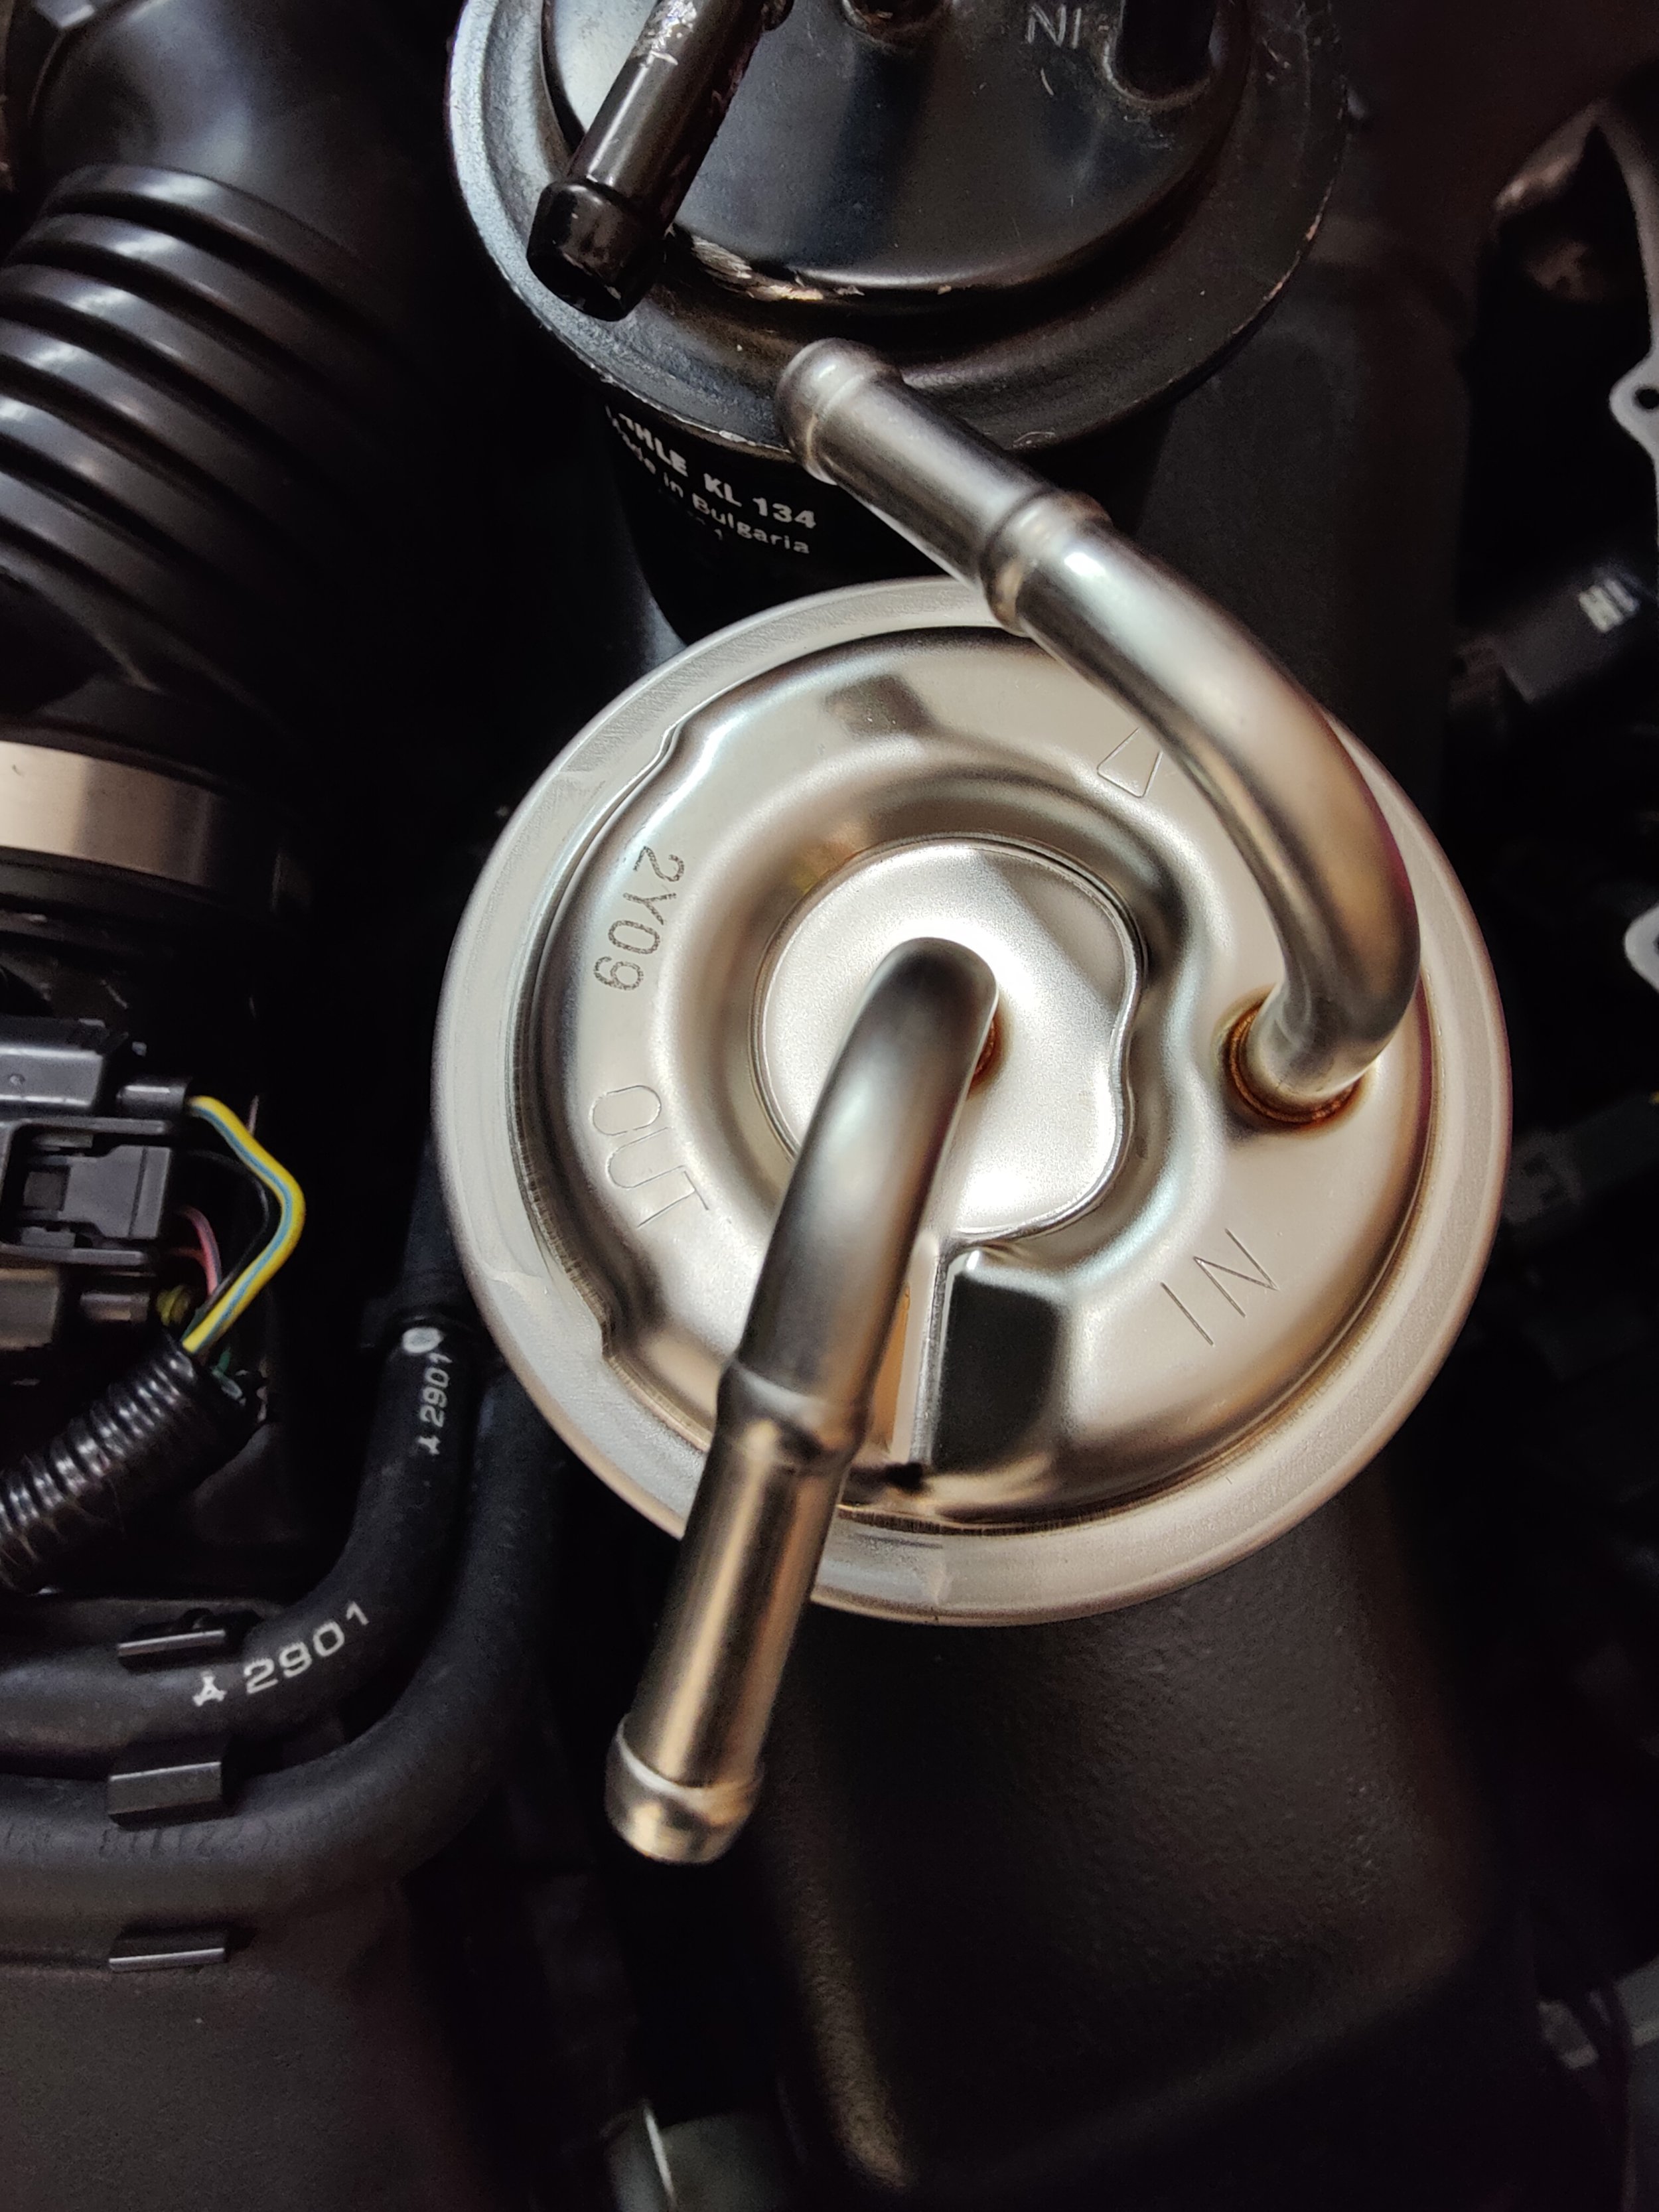
Check your location for flow, and get ready to install your new fuel filter.
Finally it is time to bring in the band clamp that will hold the filter to the bracket. It slides in on the front and then can be clasped on the rear near the master cylinder.

After you slide the hoses over and put on the new hose clamps you are ready to clasp the clamp.

Clamped in and ready to filter some fuel.
After you have everything setup you can prime the fuel pump by turning the key but not starting the car. Then you can check for any fuel leaks. If you find no leaks you can go ahead and crank the car on over and recheck your work while the car idles. I would highly recommend checking the hose clamps after a few heat cycles as the hoses expand and shrink which can cause them to loosen up. Otherwise enjoy you handy dandy new fuel filter location.
Amazon tool links
Titan 3 piece hose plier set Knipex pliers
OTC 4522 Stinger Vacuum Hose and Fuel Line Removal Tool
Grey Pneumatic 3/8th socket set
Milwaukee 3/8ths electric ratchet
Amazon part links
Fuel filter rubber cushion 42031AA040
Fuel filter bracket 42050AA020
Fuel filter rubber cushion 42031AA040