Jdm power folding mirrors for your Usdm Subaru! How it should have come from the factory.
There are plenty of differences between various models from Usdm, Audm, Jdm, Eudm, etc etc… which we ogle over and wish we would have received in our location on the Earth. While this one might sound a little less than useful I find it incredible nice because I fold my mirrors in every time I park the car in the garage, Also who doesn’t want something equipped to there car that didn’t belong.
I have always wanted to complete this mod as it just seemed interesting to me. So when I saw a set pop up online on a Japanese auction site I thought lets give it a go!
Time frame
I wish I had better news for you but this is going to take you a long time. I think I spent a little over 10 hours in total working on this modification. But plenty of the tasks can be completed with the car being able to be driven. There was also a lot of trial and error so I would definitely set aside a whole weekend or longer. Nothing in this is incredibly hard it is just time consuming but you learn a lot.
Tools
The typical tools are coming out for this job, you will need a screwdriver set and a non-marring set of trim tools. Alongside those everyday tools a heat gun will be necessary alongside a drill and a dremel tool. There is a bit of wiring too so you will want a depinning tool, soldering iron, and wire strippers to set them up.


Parts
First off is your set of Jdm folding mirrors on eBay with a set of Usdm mirrors. Then you will want some 20 gauge wiring with either solder or connectors and the proper terminal pins to make the wiring complete. Lastly you will want a folding mirror switch that can be found either from Japan or a you can snag one from Toyota, they are the same.


If you need oem style mirrors for parts here you go. Dorman Usdm mirror assembly (driver)


Toyota mirror switch

20 gauge wiring
Installation
First off you can start either mirror as both will need these steps completed, you will need to basically strip them all down so let’s walk through those steps together. What is commonly referred to as the triangle base can be removed first, it is the three screws that attach the mirror base to the mirror body. You can now depin the connector to allow the wiring to slide through the triangle and allow the mirror body to be free,

After staring at Jdm fold in mirrors for many years I finally pulled the trigger and picked up a set. I was even lucky enough to get them in my color with this cool Jdm aero covers too.

Three screws hold the triangle base to the mirror body, remove them to detach them

The five wire connector helps you identify the Jdm fold in mirrors

When removing the pins you need to pull these panels and that will allow the wiring to come free from the connector.

Another view of the connector, on the lower section you can see the pin that holds the connector pin in place.
All the connectors depinned and ready for their new home.

The Jdm triangle bases removed from the mirror assembly to be replaced by the Usdm triangle bases.
Next on the list will be using your heat gun to slowly warming up the full mirror and surround, from the factory there are two places they use tape to adhere the mirror and the rubber surround keeps it in place and looks nice. Well you need to warm that to release it too. If you get it too warm it will deform and ruin it. So take your time warming it up and removing the mirror so you don’t damage anything.

When removing the mirror glass you will need a heat gun to warm up the black mirror surround and the adhesive that holds the mirror in place.

Mirror comes out and and this is what you will see.
With the mirrors removed from the Usdm mirror they will need to be added to the Jdm mirror bodies, the factory used double sided tape and that works for me. You can use a little bit of heat to warm up the surrounds so it firmly holds the mirror in place as it did from the factory.
Now on the Jdm assemble you will want to remove the adhesive with some goo be gone.

Setting up the double sided3M tape for switching mirrors to the Jdm mirror assemblies.

Adhered to the Jdm assembly and ready to go to the Usdm bases.
The Usdm mirror glass attached to the Jdm mirror bodies you can now begin the arduous task of readying the Usdm triangles for the Jdm bodies, Unlike most things Subaru these are not the same and you will need to make a few modifications to make them fit snugly. I start by pushing the two pieces together and eyeing where they rub, you should be able to see marking on both the base and triangle, this will help you gauge what needs to be removed. You will want to take your time with your dremel or drill to not take too much, you want the base to well supported within the triangle.
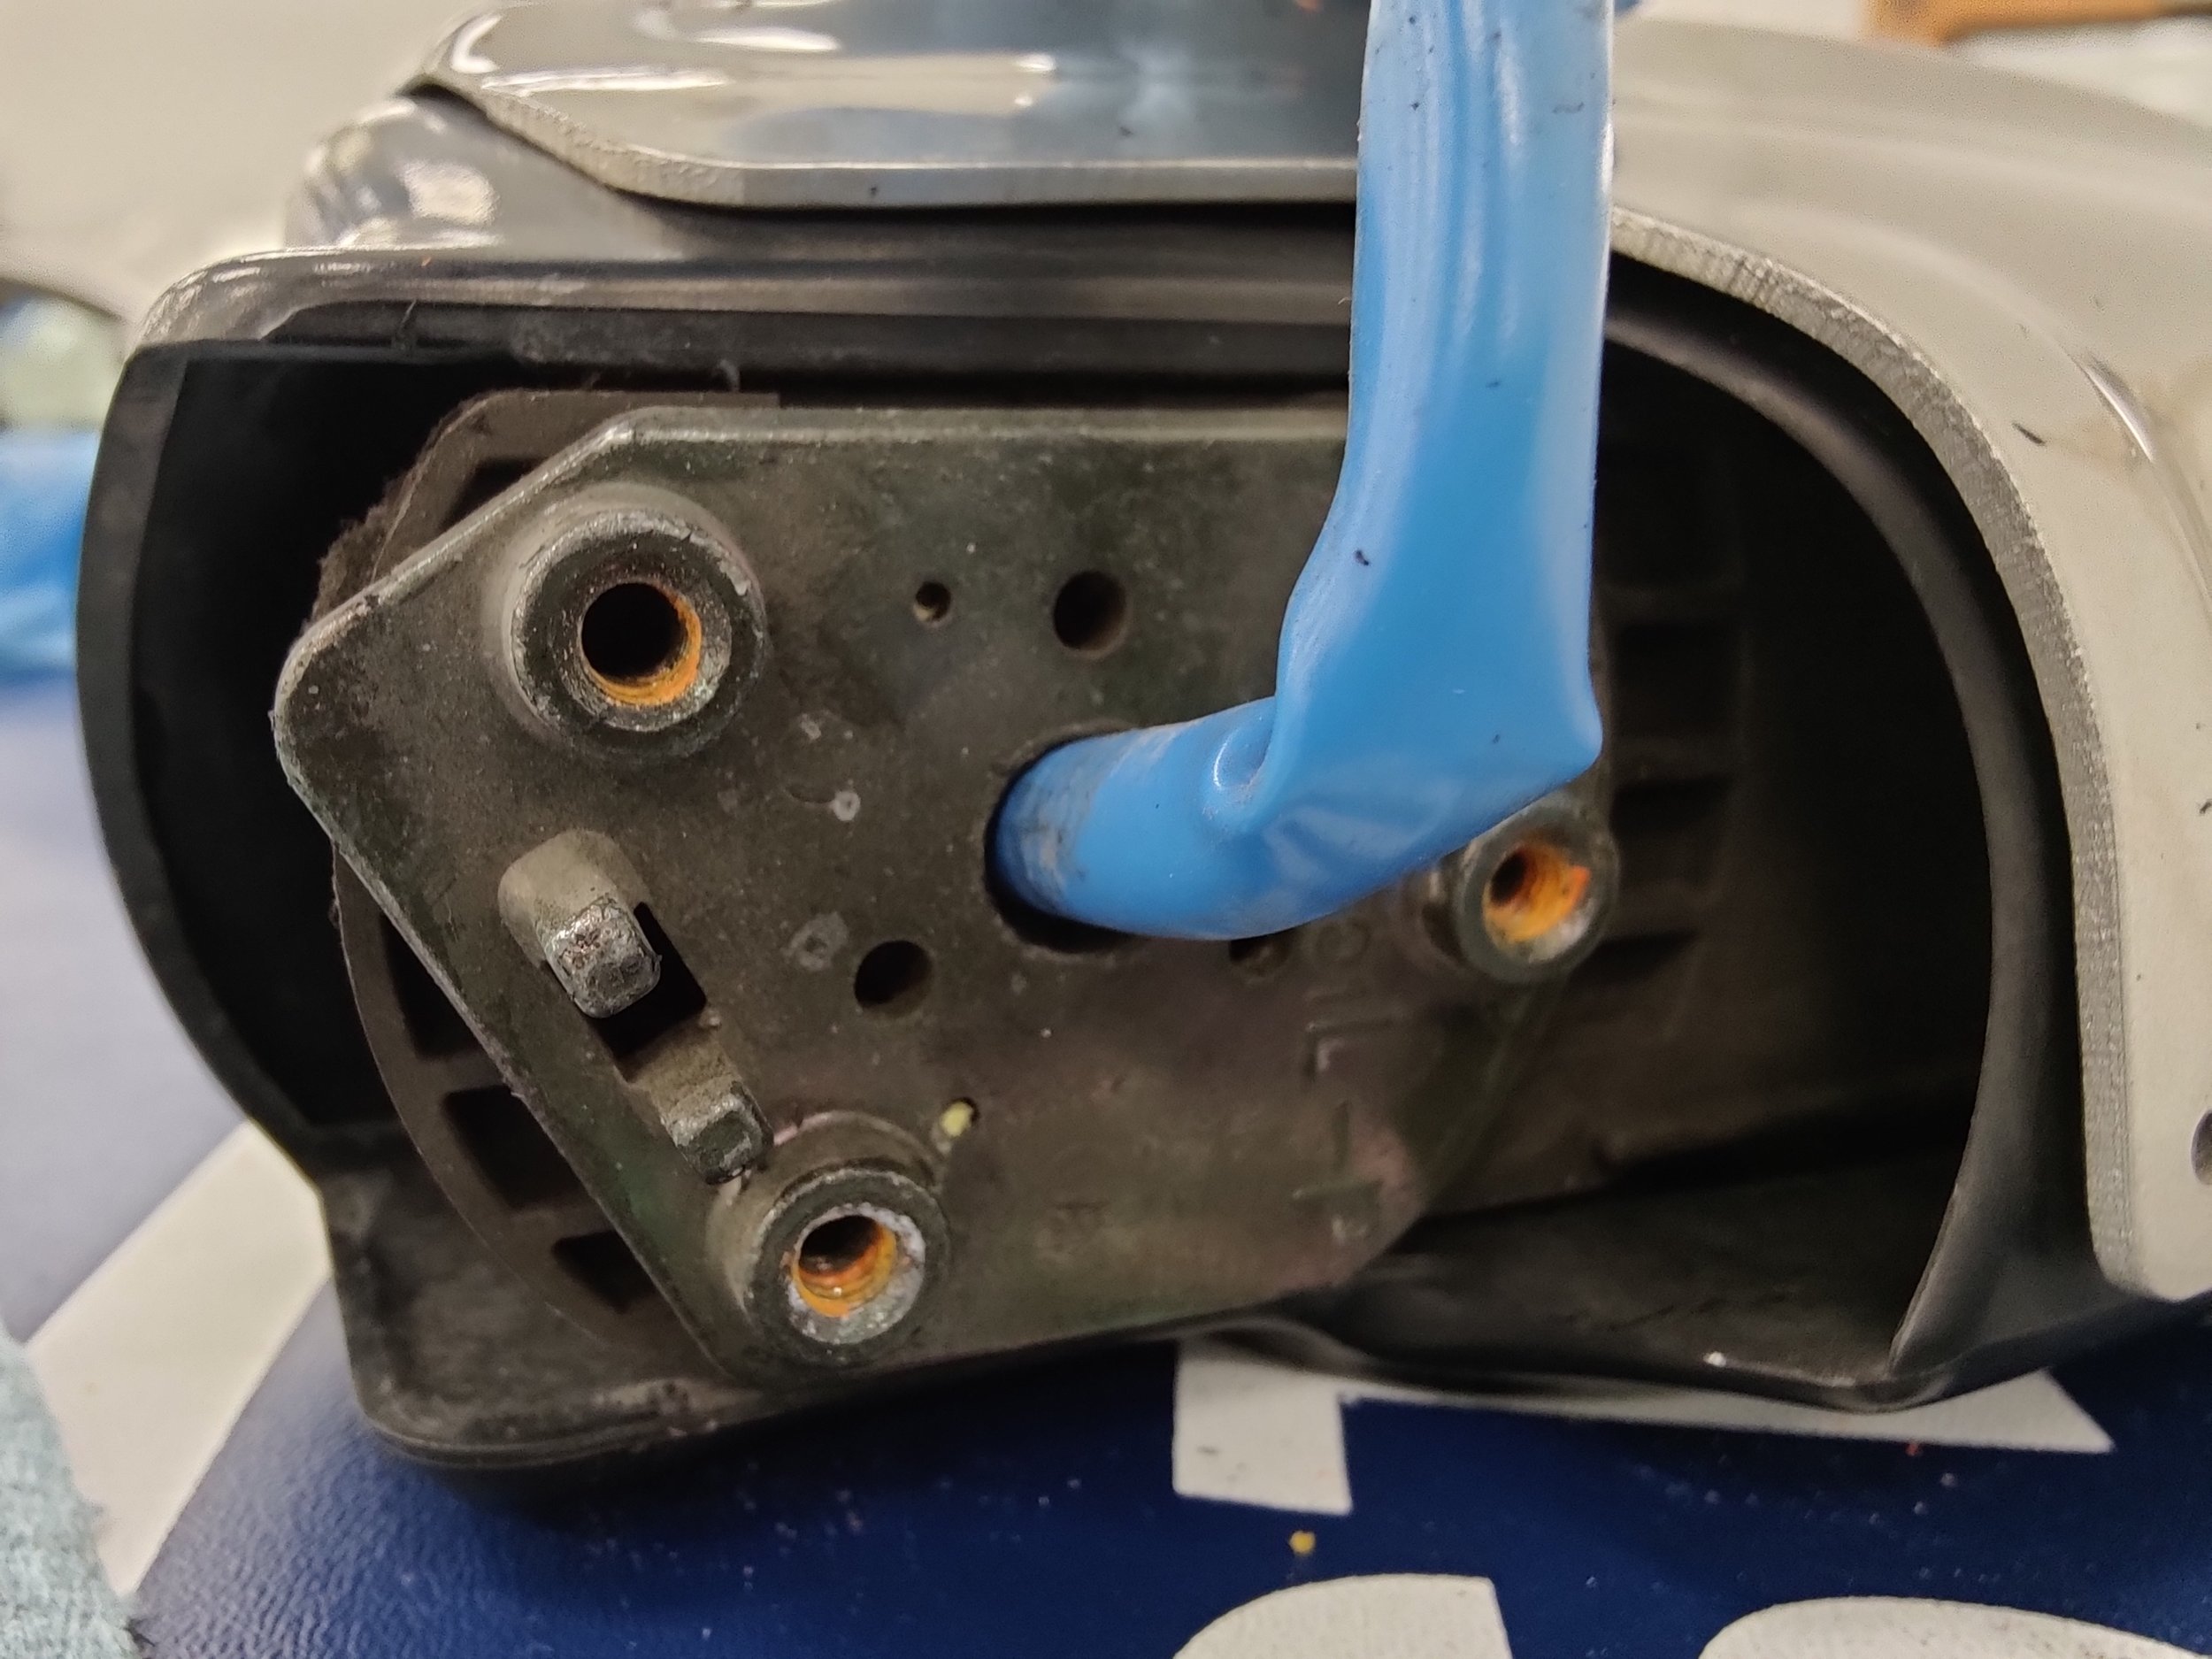
The Usdm and Jdm metal base that attaches it to the plastic base aren’t interchangeable. They are close but with a little work this can be fixed.

Jdm on the left and Usdm on the right. It might be the angles are slightly different and the openings where the metal base mounts in. The plastic is soft and is easy to modify as we will see below.

When you put the triangle base on you will notice it wont sit flush.

It’s hard to tell but the metal base is visible here and so you will need to modify the plastic base.

When you place the metal base into the plastic base you will get a good idea what needs to be cut away. You can also make a template if that helps.

Here is the drivers side carved out and ready to accept the metal base.
When you finally have those triangles and bases matched you will notice the one of the bolt holes does not match up. Taking a drill and widening out that hole will give you the space you need to get the third finally mounting screw in.

This hole doesn’t line up exactly, so after the base fits up, widen out this hole to match up with the metal base to allow it to be fully mounted.
That concludes all the necessary modifications to mirrors to allow you to see out of your Usdm Subaru with your Jdm mirrors in place.

Bolting them all up and they are ready for wiring.
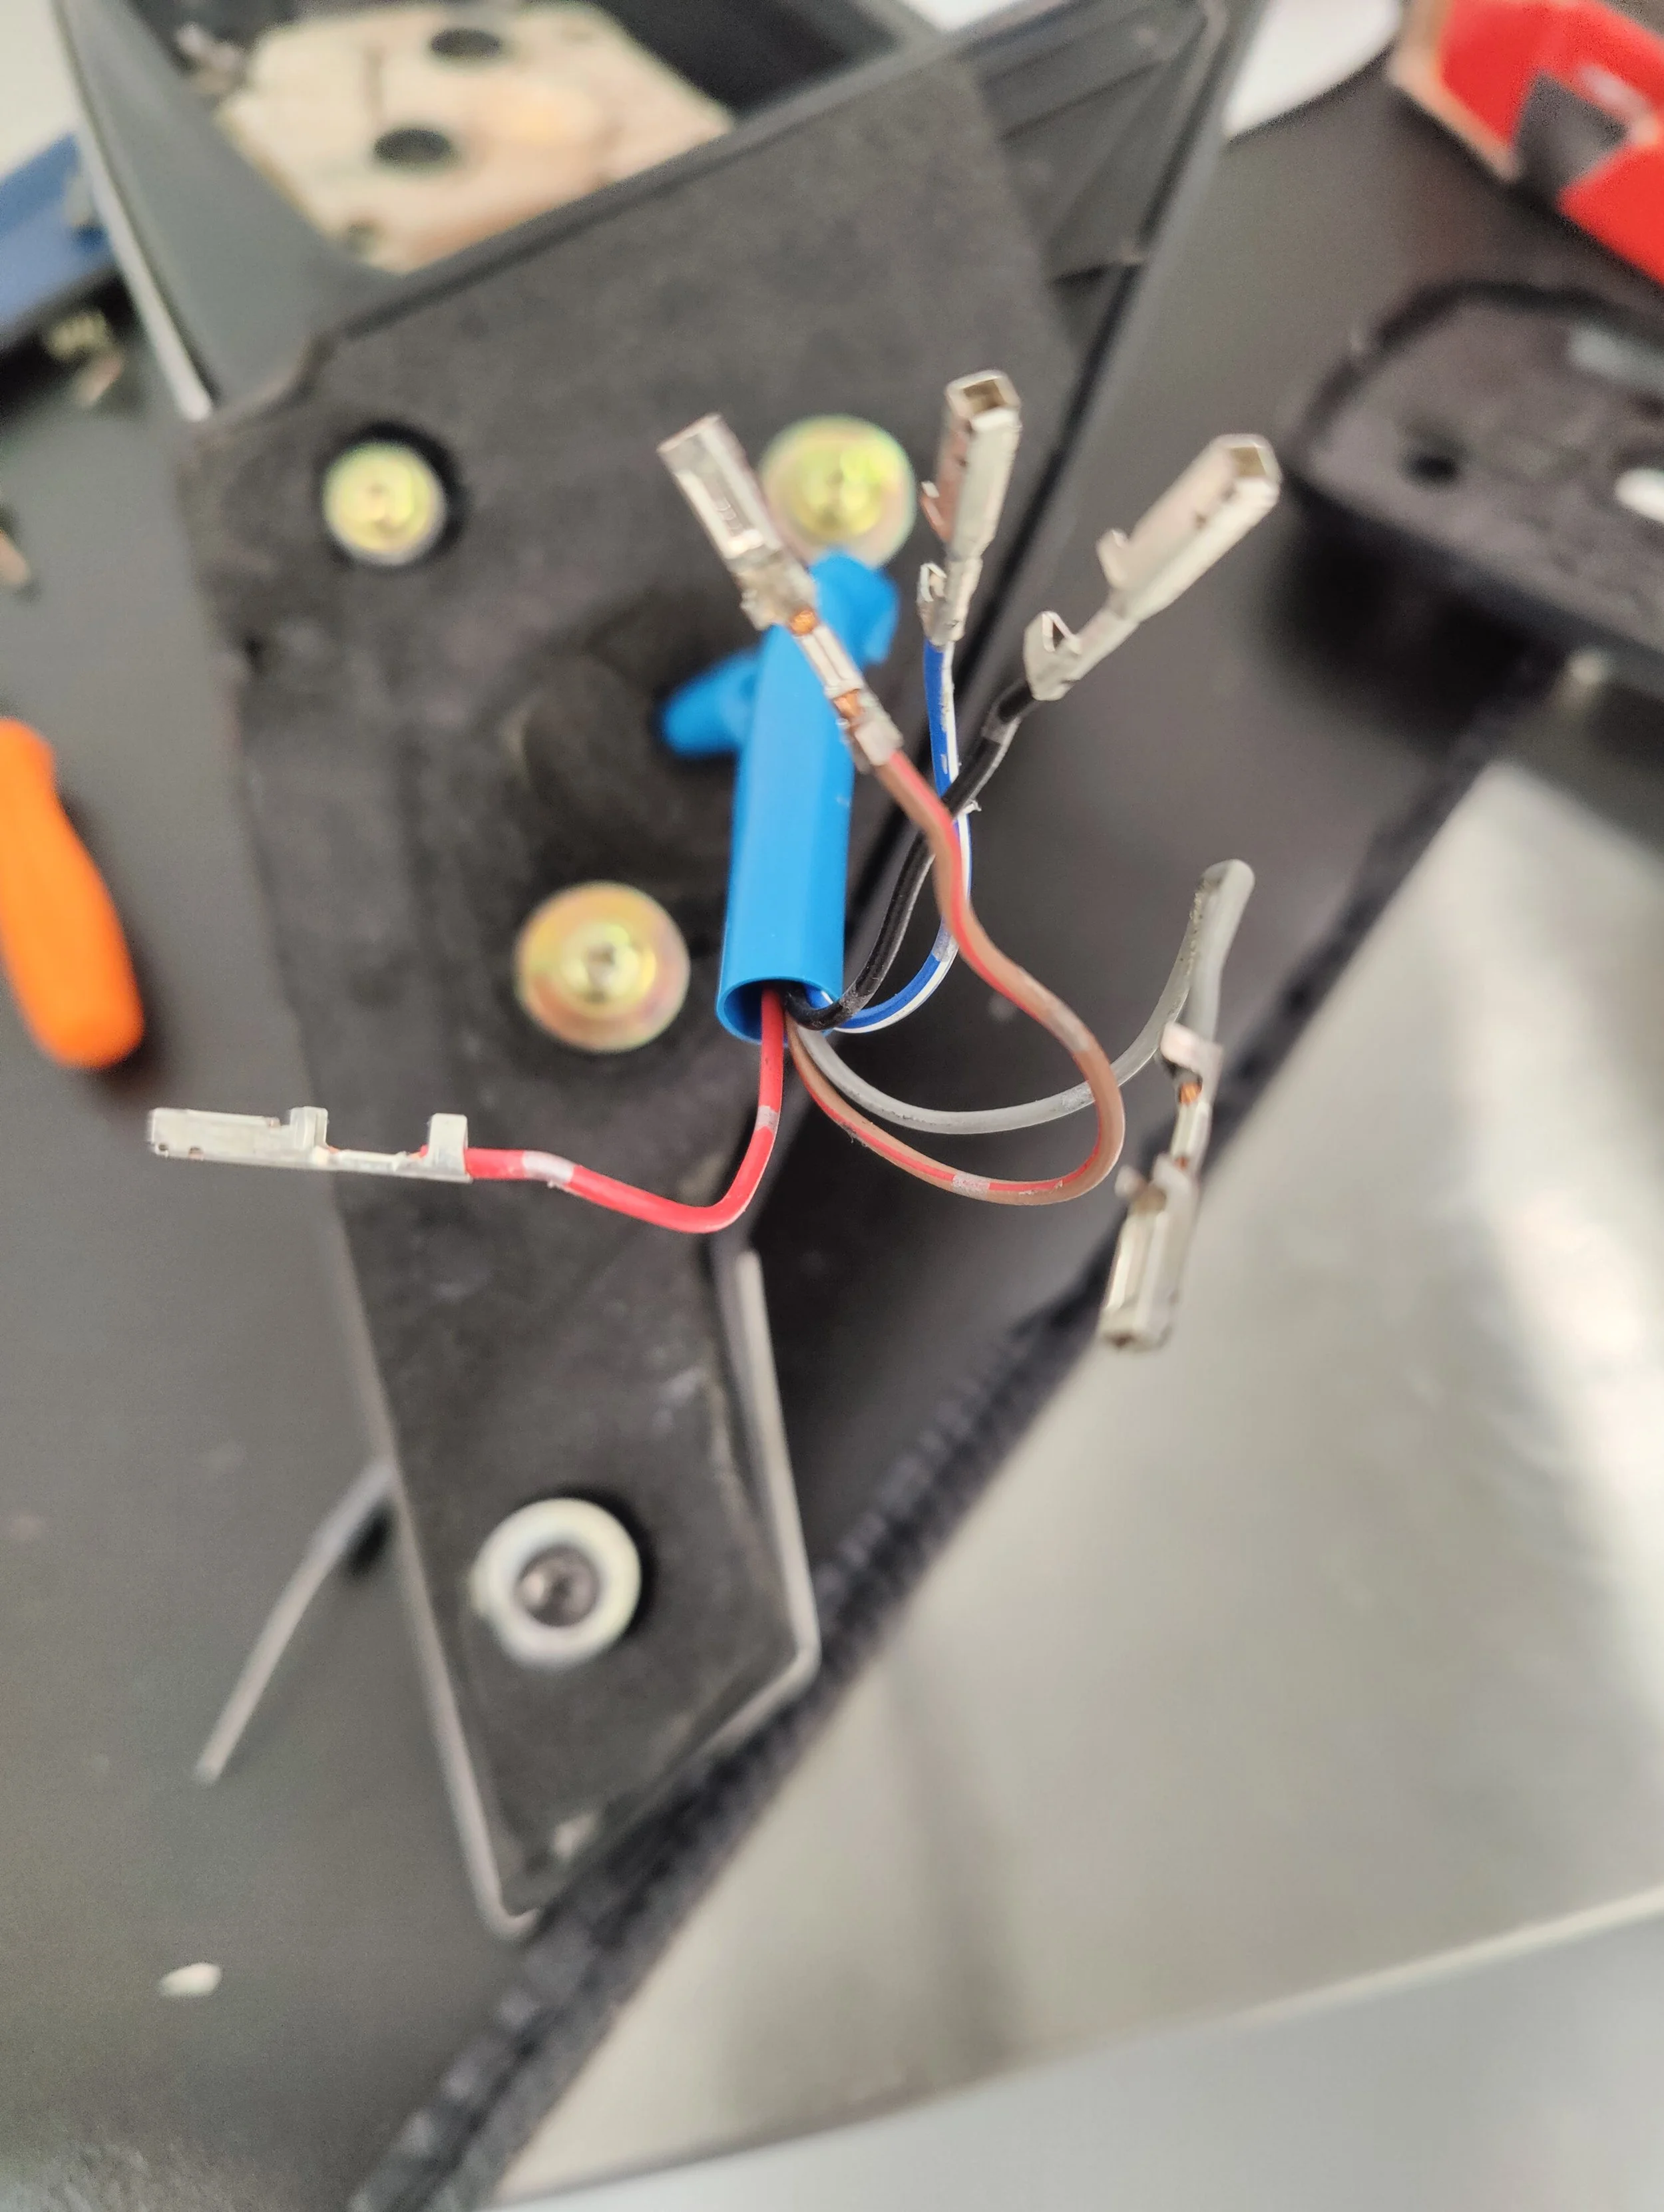
Up next is the wiring and there is plenty of that to go around, so buckle in and get ready for a wild ride. With the Usdm mirrors you will likely have just 3 wires that run into the connector, while the Jdm adds two extra wires for a total of five to give the mirrors the folding capabilities ran by the motors . The connectors for both vehicles are the same and you already had the pins removed so you can just add them in the same spot you removed them from the Jdm connector. This would be a good time to test out your operation per wires for later wiring knowledge.

This is what you see with Usdm mirror connector, just three wires here but in the same connector.

The Jdm folding mirrors have five wires, the left two wires power the mirror motor.
This is one of those times were Subaru let us down… They did not just leave the wiring there just in case you added them later. Therefore you will need to measure out your wiring, which in my case was just draping the wiring over from the passenger mirror and pushing the wiring into firewall above the edge of the carpeting and pulling through and around to the driver’s mirror, you can certainly leave a bit of extra wiring too so you don’t run out.
Having the wiring measured and ready for the passenger side I had to round up some terminal pins to go into the factory mirror wiring connectors, this will give the ability of the mirror switch to power the mirrors. I went ahead and soldered the wiring too the connectors and you can always use butt connectors too, but you will want to have the wiring ran through the door loom seals.
With the passenger wiring soldered up it was time to run the wiring through the door weather loom which is no easy task. First task would be to remove the scuff panel to access the interior side seal and door wiring connector. Next you can undo the connector and push the wiring and plug out of the car. Now you can remove the door side of the wiring loom seal which allows you to pull it clear and figure out how to pull the wiring through. The biggest issue I found here is the rubber seal continues on into the door and unless you want to remove all of the connectors and pull it out you won’t be able to easily run the wiring through. So I had to improvise which meant suing a long ziptie with the wiring threaded through it and then sliding it through the wiring and finding where it was past the seal and cutting a small hole to allow the wiring to pop out. The images below should hopefully paint a clearer picture for this trick. I then roped the wiring around the existing mirror wiring and snapped the pins into the connector, This side is complete and now you need to run the wiring back behind the carpeting and make it’s way to the driver’s side.

On both sides of the car this connection is to easy to find after you remove the lower kick panel trim.
This is the door loom you will need to remove from both the chassis and door

After the seals are loose and the connector is undone you can push the wiring out of the chassis. You will need it out to help push the wiring through.

Now you should be looking at this.

I used a ziptie that was slightly longer than he weatherproof seal and make a small incision past the door seal and pull the wiring through.

Pulling the wiring on through a small hole past the seal.

I wrapped the wiring around the power mirror wiring and the tested it before finishing up the wiring.
On the driver’s side you are completing the exact same steps but you will need to wire up both passenger’s side and driver’s side together. So make sure you have your wires identified so you don’t have to do it twice. Now you can merge both the driver’s and passenger’s wiring together and attach them to the switch. Now is the moment of truth where you can test out everything, with the key on you can use your switch and see if the folding begins and if so you can go about cleaning your wiring up and putting all the panels back together.

On the drivers side of the car you need to bridge the wiring from the passenger side and then run them down to the switch. I lucked out by finding these pinned connectors with a Y split from a 97 Legacy tail light assembly but you can easily build these yourself.
With everything working you can figure out how you want to run your switch, I wanted in the factory location but it obviously doesn’t fit. I took a drill bit and started trimming it but found out that isn’t the best way to make it look proper. The button that Subaru used for the mirror switch is centralized but the new button will need to be opened up quite a bit make space. Another trick is buying a Toyota button that comes with a surround and cutting a large square into the door trim panel, that will likely be my next attempt but for now I just wanted to get it working.

The Jdm button definitely will not fit as the design is completely different than the Usdm opening.

With a drill bit I carved out a location to test out, this could be much improved with the right skill and a dremel.

This is the usdm mirror wiring harness and connector, the two open slots on the right side is where you need to connect to for the button to operate the power mirror circuit.
Amazon and eBay Affiliate part links
JDM power folding mirror listings on eBay
Dorman Usdm mirror assembly (driver)
Dorman Usdm mirror assembly (passenger)