Brake fluid exchange without special tools! Thanks for the assistance gravity!
Brake fluid, the often overlooked fluid for replacement. We press the brakes and they work… what more needs done? Well let’s take a detailed look into what makes up brake fluid and why it is important to change it out regularly.
30k miles is the maintenance interval from Subaru for replacement.
Brake fluid is hygroscopic and thus absorbs moisture from the air in normal humidity levels. When water mixes with the brake fluid it lowers the boiling point which lowers it’s effectiveness. With water in the system you will may find your brake pedal a bit mushy and it is necessary to press the pedal much harder to achieve the same braking performance. The steel brake lines will also corrode and break down over time, once again lessening capabilities of the brake fluid and system.
Dirty fluid ready to be flushed out.
All of these are excellent reasons to keep you brake fluid fresh and up to date. We can now take a look at how to easily exchange your brake fluid with very simple tools.
-Warning-
If you do not have the proper training or haven’t worked with a vehicle’s braking system understand the importance of this repair. If this repair/maintenance is improperly completed serious injury to you, others, your vehicle or nearby property can occur. Please proceed with caution and only attempt this wit the proper tools and knowledge.
Do not add any other fluid to the brake system, any petroleum based fluid will completely ruin your entire braking system. Causing all the rubber seals within the braking system to swell and be unable to function properly. You will not be able to brake the car properly.
I can assume no liability for damages to you or your vehicle via these guides. There is only one of you and you are very important to many people, keep this in mind!
Time frame
This is a bit of lengthy task. If you have other little jobs to do on your car, it will be a great time to do so. The time it will take is based off how many brake fluid collecting pans, if you open all the bleeders you can speed up the process, but you need to keep a keen eye on the master cylinder. I would set aside an hour plus for this for a task, this will give you plenty of time to properly complete it.
Tools
Are few tools today will be a a quality jack and jack stands.

A impact gun to remove wheels with and a torque wrench to reinstall and your wheels.

With wheels to be removed my Milwaukee 1/2 impact is never too far away.
Your favorite wrench to loosen the bleeder screws and retighten them.

It’s always good to have an extra 10mm around, you never know when it will decide to play hide and seek. 8-10mm wrench line wrench set 10mm wrench
We also need a pan to collect the brake fluid as it comes out, the more the merrier and the faster you can complete this task.

If you have an air compressor and would like to speed up this process you can utilize an air brake bleeder to pull fluid out much quicker.

Always close by and never to far away from my hands are my gloves, not a big fan of brake fluid on my skin..

Parts
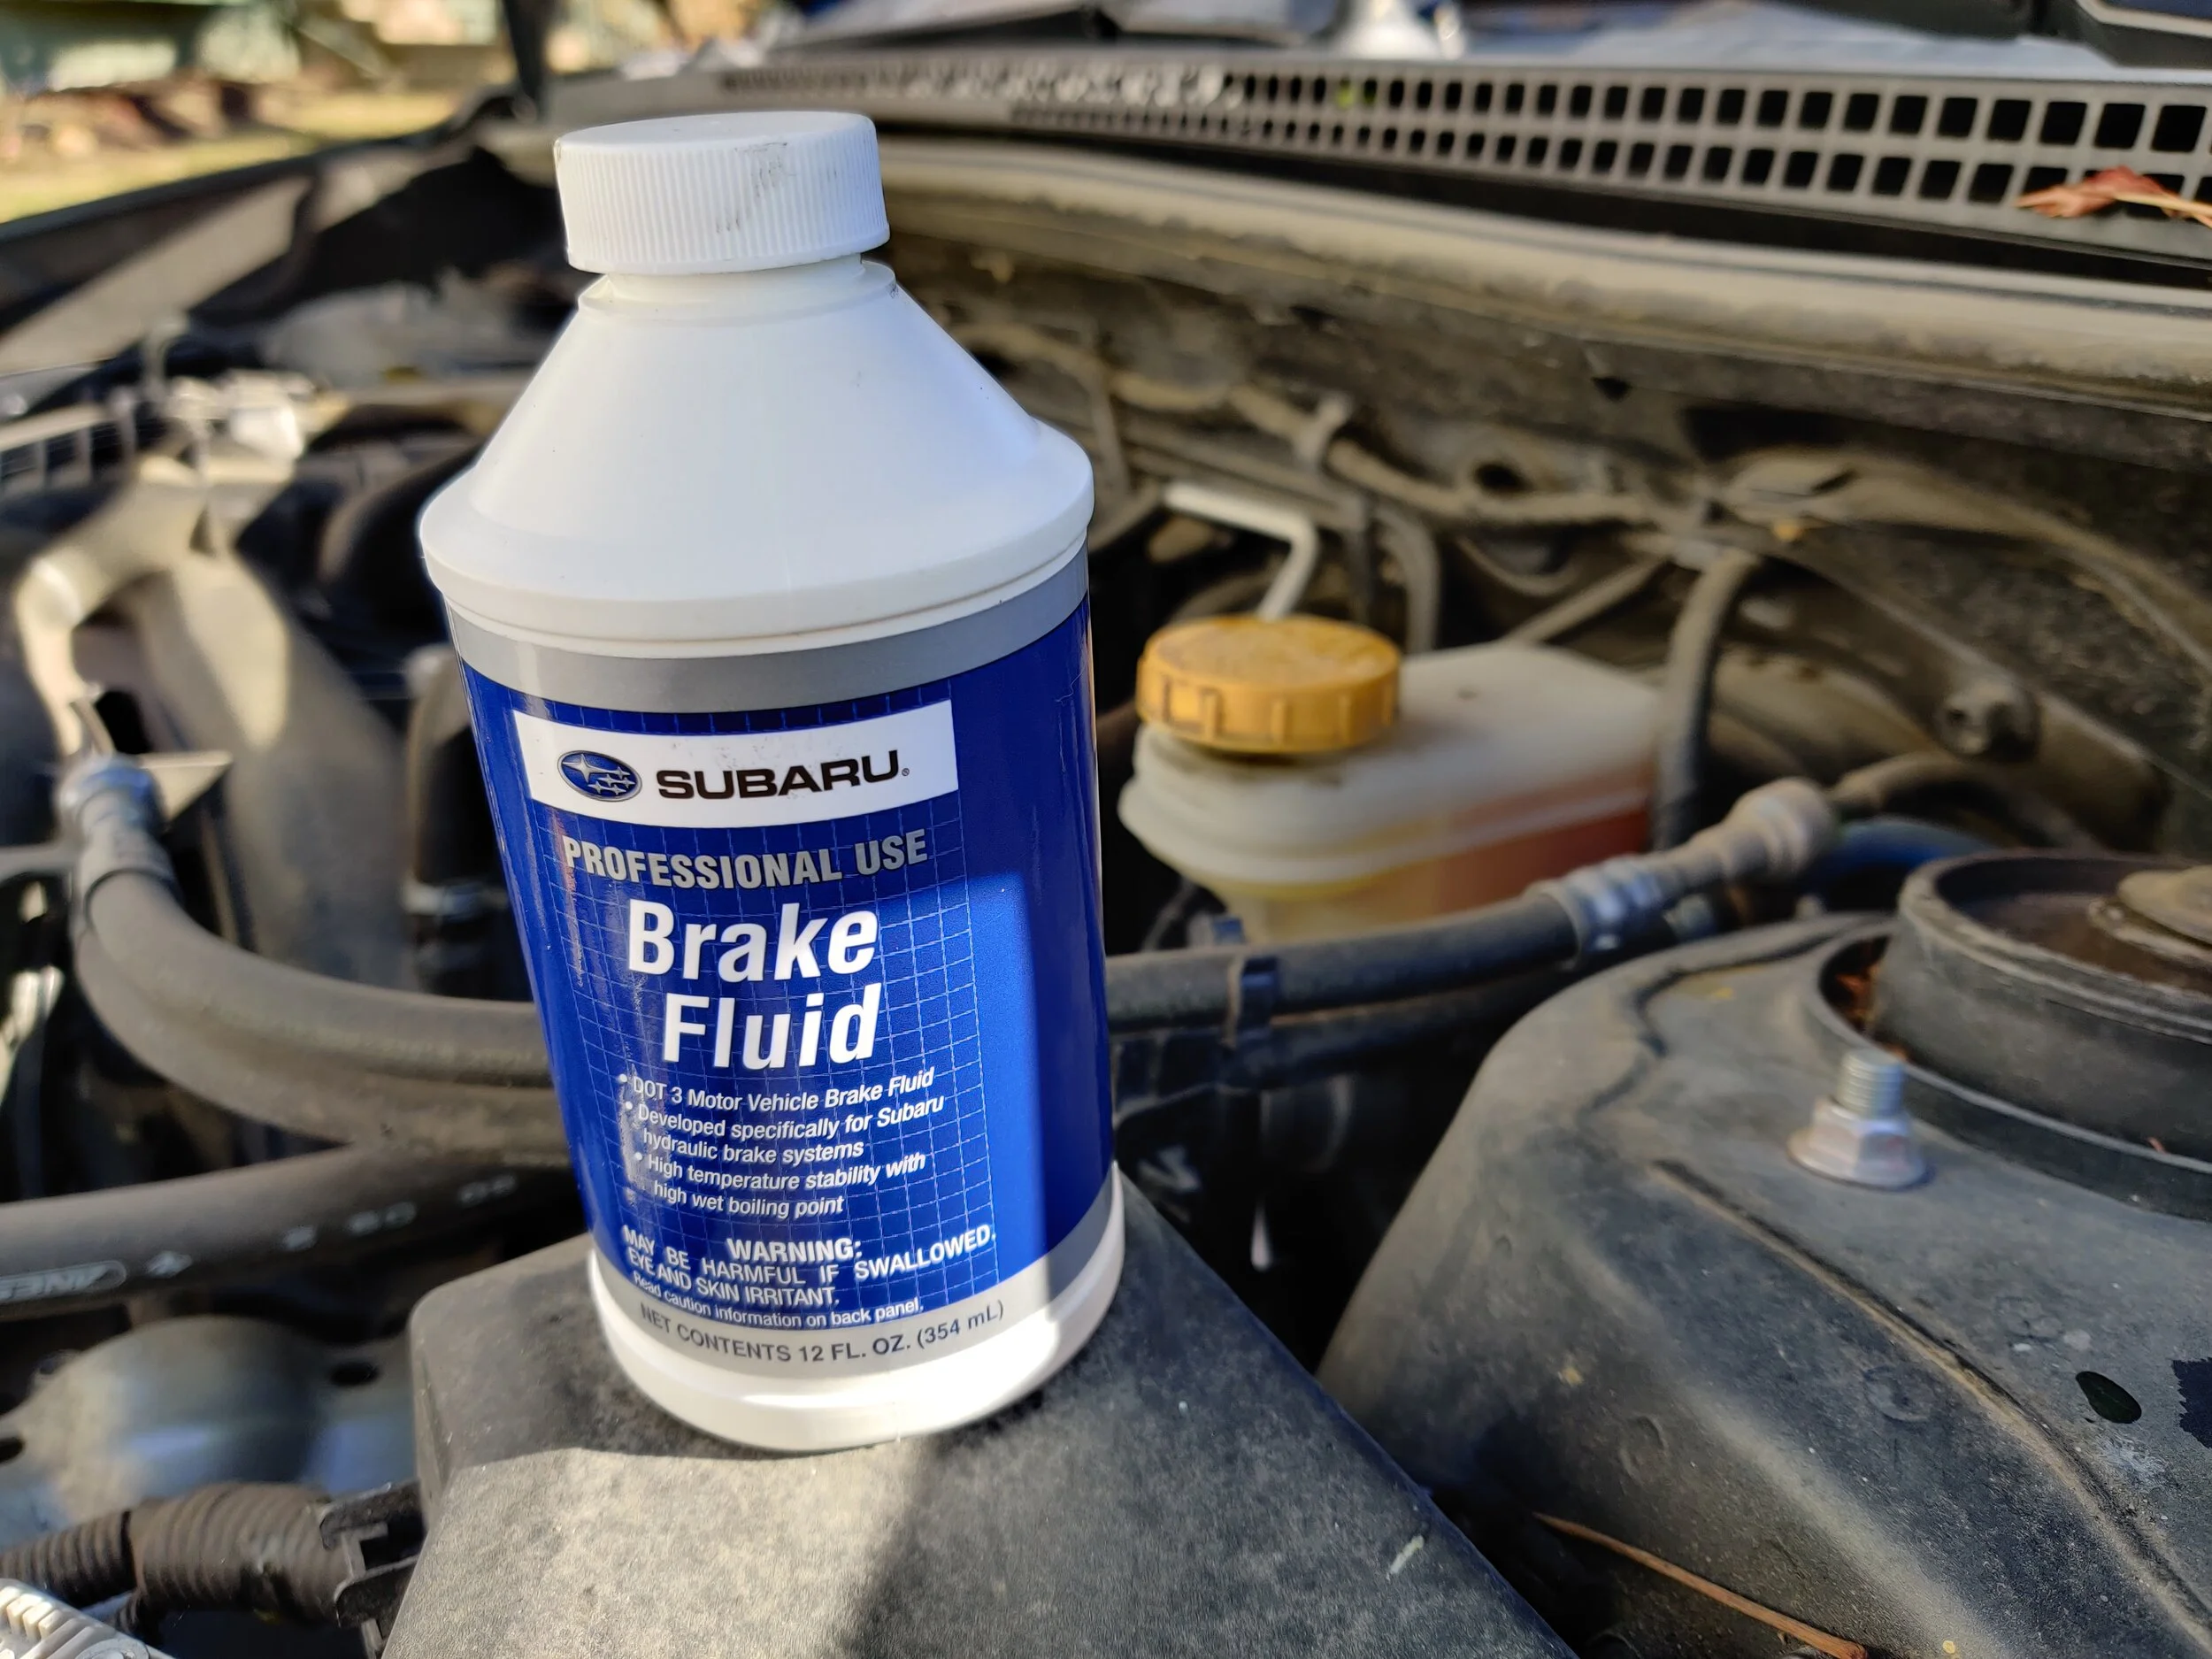
Well what else would be here… brake fluid!

If you are looking for the factory fresh fluid from Subaru, here it is!
For my STi I use ATE brake fluid.

Installation
We begin by parking on a flat surface and engaging our parking brake. Now we can jack up the vehicle and place it safely on jack stands. After setting the jack stands and checking the stability for your safety, you can now remove the wheels.

Parking brake set. Even on a flat surface we don’t want the car moving about.

Jacking the car up from the jacking plate near the steering rack. Set your jacks evenly to support the weight properly.
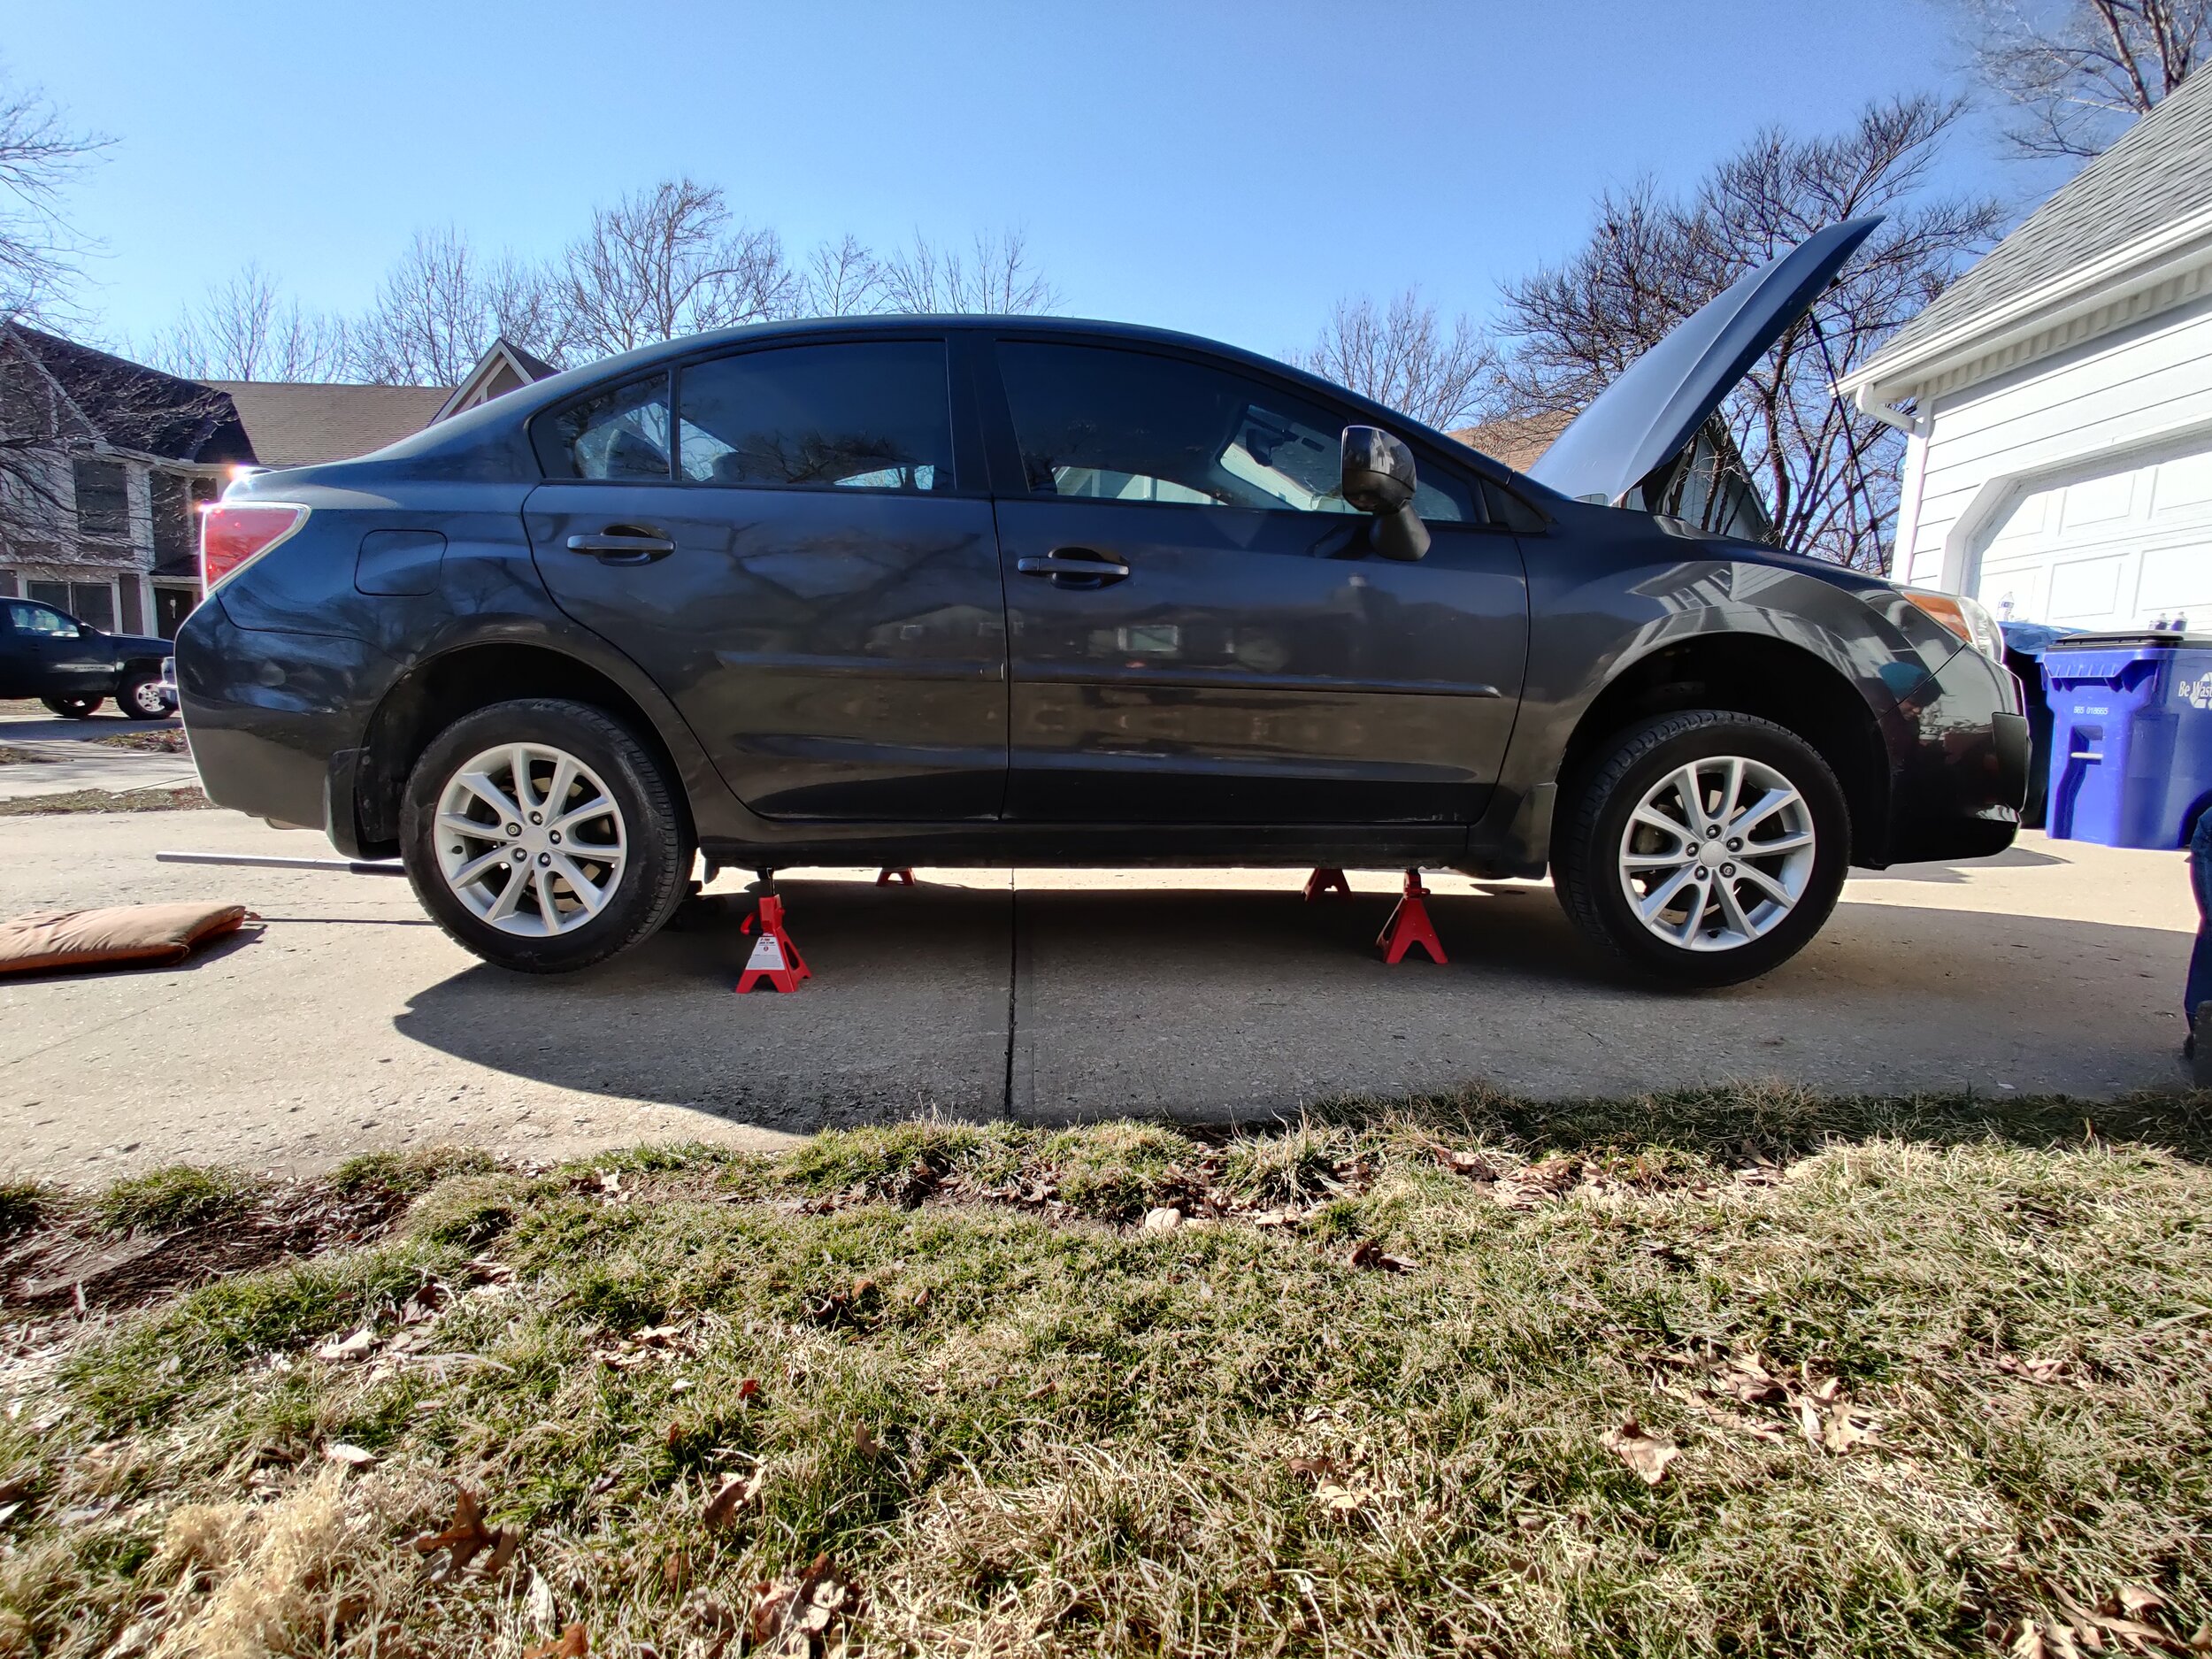
Off the ground and ready to remove the wheels.
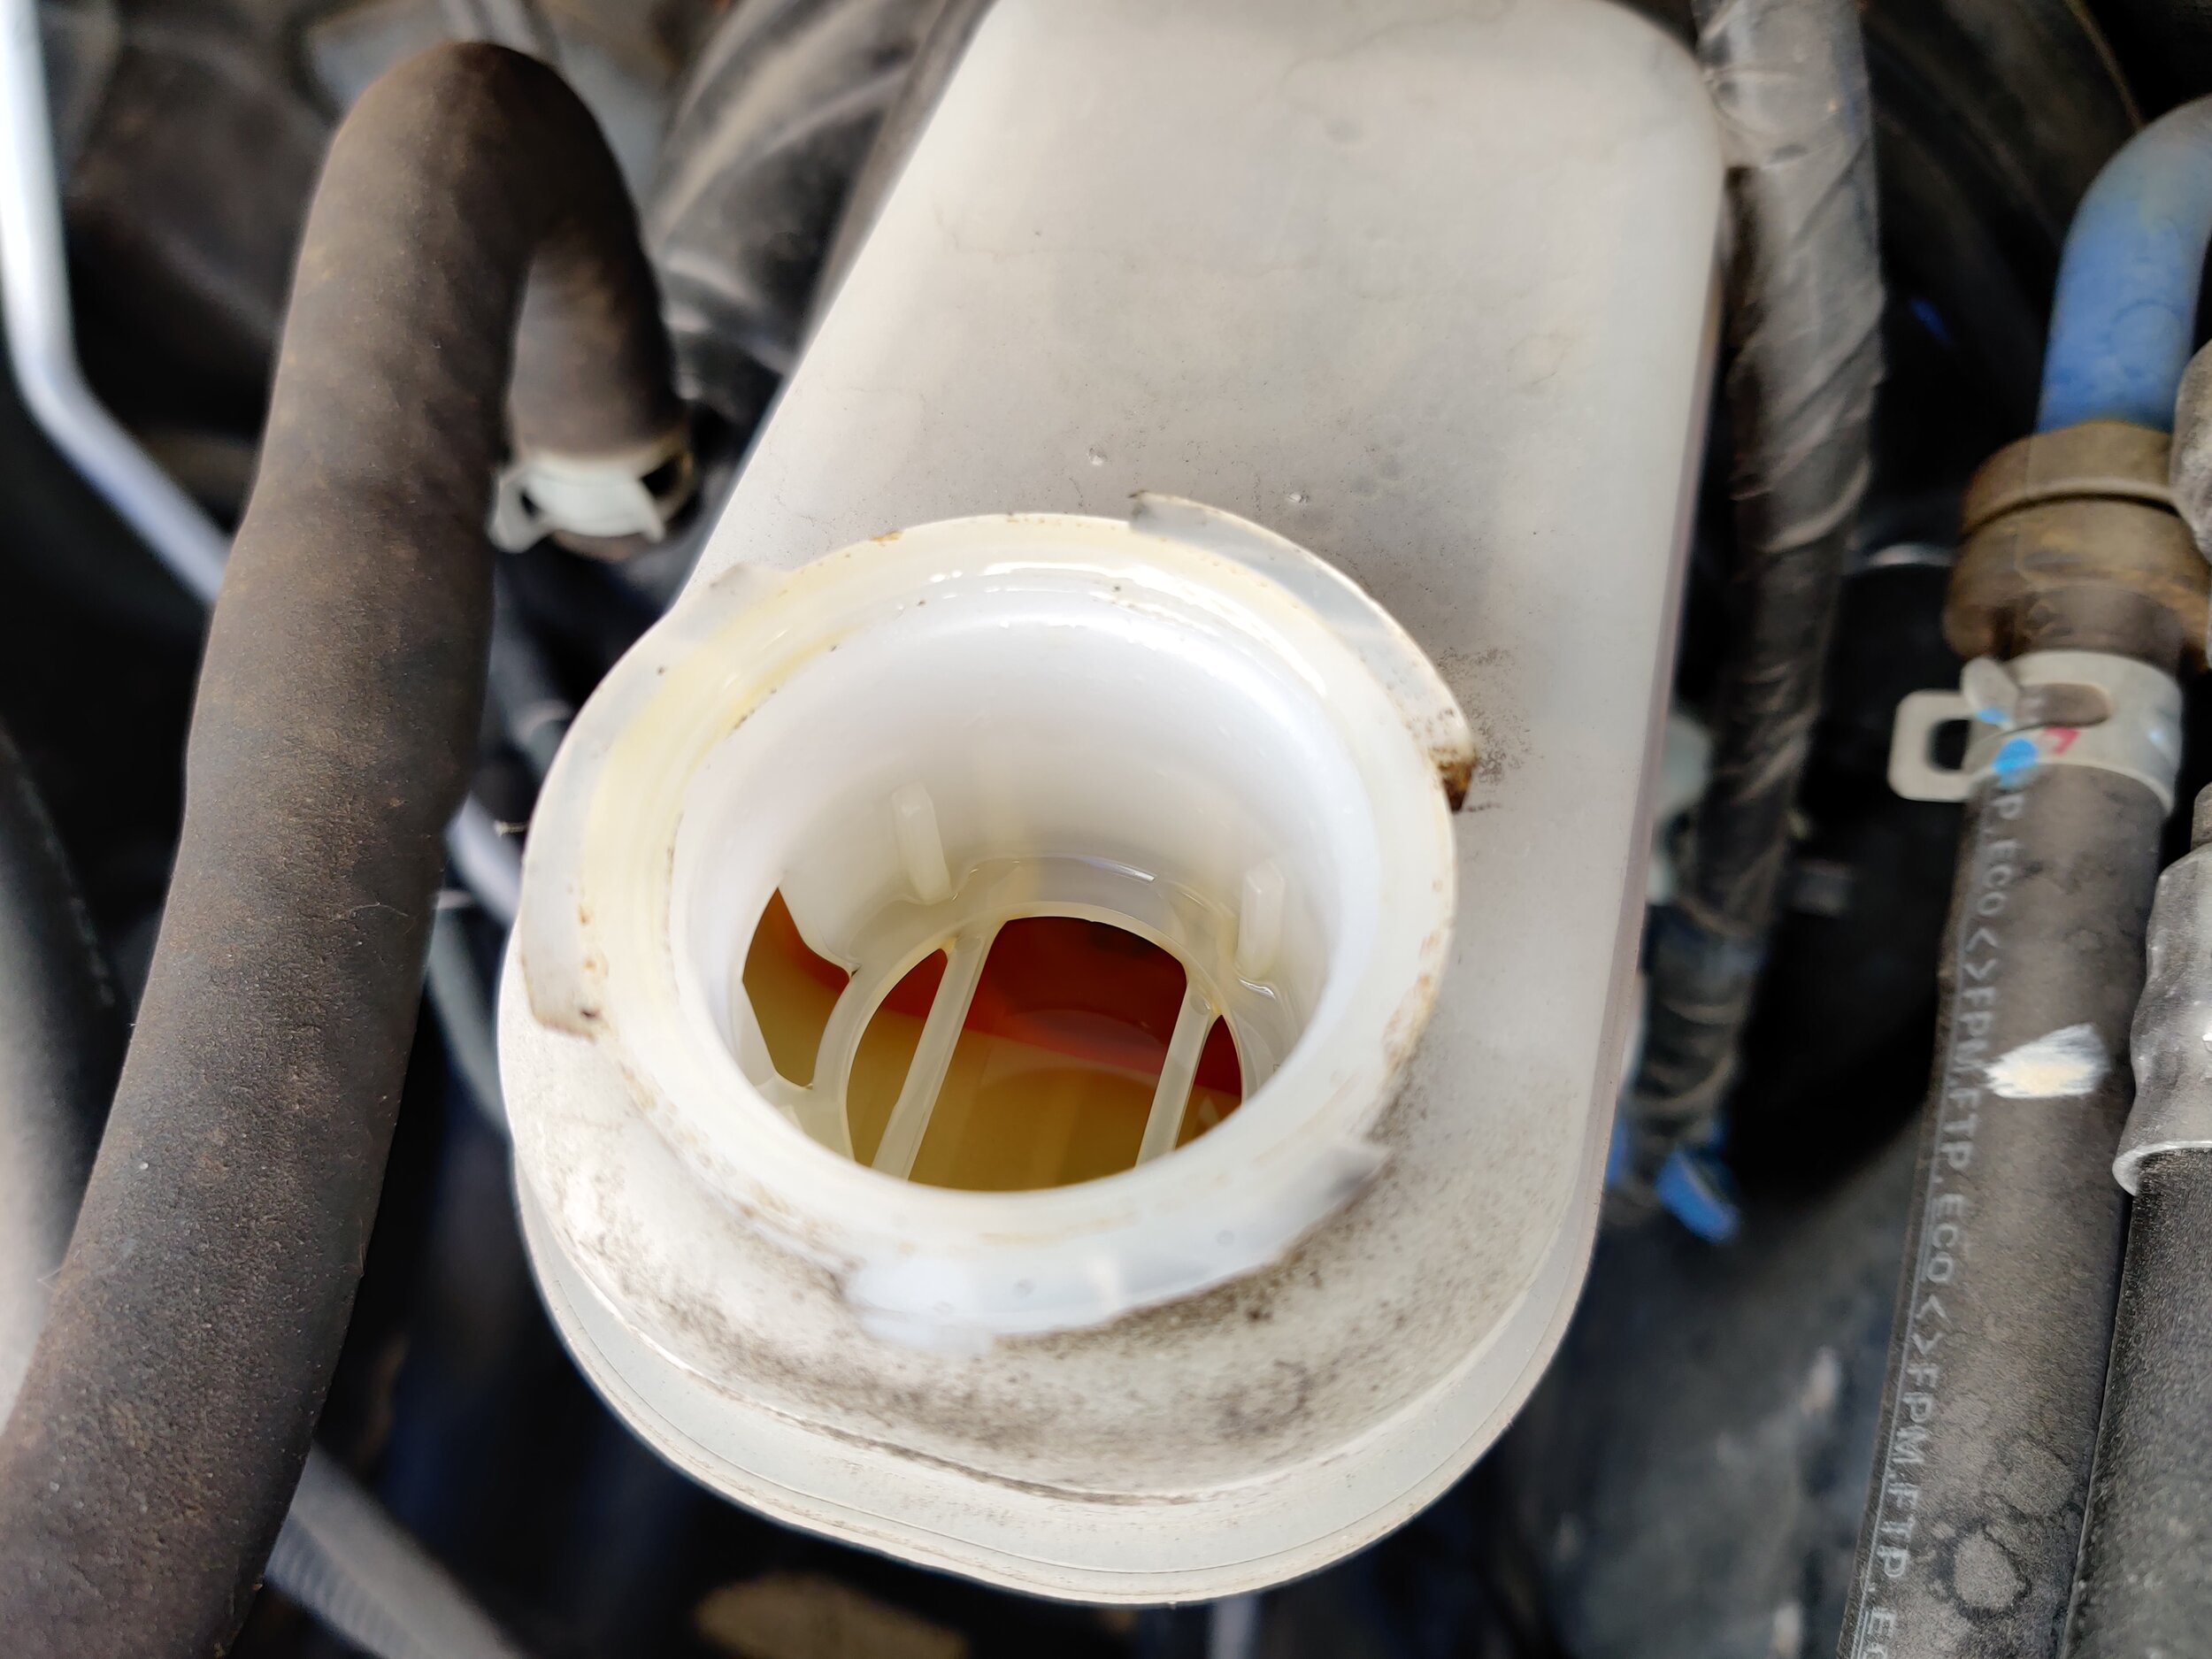
With the hood open it is a good time to check the fluid level, refilling it to the same level is good to not cause an overflow if/when you replace brakes and compress the calipers. We will also want to keep a constant eye on it when we are bleeding the system, running the system dry can cause damage to the master cylinder. This also will draw air into the system and cause a lack of braking, make sure the master cylinder doesn’t go empty!

Checking the brake fluid level. We want to leave it right around this area. Note how dark the fluid is, as it will slowly change throughout the how to.
Having placed the pans below the rear brake calipers you can now open up the bleeder. (if you have enough pans you can do all four brakes at the same time) Slowly but surely brake fluid will drip from the caliper, the older the fluid the darker it will be. As the fluid pours out we will check the master cylinder to refill as needed. If you spill any fluid on a painted surface be quick to douse it with water to keep it from peeling the paint right off your car.

Rear bleeder open, the fluid will now drip out slowly. if you have any other tasks at hand you can do them but keep a sharp eye on the master cylinder.

Watch for the fluid to become more clear, this shows the new fluid is now throughout this hose.
As the fluid continues to come out we will watch for the fluid to change color to the lighter fresh fluid. Continue to add fluid and watch until the fluid changes color at the bleeder. When it changes color you can shut the bleeder. This form of bleeding your brakes is called gravity bleeding, which is quite slow but one of the easiest methods. When you are done with the bleeding of a caliper and have it closed off. Use a cup of water to help breakdown the brake fluid, this keeps the brake fluid from damaging the paint.

Filling it back up and slowly getting lighter in color!


This is what will happen when you pour water over the brake fluid to help clean it off the calipers and halt it’s ability to peel paint off. Make sure all your bleeders are closed when you wash if off with water. Water in the system can cause you many headaches.
With the rear brakes completed you can move to the front brakes. Double check that brake fluid level again before starting, you should see the fluid in the master cylinder changing color. Once again we will set up our pans and open up the front brake bleeders.

Keep your eye on the fluid. Here we can see it dropping, do not allow it to go empty. If you do… you are going to have a bad time.
At this time if you have a helper they can help with the bleeding process. With your helper behind the wheel have them pump up the brakes three times and hold the pedal down as you can quickly open the bleeder and close it. Making sure that the helper holds steady pressure on the pedal while you open it. This will help push out any air out of the system that gravity bleeding cannot do by pushing any of the air that is trapped within the brake system.
After you have checked your fluid level and topped it off the the prior level you began at. You can checked the brake pedal before lowering the car off the jack stands. Starting the car up and pressing the brake pedal should be good and firm. If the pedal falls to the floor quickly, double check your bleeders and make sure they are closed. Then open them all up and make sure a steady stream of fluid is flowing out. If you find a bleeder that doesn’t have fluid coming out of it, open it and wait till it starts flowing again.

Moving to the front of the car to start the gravity bleeding.

Bleeder opened and dripping away.
Now you can place the car back on the ground and torque the wheels down. Now behind the wheel you can start the car and check the brake pedal, put the car in reverse or drive and double check that the brake pedal is working as it did before. Slowly accelerate and double check your brakes again, if everything is working well you can take it around the block and make sure everything is good. If you have any brake pedal inconsistency you need to slowly take your car back and find the the issue.
Congratulations! You have completed a brake fluid exchange and can keep driving till the next fluid change interval. Subaru states this at 30k miles or 3 years, whichever comes first.
Amazon tool links
Amazon part links
Factory fresh fluid from Subaru