Subaru Forester door seal replacement. Keep the elements outside where they belong.
If you have owned your SG Forester for awhile you know there are many plastic and rubber items at 10+ years are running low on time to be useful. With some Foresters being on the rougher side. Mine at 218k miles has seen it’s fair share of use and I open the driver’s door at least eight times a day or more during the work week.

I have opened and shut this door every weekday around 16 times for the last 4 years. With the 218k miles on it means… it is about time for a change.
During the last few years my Forester has experienced many freezing rain events causing my door to be stuck shut a handful of times. This plus all the mileage and wear caused the seal to tear and break a few clips. With this I went about replacing the clips and adding some silicone to help hold the seal together. This repair lasted a good couple of years but it is time to finally replace the seal. If you would like to try and reseal yours first before replacing here is my DIY on clip replacement.
Time Frame
With not many tools needed and just a bunch of push clips holding everything in you should be able to complete this task in less than 30 minutes. The time varies a bit due to your clips that stay stuck in the door and need to be forcible removed.
Tools
Our tools today will be our hands for the most part. The seal will generally come right out but for a few screws we will need a philips screwdriver.
Other helpful tools would be a good set of nonmarring plastic body tools can take care of the stubborn door clips.

This or my Subaru spare tire screwdriver is never to far away. Makes life easy while being able to swap between either style. Stanley screwdriver

This cheap set with the funny name has worked well for me over the last year. Utool trim removal tools
I found that a pair of wire crimpers was a great help to popping out the clips that were happy to stay put.

These seemed to do the trick if you don’t have the trim tool kit. Wire crimpers.

My favorite go to gloves, as I loathe washing my hands constantly and drying them out till they crack. These save my hands everyday.
Parts
The lone part necessary to this would be Subaru part number 63511SA010
I found a low mileage used Forester at the local junkyard and pulled it off. If you go with this method you may need a few more clips that may break. Here is a link for extra clips. Car retainer clips

Installation
We will start by opening the driver’s side door and locating the screw that is slightly hidden behind a flap inside the door handle. Go ahead and use your phillips screwdriver to remove that. Next you can locate the second screw inside door grab that is located right behind the window switches. Once again it is hidden by a little cover flap.

One screw here holds the door card to the door.

The other screw is located in the pull handle on the door.
With these screws removed you can use your prying tools on the bottom of the door card. Now slide your hand inside and give it a good pull outwards to undo the clips. You don’t need to remove it completely, moving it up and away from the window will allow to access the next area. You may need to remove your tweeter cover located by the mirror, it pops right out.

Pop your trim tool behind the tweeter cover and it should easily pop out

Tweeter cover removed.
Having the door card moved out you can remove the two clips that hold the large mounting seal near the window. There are two black clips that you can easily remove with your prying tools. Now you can start pinching the seal where it clips in. This allows you to remove both at the same time, a few might stubbornly stay put but we can remove them later.

Here is the upper rear seal. You can see below how it is covered by door card in this shot.

This is one of the larger portions of the seals that firmly attaches it to the door and slightly under the card. Which is the reason for pulling the card off.

One clip hidden behind the door card.

With both those clips removed you can pull on the seal where the clips are attached and hopefully it will both the seal and clip.
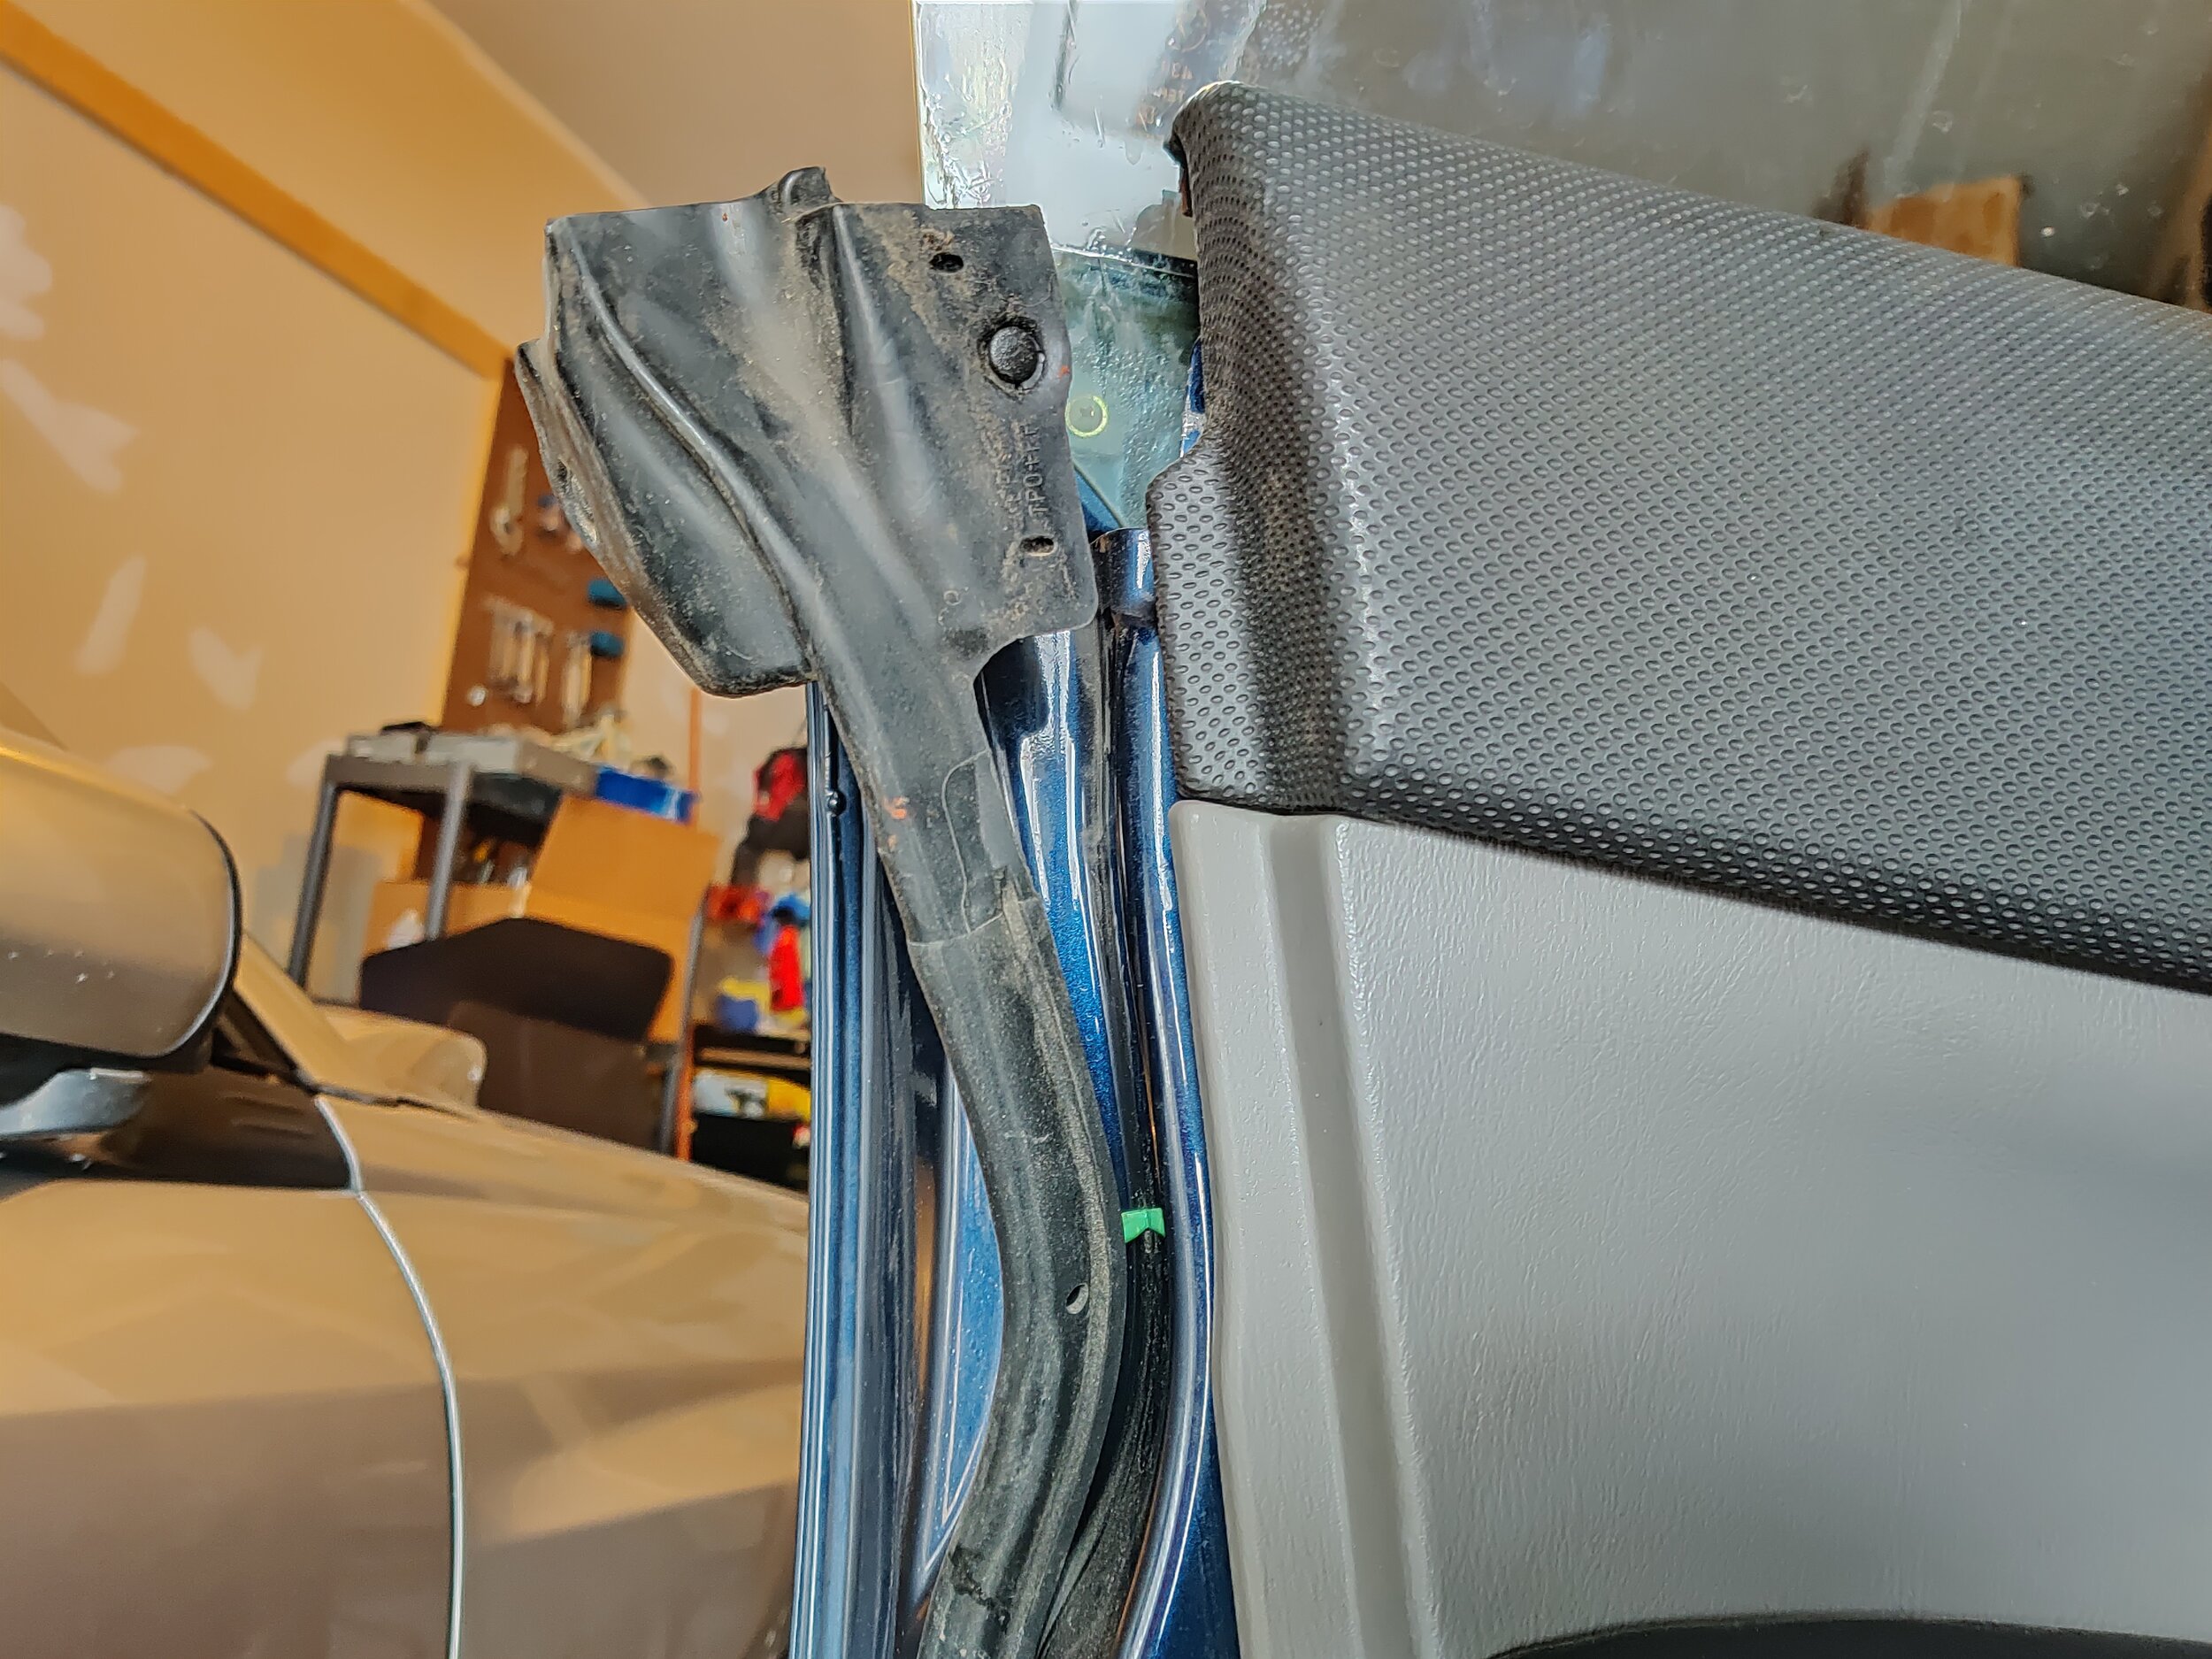
Continue around the lower portion of the door snapping the seal out. Once you make it around to the other side of the door you find large front seal that holds everything tightly in place. It has one plastic clip on the front and rubber stopper that holds it in. Once it is is freed we can continue one down.

Some of the clips will stay stuck inside. These were new clips so I wasn’t expecting them to easily come free.

Just keep following the door along, you will see that there is another seal above the lower seal. Leave that one for later.

Moving on up behind the door hinge

Upper seal when covered by the door card.

Now the other large portion of the seal towards the front of the door needs to be removed. It has one clip and comes out quite easy.
Now you will be able to move down to that seal we passed up early.
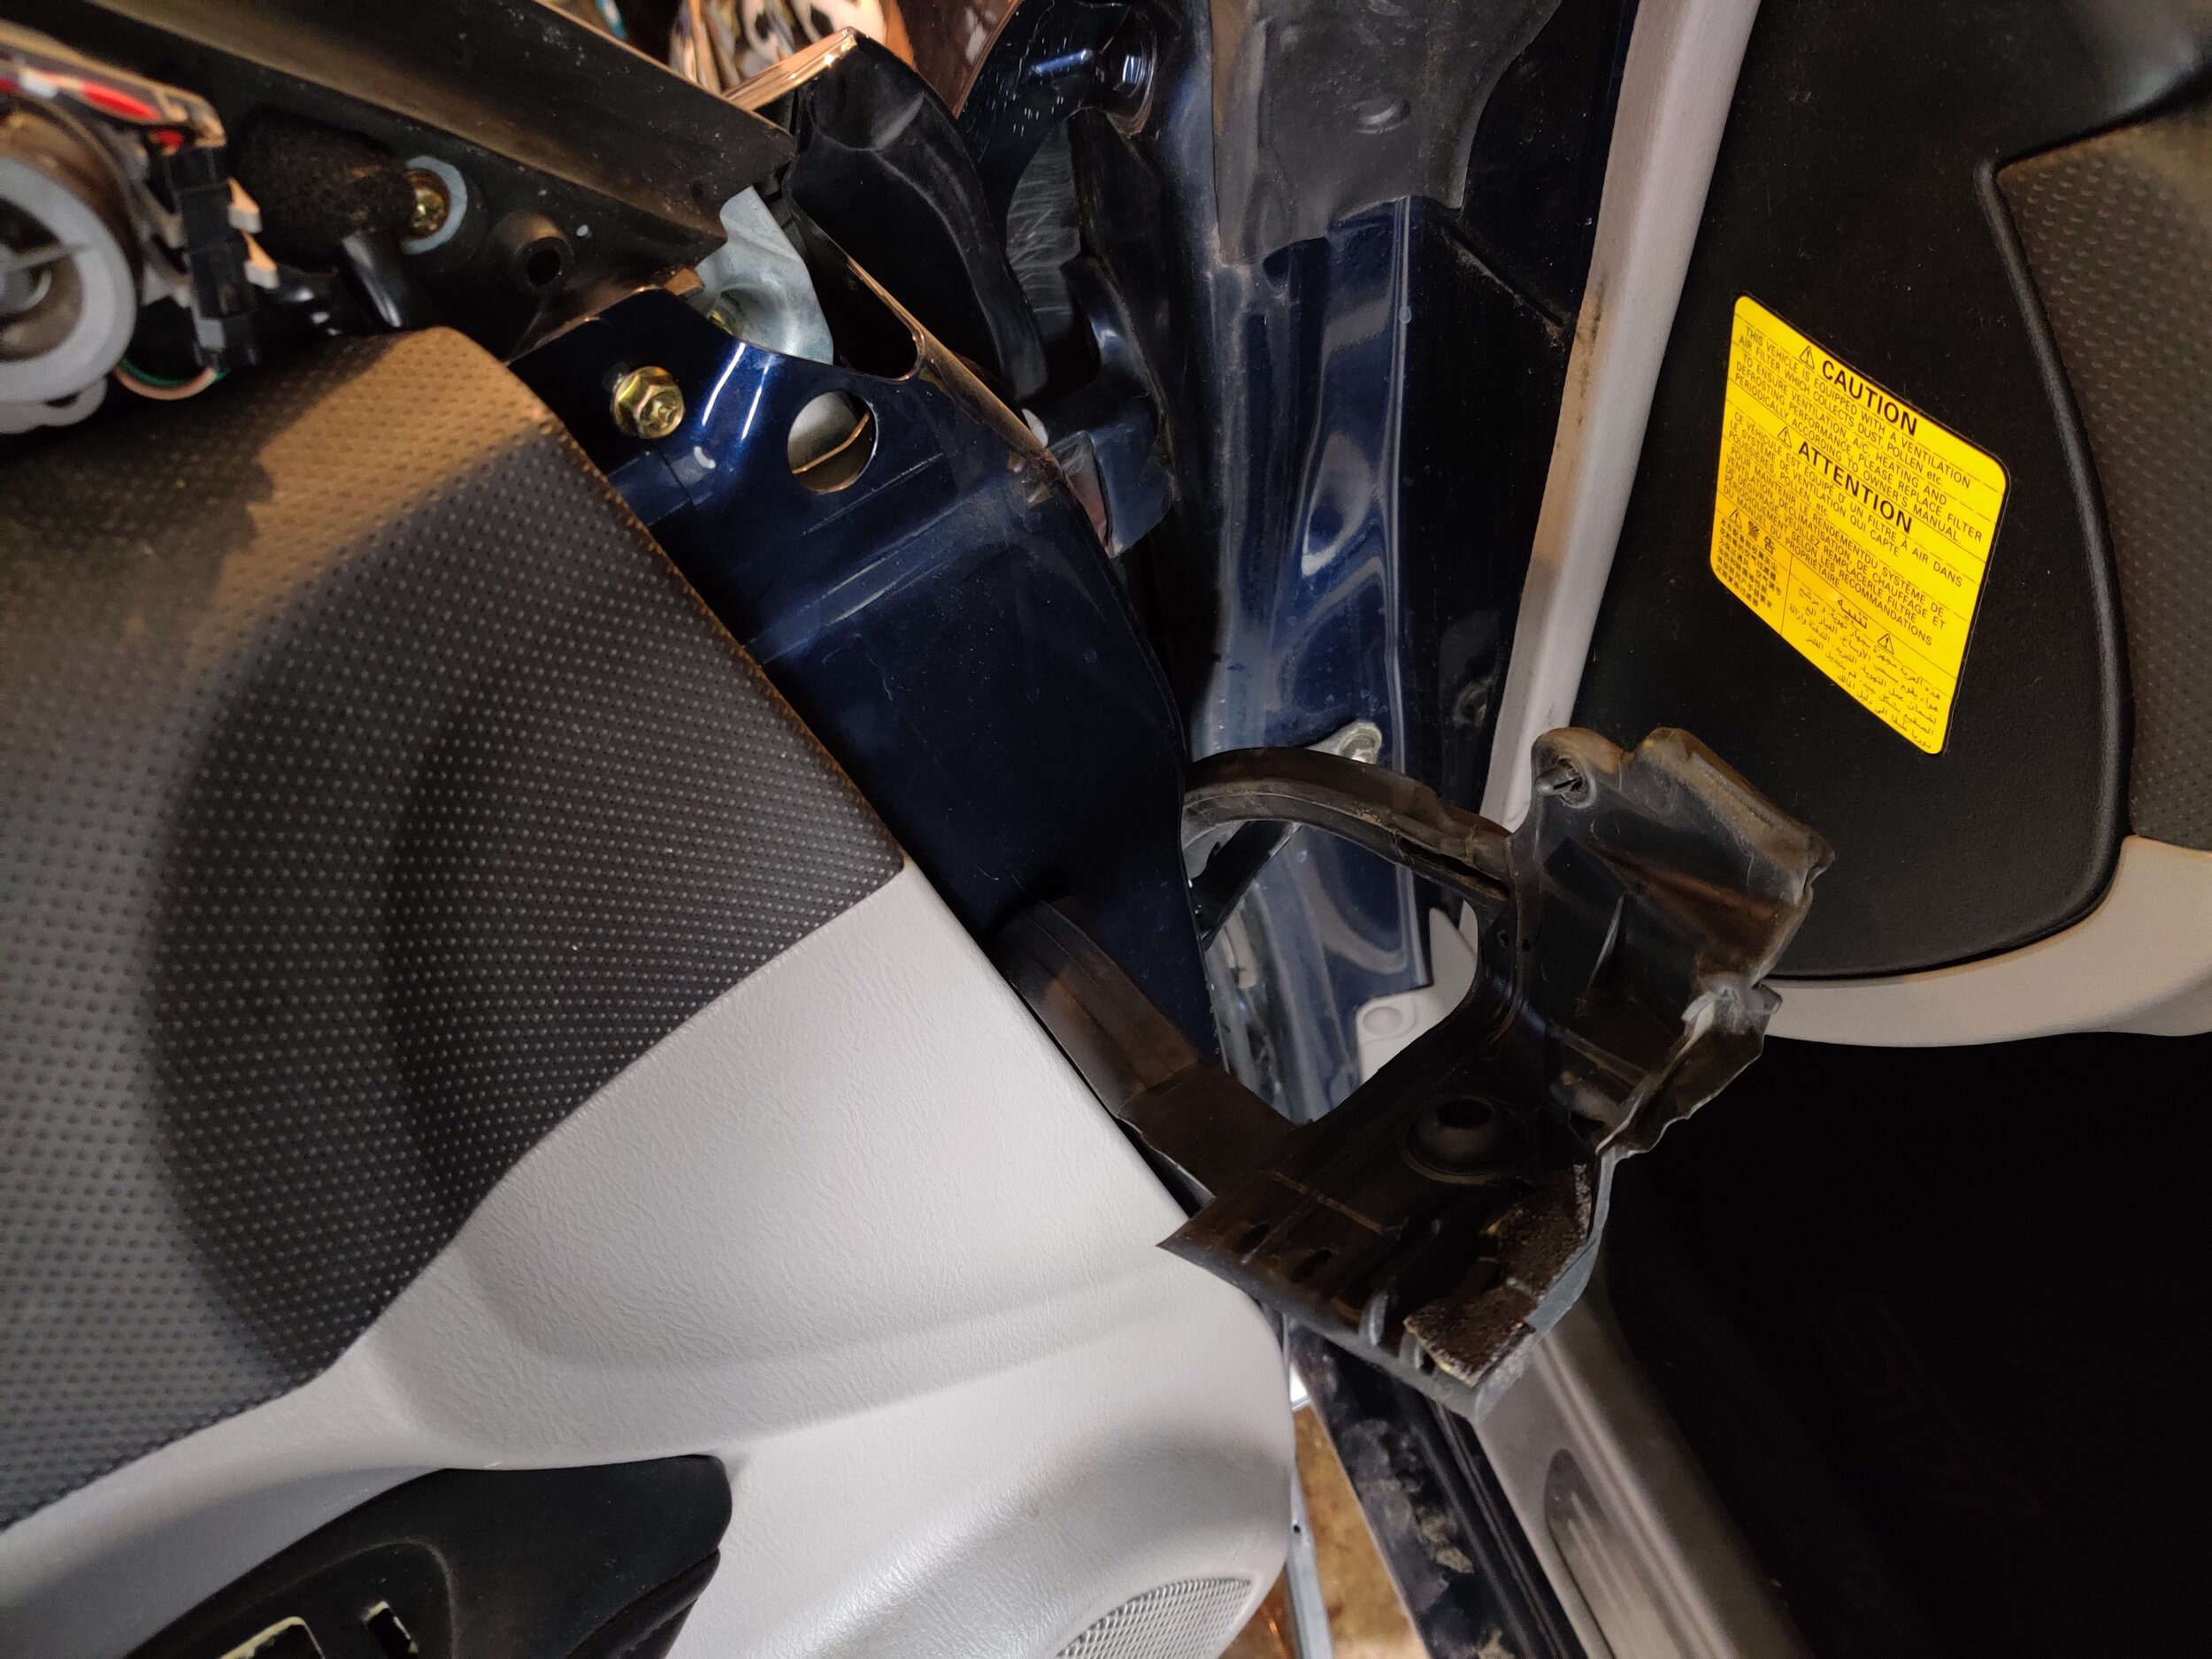
You can head back down the door to release the rest of the seal. With that complete the seal will now be hung up on the bracket that restricts the door from opening too far and hitting the fender. You can either unbolt the 10mm to easily remove and leave it out till you install the new seal.

Blurry photo but this is where you can either use your best puzzle solving skills to get the large portion of the door seal through or remove the 10mm bolt to the door hinger and make life easier.
One other way you can go about this is by folding the large portions of the seal you can just get them by with the right Tetris skills. I am always looking for a way to skip a step and this working well for me. Just make sure to take your time and not tear your new seal trying this.
Before you start installing the new seal now would be the time to double check that all your clips have been removed. You wouldn’t want to break a new clip on your new seal!

Here is what a clip looks like if it stays put in the seal.

If they get stuck and you don’t have the proper trim tool, I found a set of wire crimpers easily removes them.
Newer seal going in!
Now you are ready to install the new seal. I started from the front of the door with the large upper seal then making sure that each clip was snapped into place and in lined up with the proper holes.
Once you had made it back to the other side of the door you can pop the back upper seal in and you should be pretty set now. You can now pop the door card back in and check that the door has no issues closing. If everything is working you can now pop on the tweeter cover and run down the two screws.
Congratulations! I immediately noticed a much deeper tone to shutting my door and how much easier it was to shut. But my seal was torn and drooping most of the time which cause the seal to get in the way and hinder the door from closing. I did this seal in conjunction with the window seal and noticed bit less wind noise at highway speeds, which is always a welcome outcome for a Forester..
Amazon tool links
Amazon part links
Subaru door seal part number: 63511SA010 03-08 Foresters