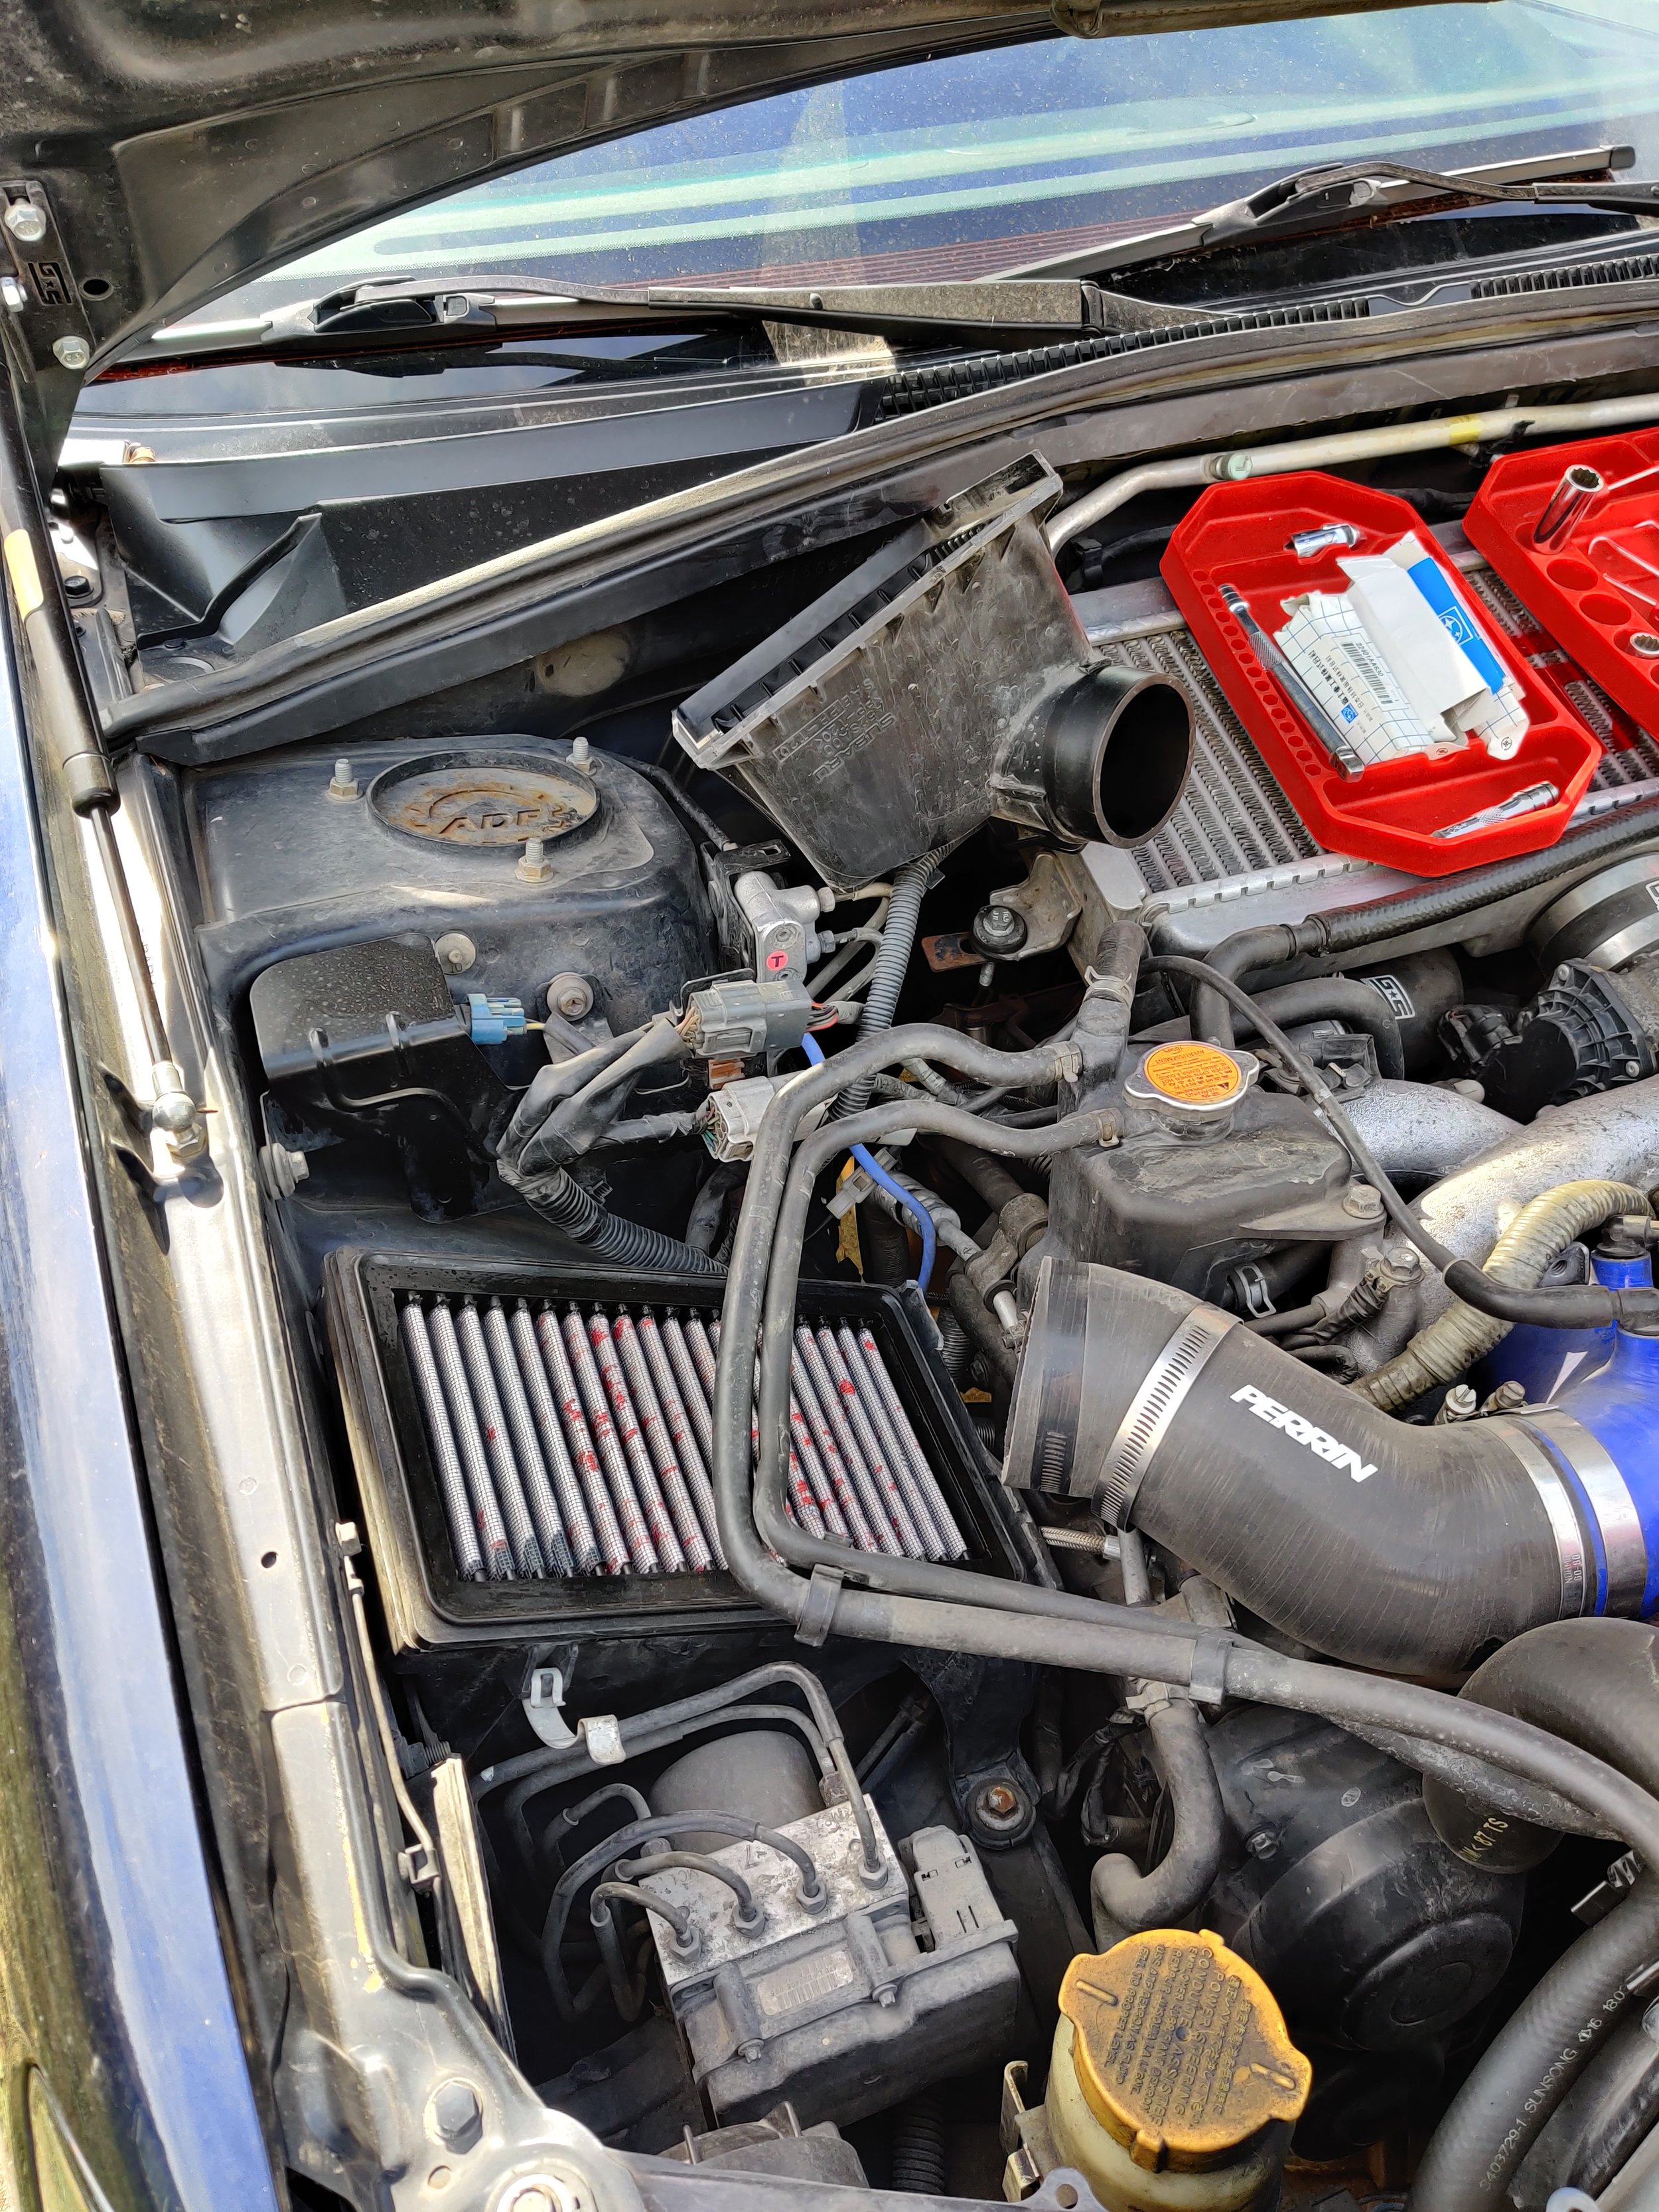
EJ257 & EJ255 spark plug replacement! Featuring my 06 Forester XT.
There are many maintenance items on Subarus that are easier than other four cylinder cars, like Power steering belts, Alternators and timing belts. But spark plugs don’t seem to be on that the easier side of things. You can’t just pop off a coil pack cover and go about removing the coils and spark plugs. But there are tools and tricks that can make this a lot easier.
One of the most difficult of the spark plug replacement Subarus is the SG 04-08 Forester XTs. So my 2006 Forester will be our test subject for today!
Time Frame
If this is your first time removing your spark plugs I would set aside at least two hours. With my life of Subaru repairs and tool set I can usually finish within less than hour with ease.
Tools
With this job we will mostly be dealing with hand tools with a few power tools to speed up the job. We will start with ratchet, I generally complete this with just a 3/8th ratchet but you might find a 1/4th ratchet. Next up is the star of the show.. the spark plug tool! I have used many extensions, wobbles and standard sized spark plug tools but for this how to we will be going with the Ares 5/8th spark plug tool with 4” extension. Alongside with that extension a 1 and 1/2” 3/8ths extension will make this job that much easier, especially on cylinder number four.
Otherwise your favorite Subaru metric sockets will be necessary, 8mm, 10mm, 12mm, 14mm. Lastly we will use a set of picks to hopefully make removing those pesky coil pack connectors.


The star of the show! Without this Ares 5/8” spark plug socket with 4” extension. All spark plugs today will be removed with this tool! Don’t forget your Craftsman 1 and a 1/2" Extension Bar otherwise you will suffer on cylinder 4!
Parts
I’m pretty big on staying with oem Ngk plugs for my Subarus. There are plenty of other options but these are what I would purchase. If you are making a bit more power you can swap to the newer Sti plug with a smaller gap, I’d recommend discussing this with your tuner prior to making any changes.


Ballenger Motorsports - Replacement for Subaru Coil on Plug COP 3-way Female Connector Housing Assembly (Plug) Not necessary but when working on older cars these coil pack connectors get brittle. This one literally feel apart in my fingers. I always have a couple back ups for this very reason.
How to
After we allow our car to cool down for a few hours if it has been driven we can open the hood and survey the area. Now is the time to decide which side of the engine you will begin on. For most Subarus you will find the passenger side is much easier to access the coil packs and then on to the plugs. The driver’s side has the slightly more difficult air pump, windshield sprayer reservoir and battery. After that the unibody frame rail sits much closer to cylinder four and make life less fun. I usually choose by whatever socket I’m ready to use.

Hood up! Ready for everybody’s favorite care for spark plug replacement!
-
Today we will start on the passenger side, first up to remove is the maf sensor plug, followed shortly by the intake tube and upper intake box. Next up will be the filter followed by the two twelve mm bolts that hold the air box down. Now you should easily see your next target the coil packs!

Air box and Maf connector are first up.
Off to a fantastic start

Two twelve mm bolts hold the bottom half in.

With the air box removed we are halfway to the spark plugs, only the coil packs are stopping us now
Grabbing your 12mm socket you can now remove the bolts that hold the coil packs to the valve covers. You can remove both coil packs on the passenger side without removing the wiring. But you might need to use your tetris skills and move it around to slide it away from the valve cover. With the Ares spark plug tool you will need a 3” extension for cylinder one, on cylinder number three you will need the 3” and 6” extension. You will find it pushes a bit of pressure on the brakes hoses but it shouldn’t cause any issues.

Coil pack removal, cylinder one is very easy to get free.

Beware of cracking connector bodies, just what happens with a turbo and uppipe living so close by.

You can also use a 1 3/8ths extension but I left it at work. This wobble with a 3” extension made it easy pickings.
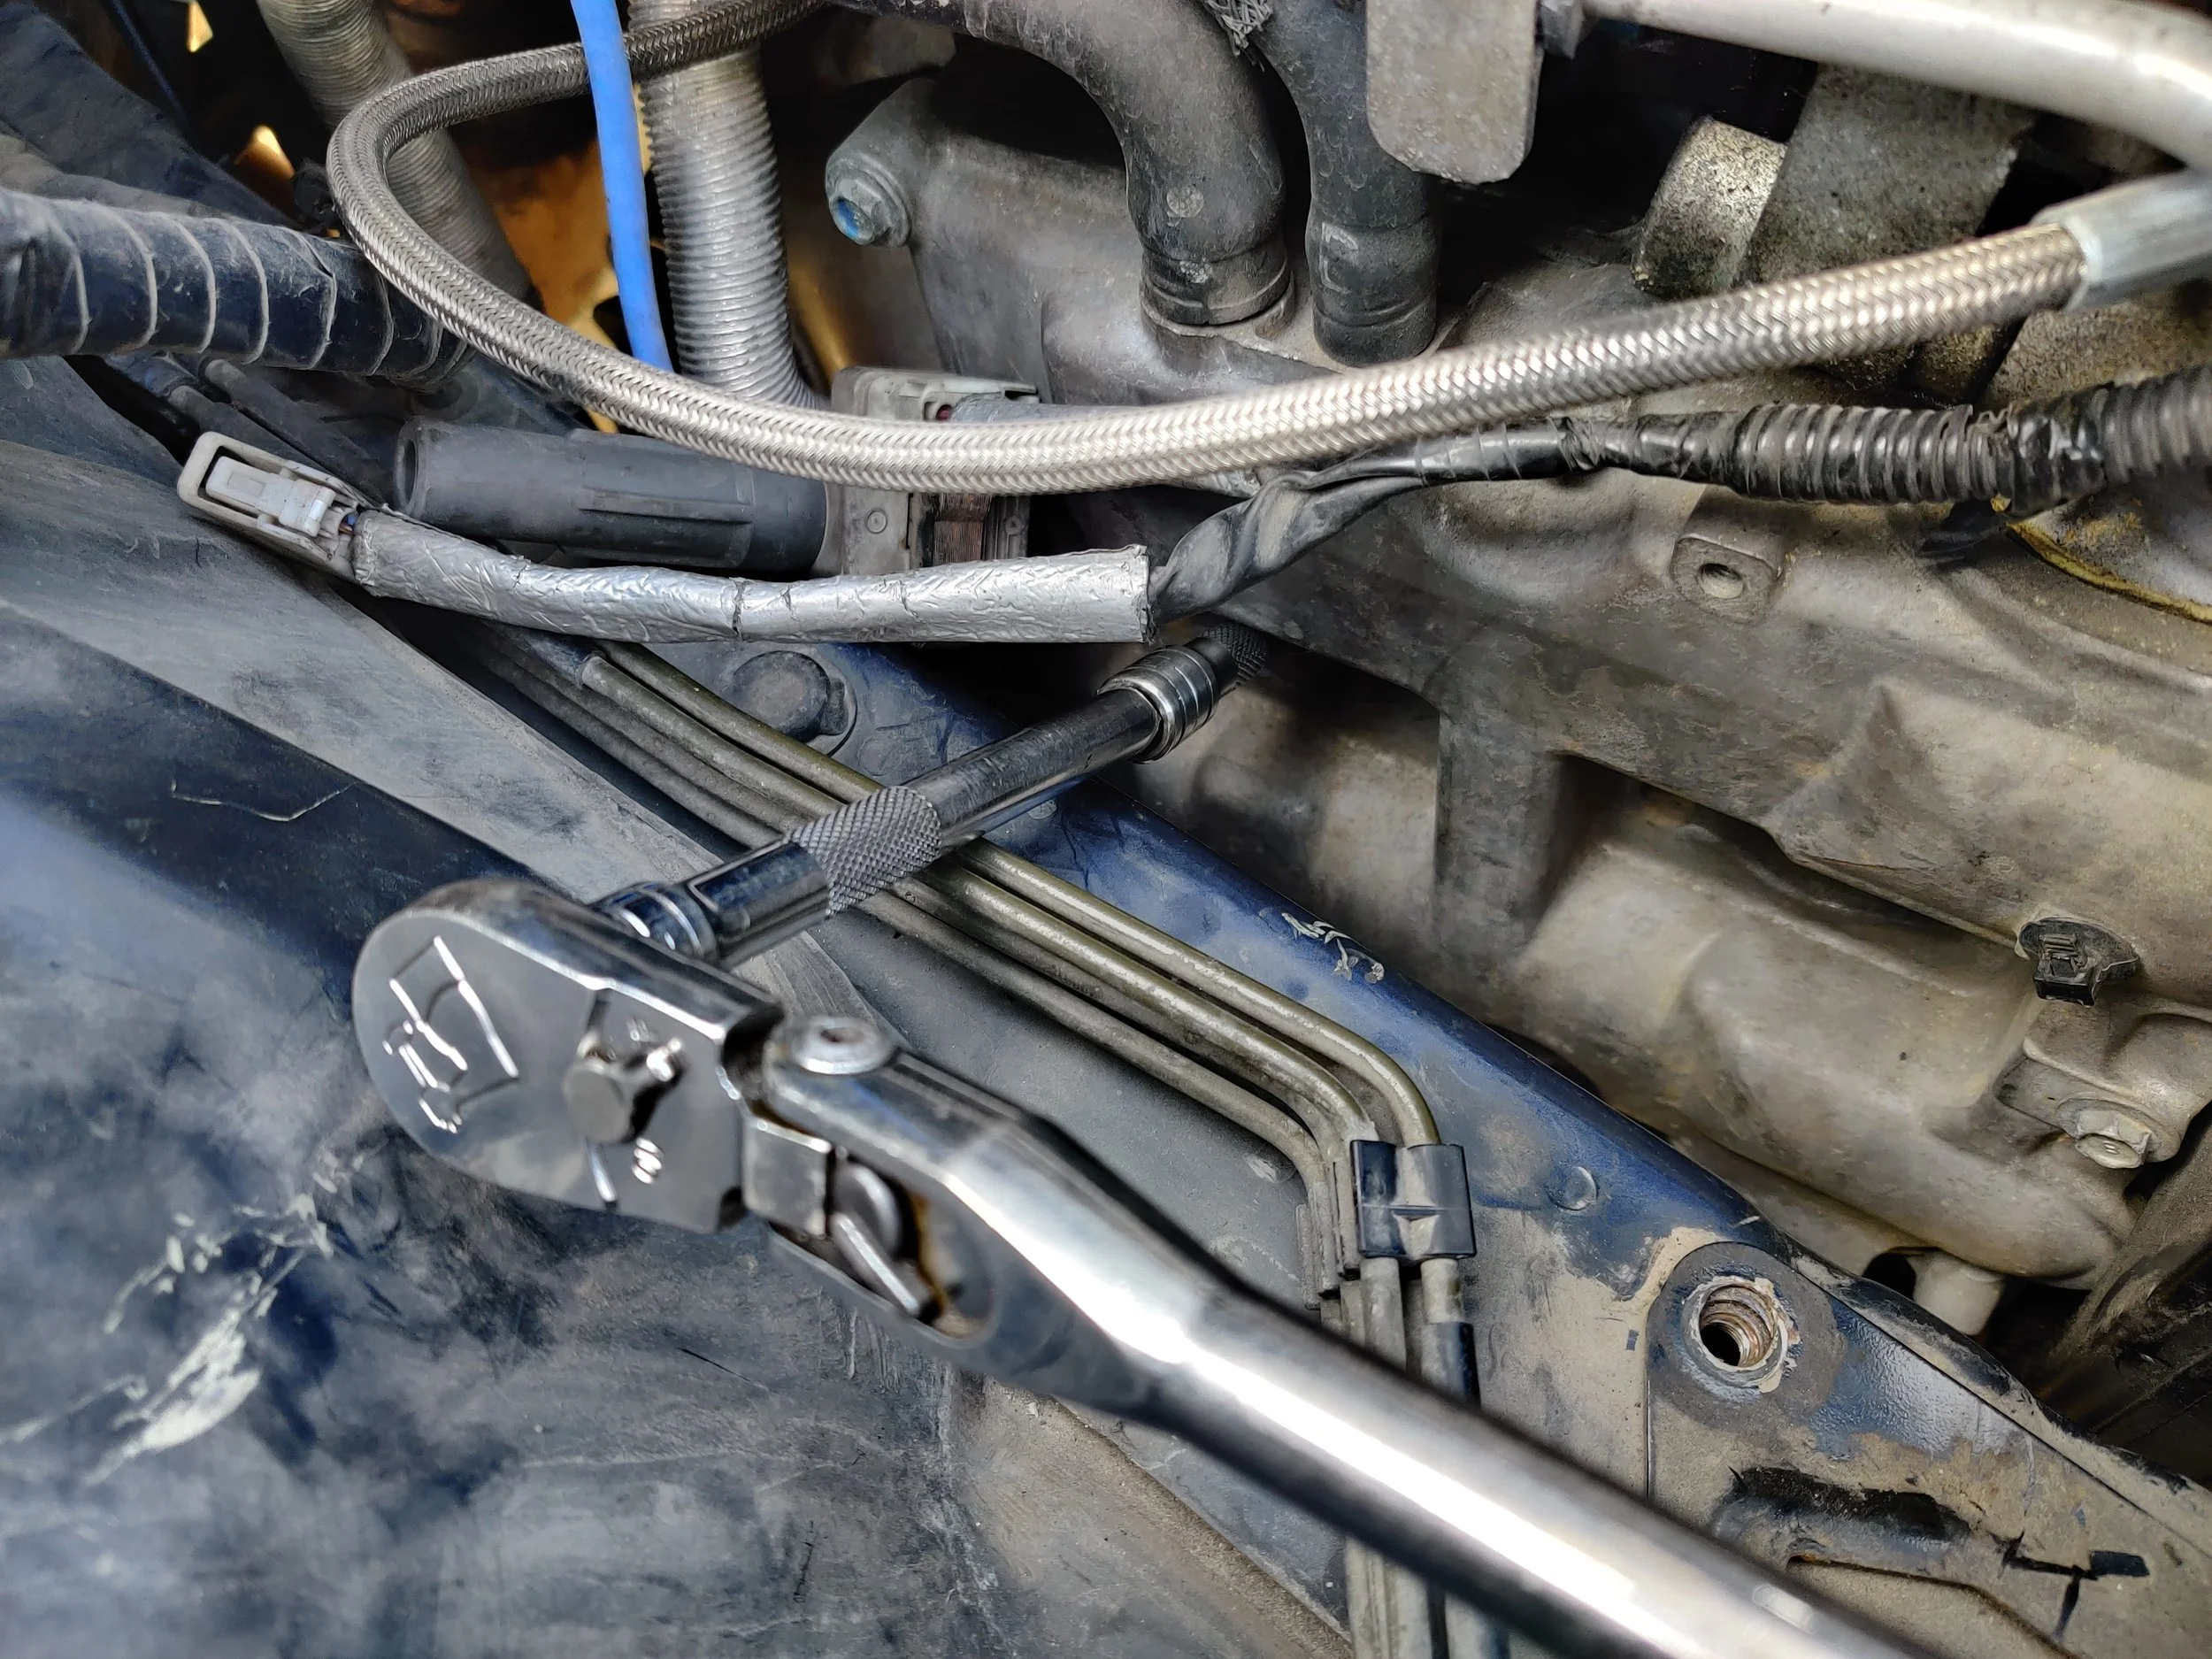
Cylinder three can easily be removed with a longer extension and tiny bit of downward pressure on the brake hardlines.
Spark plug torque per the service is 15ft pounds. If you don’t have a torque wrench a trick I was taught for aluminum heads is to complete it by only using two fingers on the ratchet handle and when you can tighten it anymore it’s tight without overdoing it.

These spark plugs were a few years old but overall looking in great shape. With many short trips I decided to change them a bit early.

Installing spark plug number one, always remember to start the spark plugs by hand to keep the cylinder heads safe from damage.
Now you can put the coil packs back in and finish by replacing the air box and any other items you removed to access the spark plugs. We can now move over to the driver’s side.

Ready for the air box to go back in!
First up to remove is the battery, you have a ten mm on the negative and positive. Now we can take the ten mm and remove the battery tie down and then set the battery aside in a safe place. Just slightly further up in the engine bay we find the air pump. To remove it we can start with disconnecting the electrical connector and then using a pair of pliers to remove the clamp. There are three ten mm bolts that hold it to the car, two located on the strut tower and the other just behind the battery and below a module. You can unclip the module for easier access, with all three bolts removed you can now take the air pump out and set it aside.

Start with the battery here to gain access to cylinder number two.

Now removing the air pump clamp.

Then on to the air pump electrical connection.

Next up is the two bolts that hold the pump in place. Unless your car has one broken off like mine.

Removing this mini fuse box shows you the last bolt that holds the air pump in.

Last air pump mounting bolt

Now you can see what your cylinder 2 and 4 coil packs.
You will now have a decent view of the coil packs. With your 12mm you can remove the bolts, once again you will need to rotate the coil pack around to remove it I’d recommend undoing the connection to the rear coil pack as it is nigh impossible to remove otherwise. Next up will be removing the spark plugs.

Easy to remove the bolts but you will definitely need to remove the electrical connection from cylinder 4
The front spark plug (cylinder #2) is easily reached with spark plug tool and a six inch extension pointed towards where the battery was situated. The number four spark plug is not that easy, you will want your Ares spark plug tool and a small one inch extension, without it you will be in for a tough time. You can also use a standard spark plug socket and then a 19mm deep socket on the end, this will give you enough reach to remove it.

Cylinder number 2 is a bit easier to reach. Ares spark plug tool and this 6” extension.

Cylinder four deems it necessary to have a 1 and 3/8th extension on the Ares spark plug socket. If not you may need to have more tricks up your sleeve or raise the engine slightly to clear the frame rails.

If you pick the wrong extension and plug socket, you might end up like this where you can’t remove it. The frame rail won’t allow it to come out far enough.
Having those two spark plugs removed it is time to bolt in the new plugs and reverse the removal process.
Now you will double check all of your connections, hoses, nuts and bolts etc… Then you can start it up, with a smooth idle and no check engine light you can take a short drive to make sure everything is working as it should.
Congratulations! It’s time to drive and enjoy your car until the next spark plug replacement!
Amazon part links!
NGK spark plugs 22401AA670 / SILFR6A
NGK 5245 Laser Iridium Spark Plug ILFR7H
Subaru Coil on Plug COP 3-way Female Connector Housing Assembly (Plug)
Amazon tool links!
Ares 5/8” spark plug socket with 4” extension.
Grey pneumatic metric sockets
Milwaukee 3/8ths electric ratchet
Gearwrench 3/8” & 1/4’ ratchet set
Ares hook and pick set
Craftsman 1 and a 1/2" Extension Bar
Ares 9 piece wobble extension set