Sunroof glass replacement! Cracked/damaged glass, time for replacement!
Just like any of the other glass on your car is susceptible to cracking, chips and shattering. With Subaru equipping the Forester with such a large piece of glass, it feels like only a matter of time before it succumbs to damage..

I came out to this one morning and the varying temperatures have taken it’s toll as the crack is almost to the other side.
For my Forester it appeared over night after a heavy rain snow storm and a warm sunshiny morning/day with moisture inside the car from a windshield cover and soaked floor mats led to a large crack in the sunroof. With the crack going larger as the days went by I decided it was time to replace it. If you are looking into replacing your sunroof let’s follow around and find out what is next!
Time frame
This is a pretty easy task, with about twenty minutes and a friend you should easily have this completed. You can do this one solo but it is a bit awkward and tough to remove the sunroof without setting it on the car, possibly scratching the paint.
Tools
Incredibly simple set of tools will be needed. Find your favorite ratchet or electric ratchet. A 10 mm socket with an extension and then if you like a trim tool set.

You will need a ratchet or socket. I choose the above setup but this list can make it happen. Grey Pneumatic 3/8th socket set Gearwrench 3/8ths ratchet Milwaukee 3/8ths electric ratchet Milwaukee 3/8ths impact gun Neiko extensions 9 piece set
Then you can use your hand to remove the plastic covers or if you can use a trim tool kit too, ast year. Utool trim removal tools
Parts
Just two pieces are necessary for this section. That would a be a new or new to you sunroof assembly and a couple shims.

If you’d like a brand new unit from Subaru it is part number 65430SA002. I would recommend hitting up your local parts yard.

There are two different shim sizes for the sunroof. Part number: 65469FC000 is a .5 mm shim and the part number: 65416GA030 is a 1.0 mm.
Installation
We will begin inside the vehicle looking towards the roof. Then we will slide the interior sunroof cover to the rear of the vehicle to expose the sunroof. On each of the sides there are two covers that house the nuts that bolt it to the track.

Here is your view with the cover out of the way

Now you can see the plastic cap cover that hides the nuts and shims.
If you don’t have trim tools you can easily squeeze the sides and pulling down the covers will come off and you will find two nuts on each side. Removing these unbolts the track to the sunroof.

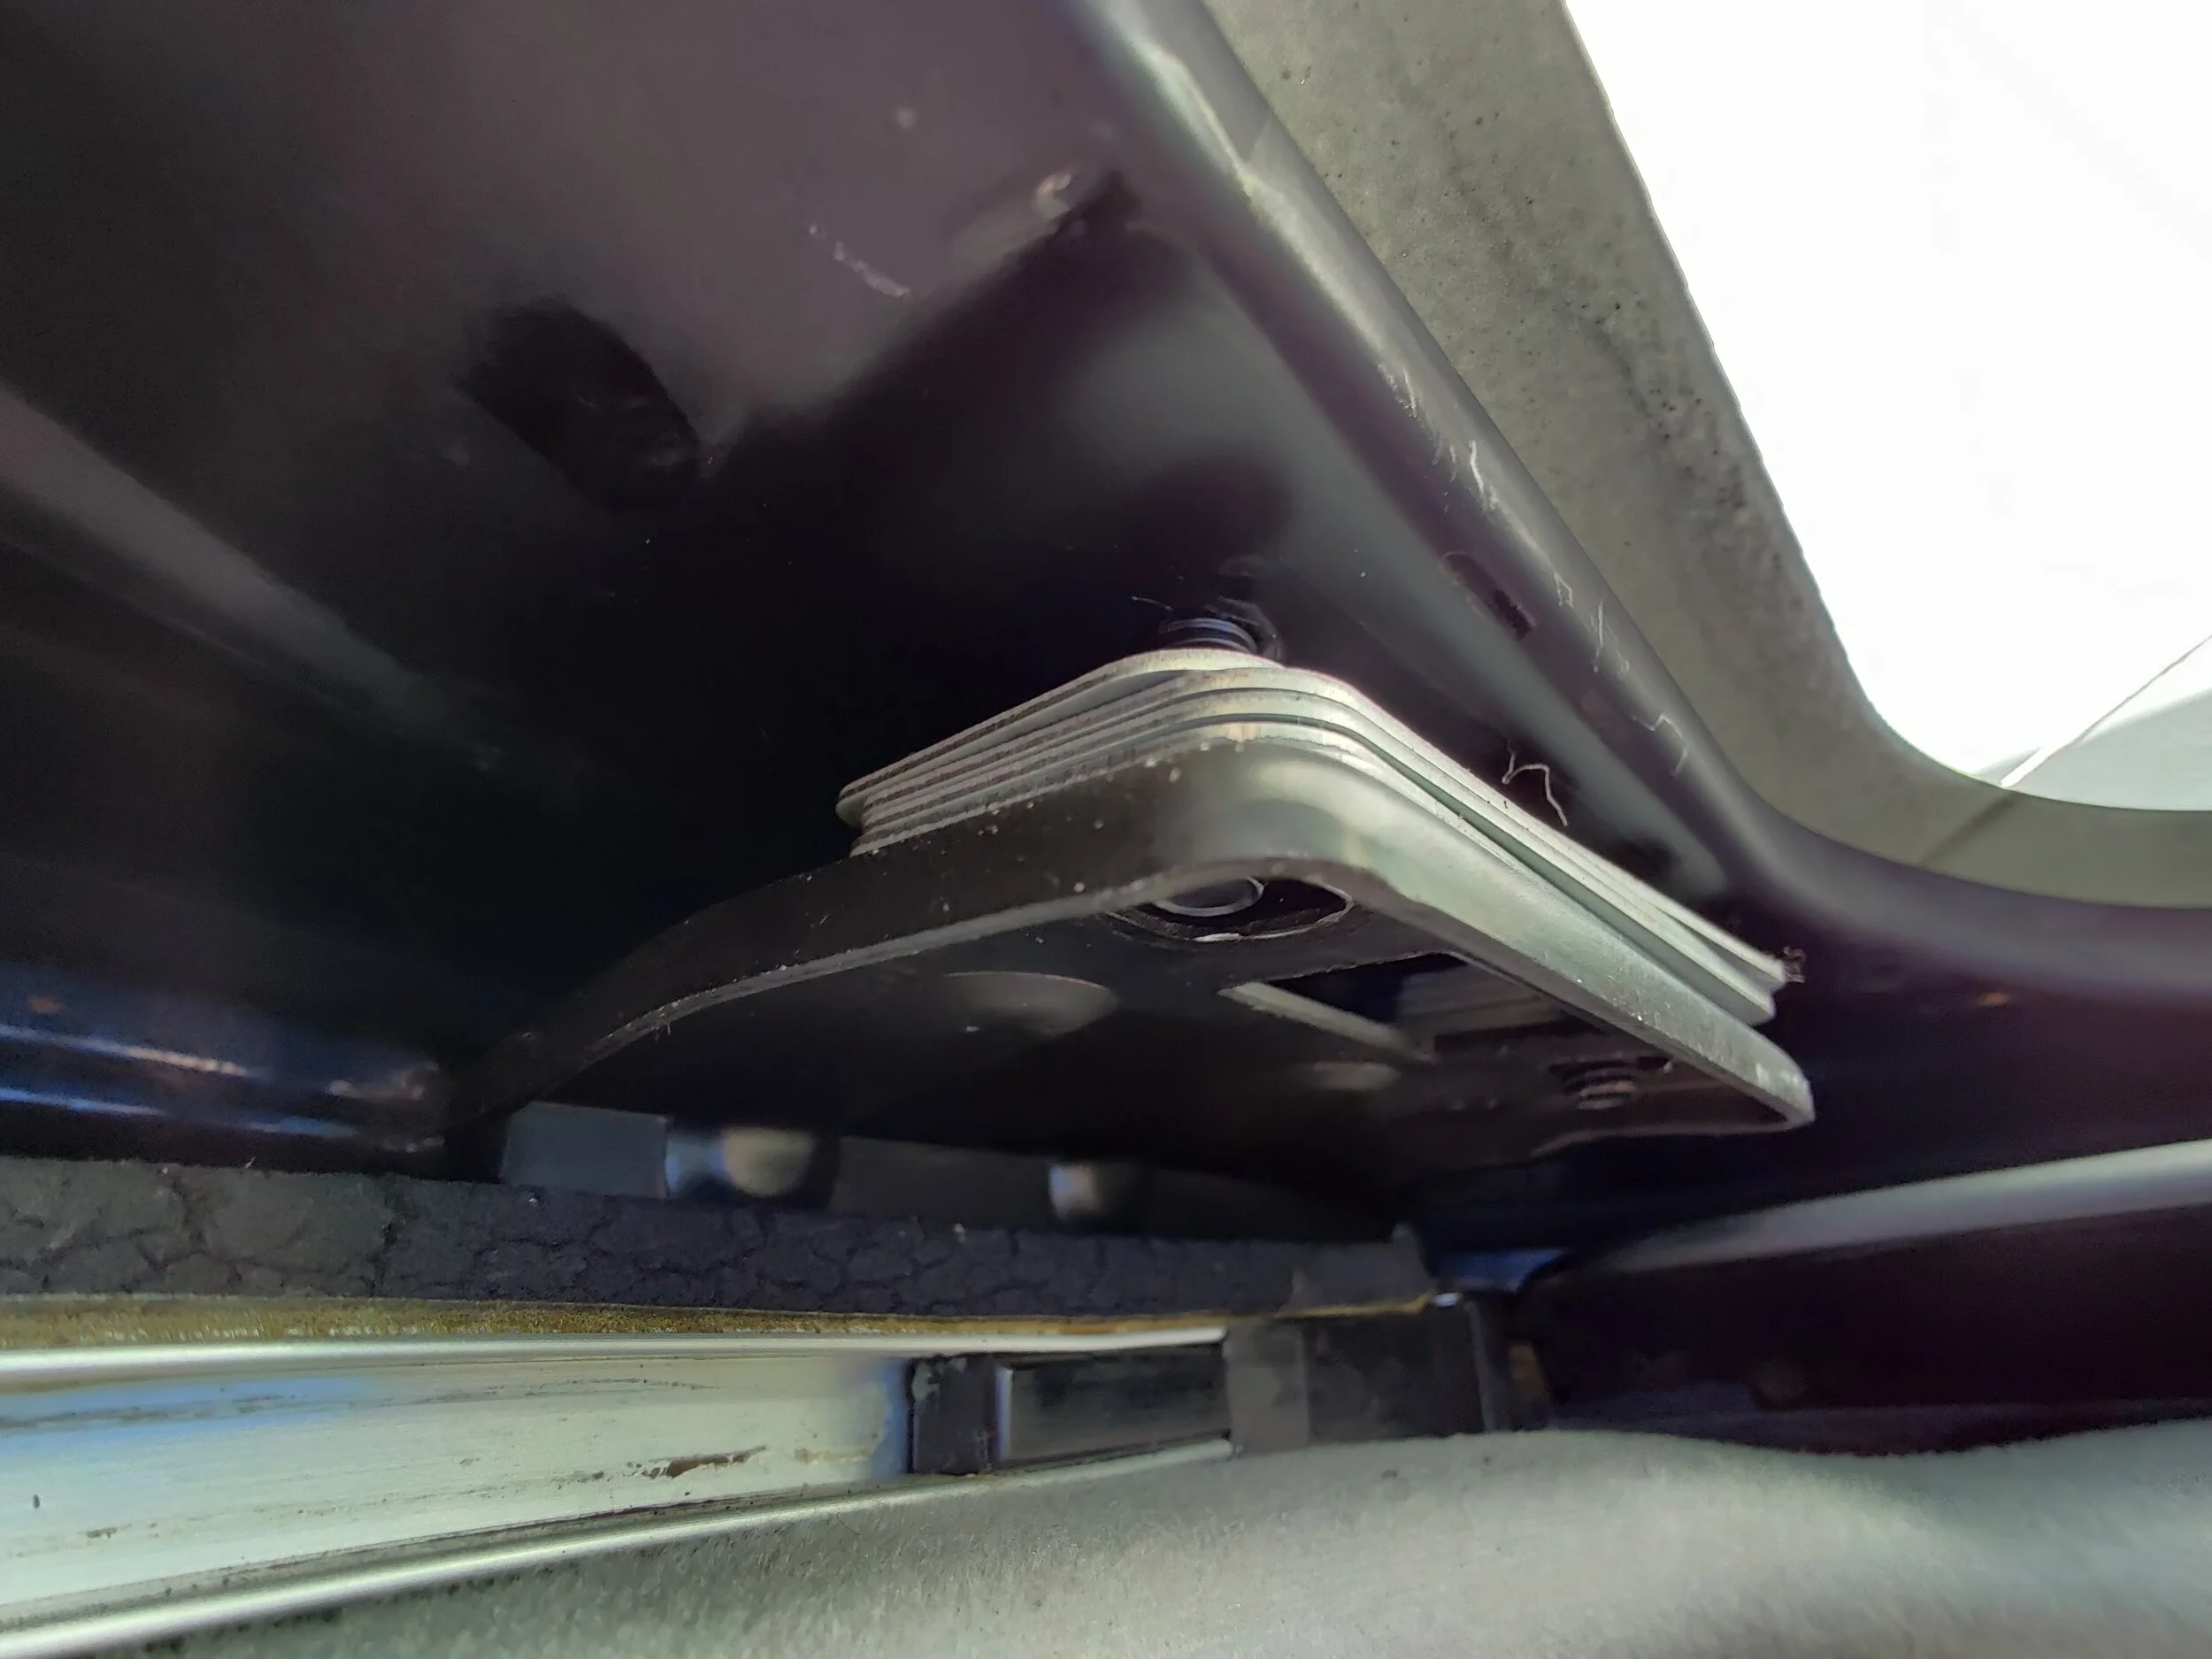
Here are the nuts that hold the sunroof to the track brackets.

Removing the nuts you will see the shims that are sandwiched between the bracket and sunroof.
With your helper you can have one person stand outside of the car with a step stool and the other person push the sunroof up and out. Then the person on the outside can help lift it up and over the car. Now you can place it wherever you fell, like the garbage or tucked away in your garage… most likely never to be seen again.

If you are a one man show or at the junkyard picking up your “new used” glass. You can set it up top on the car and then come outside and remove it. If you are doing this by yourself make sure you protect the roof as the sunroof studs can do some serious damage to the paint and metal.

With a buddy inside the car you can push the sunroof right up and out. Then you can stand on the outside and pull it up and over the car. It’s just that easy.
Now you will see all the shims that allow the sunroof to sit evenly with the roof, keeping the seals in place. I decided to start out by leaving them all in place and setting the sunroof in. Run the nuts down on all four locations and then get out and check how level the sunroof is with the roof.
Make sure your shims are lined up in place before installing the new unit.

Another angle of how the shims sit on the bracket. I recommend to try the original set before removing/adding any.
There are two different sized shims to help you get it level with the roof. Part number: 65469FC000 is a .5 mm shim and the part number: 65416GA030 is a 1.0 mm. I was pretty lucky and my new sunroof glass only needed one shim removed in the back and one added up front. Then it was level with the roof line and sealed up.

This shot shows the driver’s side is level but going across the front of the roof it tapers off. We will be adding a spacer there.

The more shims the better. If you got your sunroof from a junkyard hopefully you snagged the extras.

Another angle of the passenger side sitting a bit low. Adding one spacer to each side.

Driver’s side is looking as the factory setup did. Should be good!
With your sunroof all level you can now go back inside and install the plastic covers to hide the bolts, studs and shims. Then you can give the sunroof a test run back and forth to make sure everything is working well.

Level and fully installed.

Double checking that water isn’t bypassing the new used seal.

Back in business. No cracks in this sunroof.. yet.
Congratulations! You have completed your sunroof glass replacement and no longer need to be concerned of leaks from cracked or damaged sunroofs.
Amazon tools list
Grey Pneumatic 3/8th socket set
Milwaukee 3/8ths electric ratchet
Amazon parts list
03-08 Forester Sunroof: part number 65430SA002
Subaru shim part numbers:
65469FC000 is a .5 mm shim
65416GA030 is a 1.0 mm.