Subaru front strut replacement! Your guide to adding a new strut(s), lift blocks or coilovers!
During your Subaru ownership the time may come where your struts are old and worn, now you need to make a decision on replacing them. Will you be replacing your struts with a new set from the oem? Perhaps you will be moving on to to coilovers or adding lift blocks to change the stance and look of your vehicle. Today we will look at removing and replacing your factory front struts, if you have decided to to switch it up this guide will help you get to that point too. Let’s get are hands dirty and found out what it takes to do this!
Today our subject is replacing a leaking front strut out and due to the higher mileage of the car we will replace both front struts. The logic behind replacing them as a set maintains the symmetry of your vehicles handling and ability to absorb the imperfections in the road equally.
Time frame
We are looking at about a two hours to remove the both old struts and swap over the top hat, springs etc. If you are replacing them with coilovers or full assembled struts you will save yourself a half hour or more.
Tools
With the proper tools you will expedite your task and be back on the road quicker without cursing your car. Here are a few that I use to complete these tasks without struggling.
Milwaukee 1/2” electric impact will take care of those lug nuts and break the strut bolts free. If you don’t have a impact a breaker bar might be necessary to help free those strut bolts

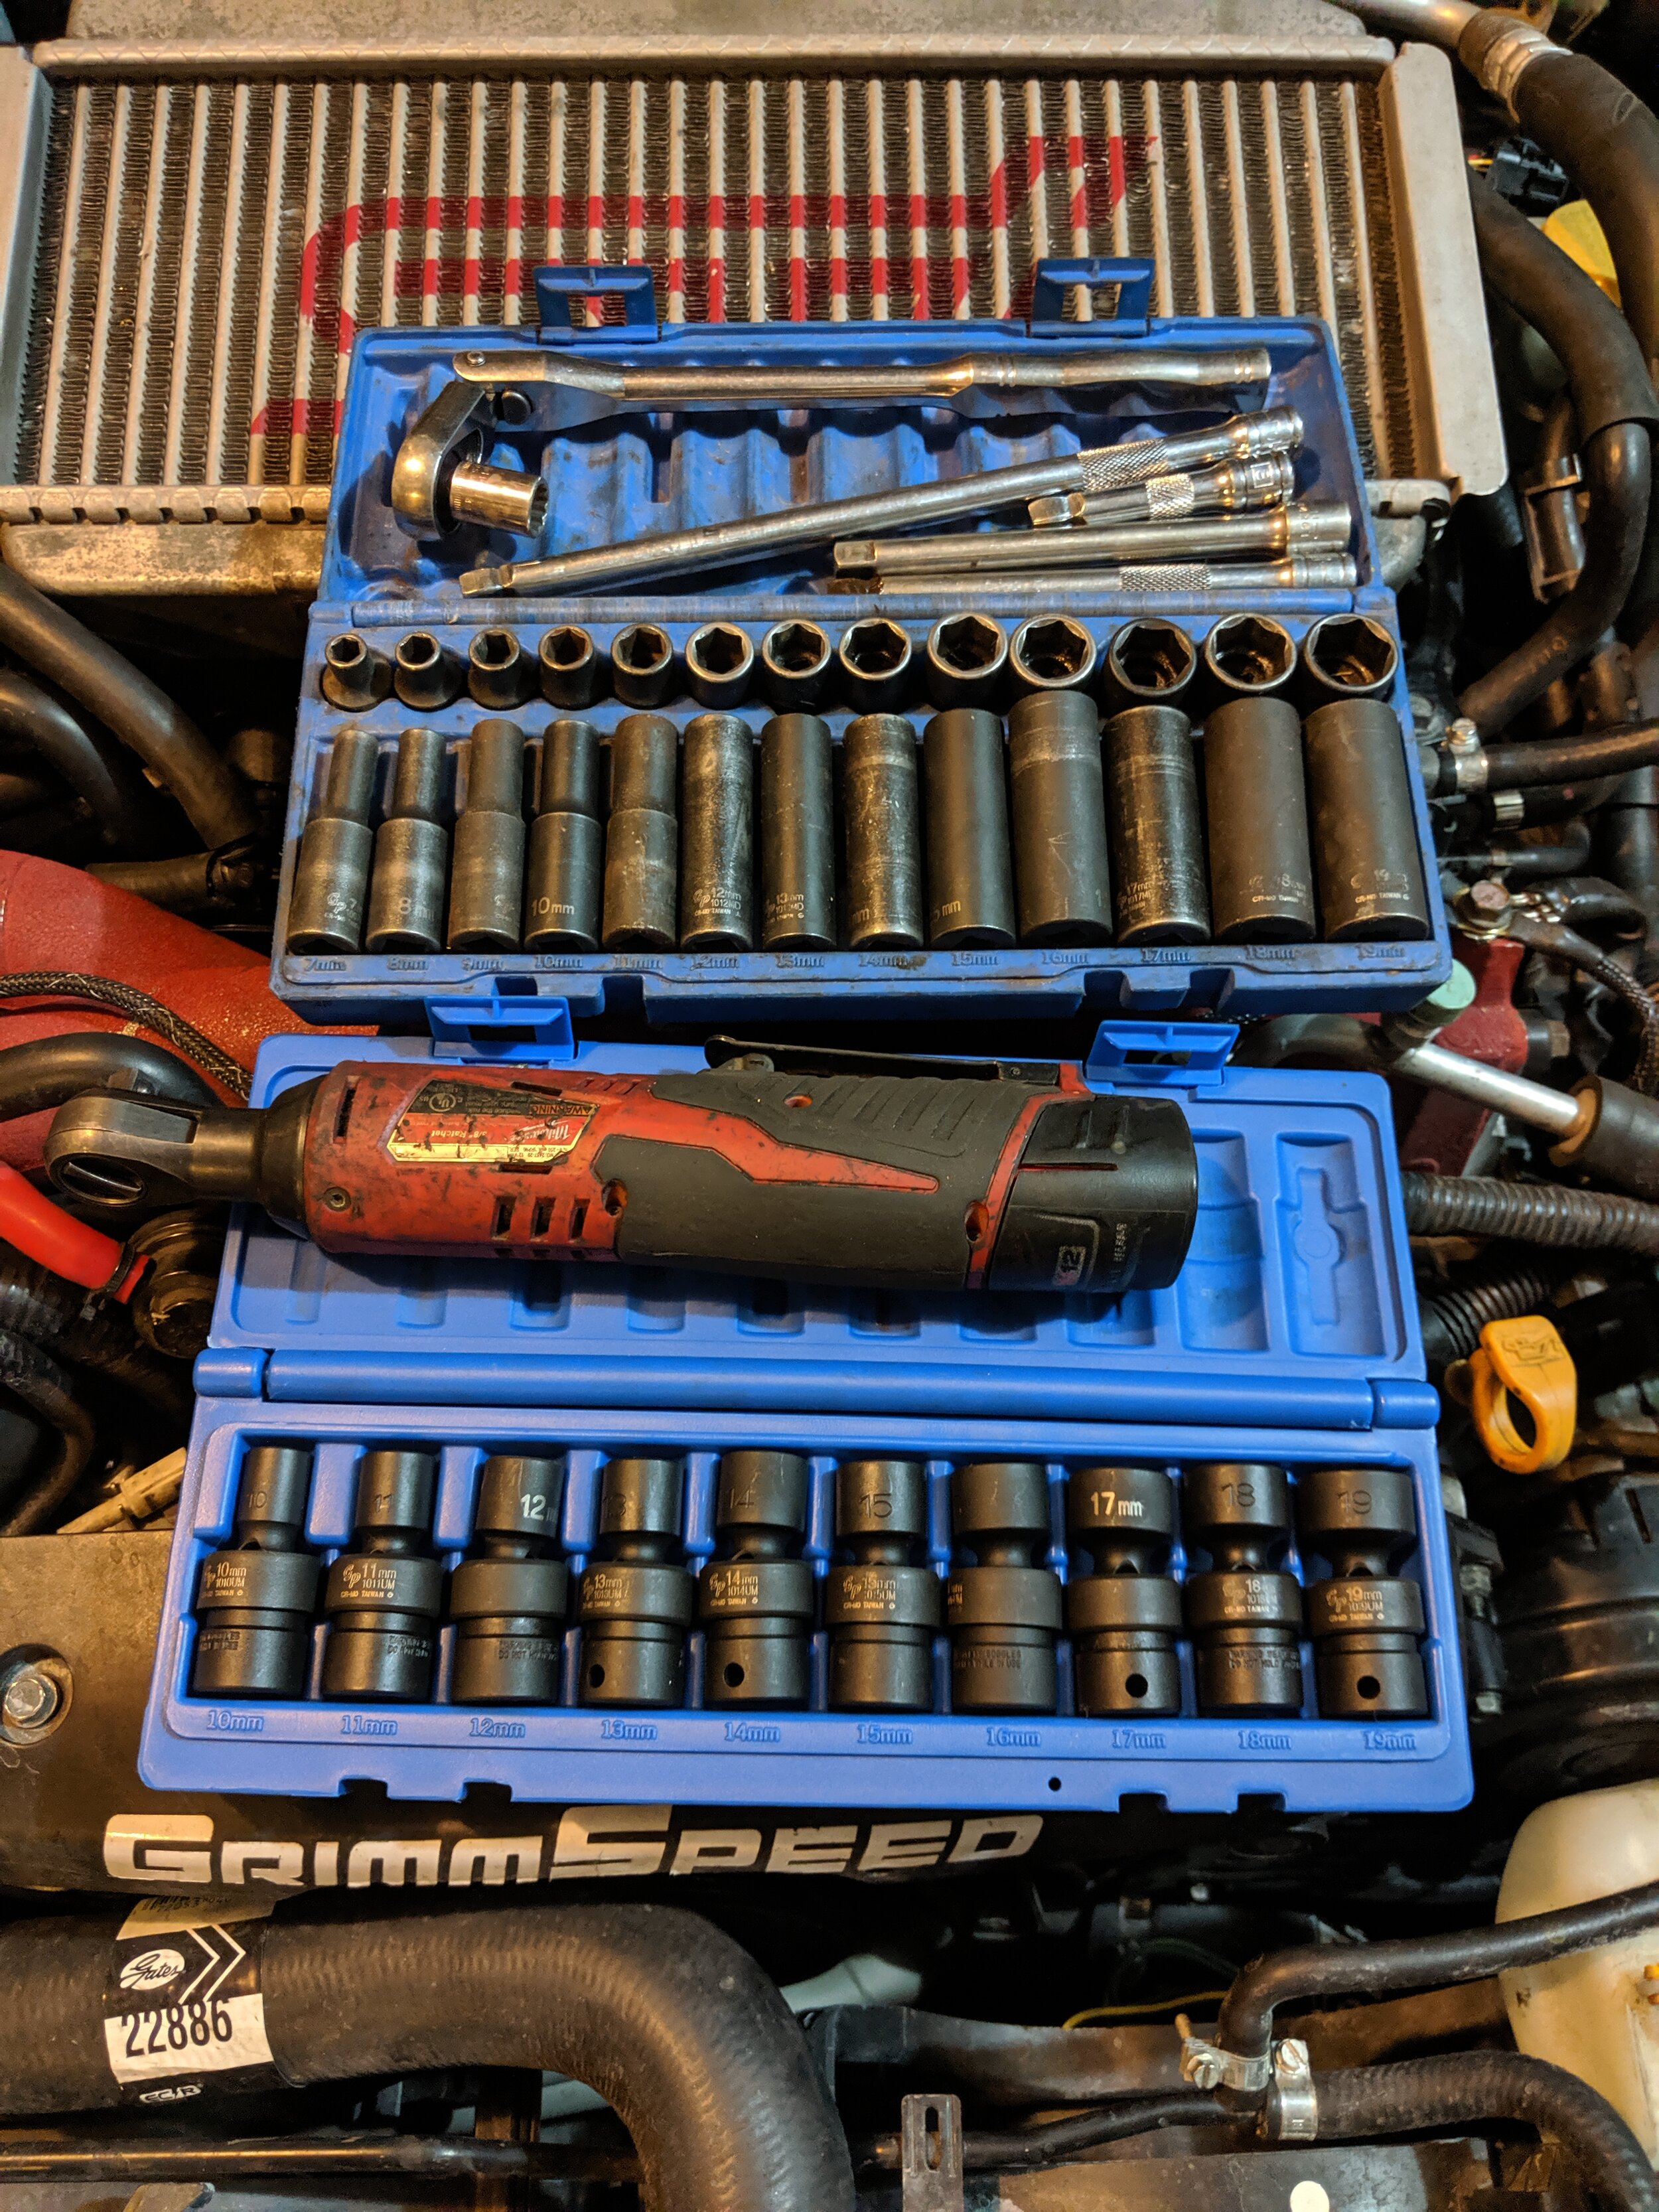
Grey Pneumatic 3/8th socket set Grey pnuematic wobble socket set Sockets necessary will be a 12, 14 and 19mm. A 19mm wrench will help hold the bolts to break the nuts free.
A deadblow hammer and/or a hammer can be helpful if the strut bolts have rusted in knuckle.


A set of screwdrivers and punches can help hold the strut in place or knock the bolts out.


Raven nitrile gloves keep my hands clean and give a bit more grip when the grease and oil try to take hold.

Spring compressor set you will find at your local auto parts store or you can purchase on Amazon.

Bungee cord set to help hold that knuckle in place.
Parts
I will list a few of the struts and part numbers I have worked with. If your part number is not listed below you should be able to find it directly from Subaru or a comparable aftermarket unit on Amazon or your local automotive shop.
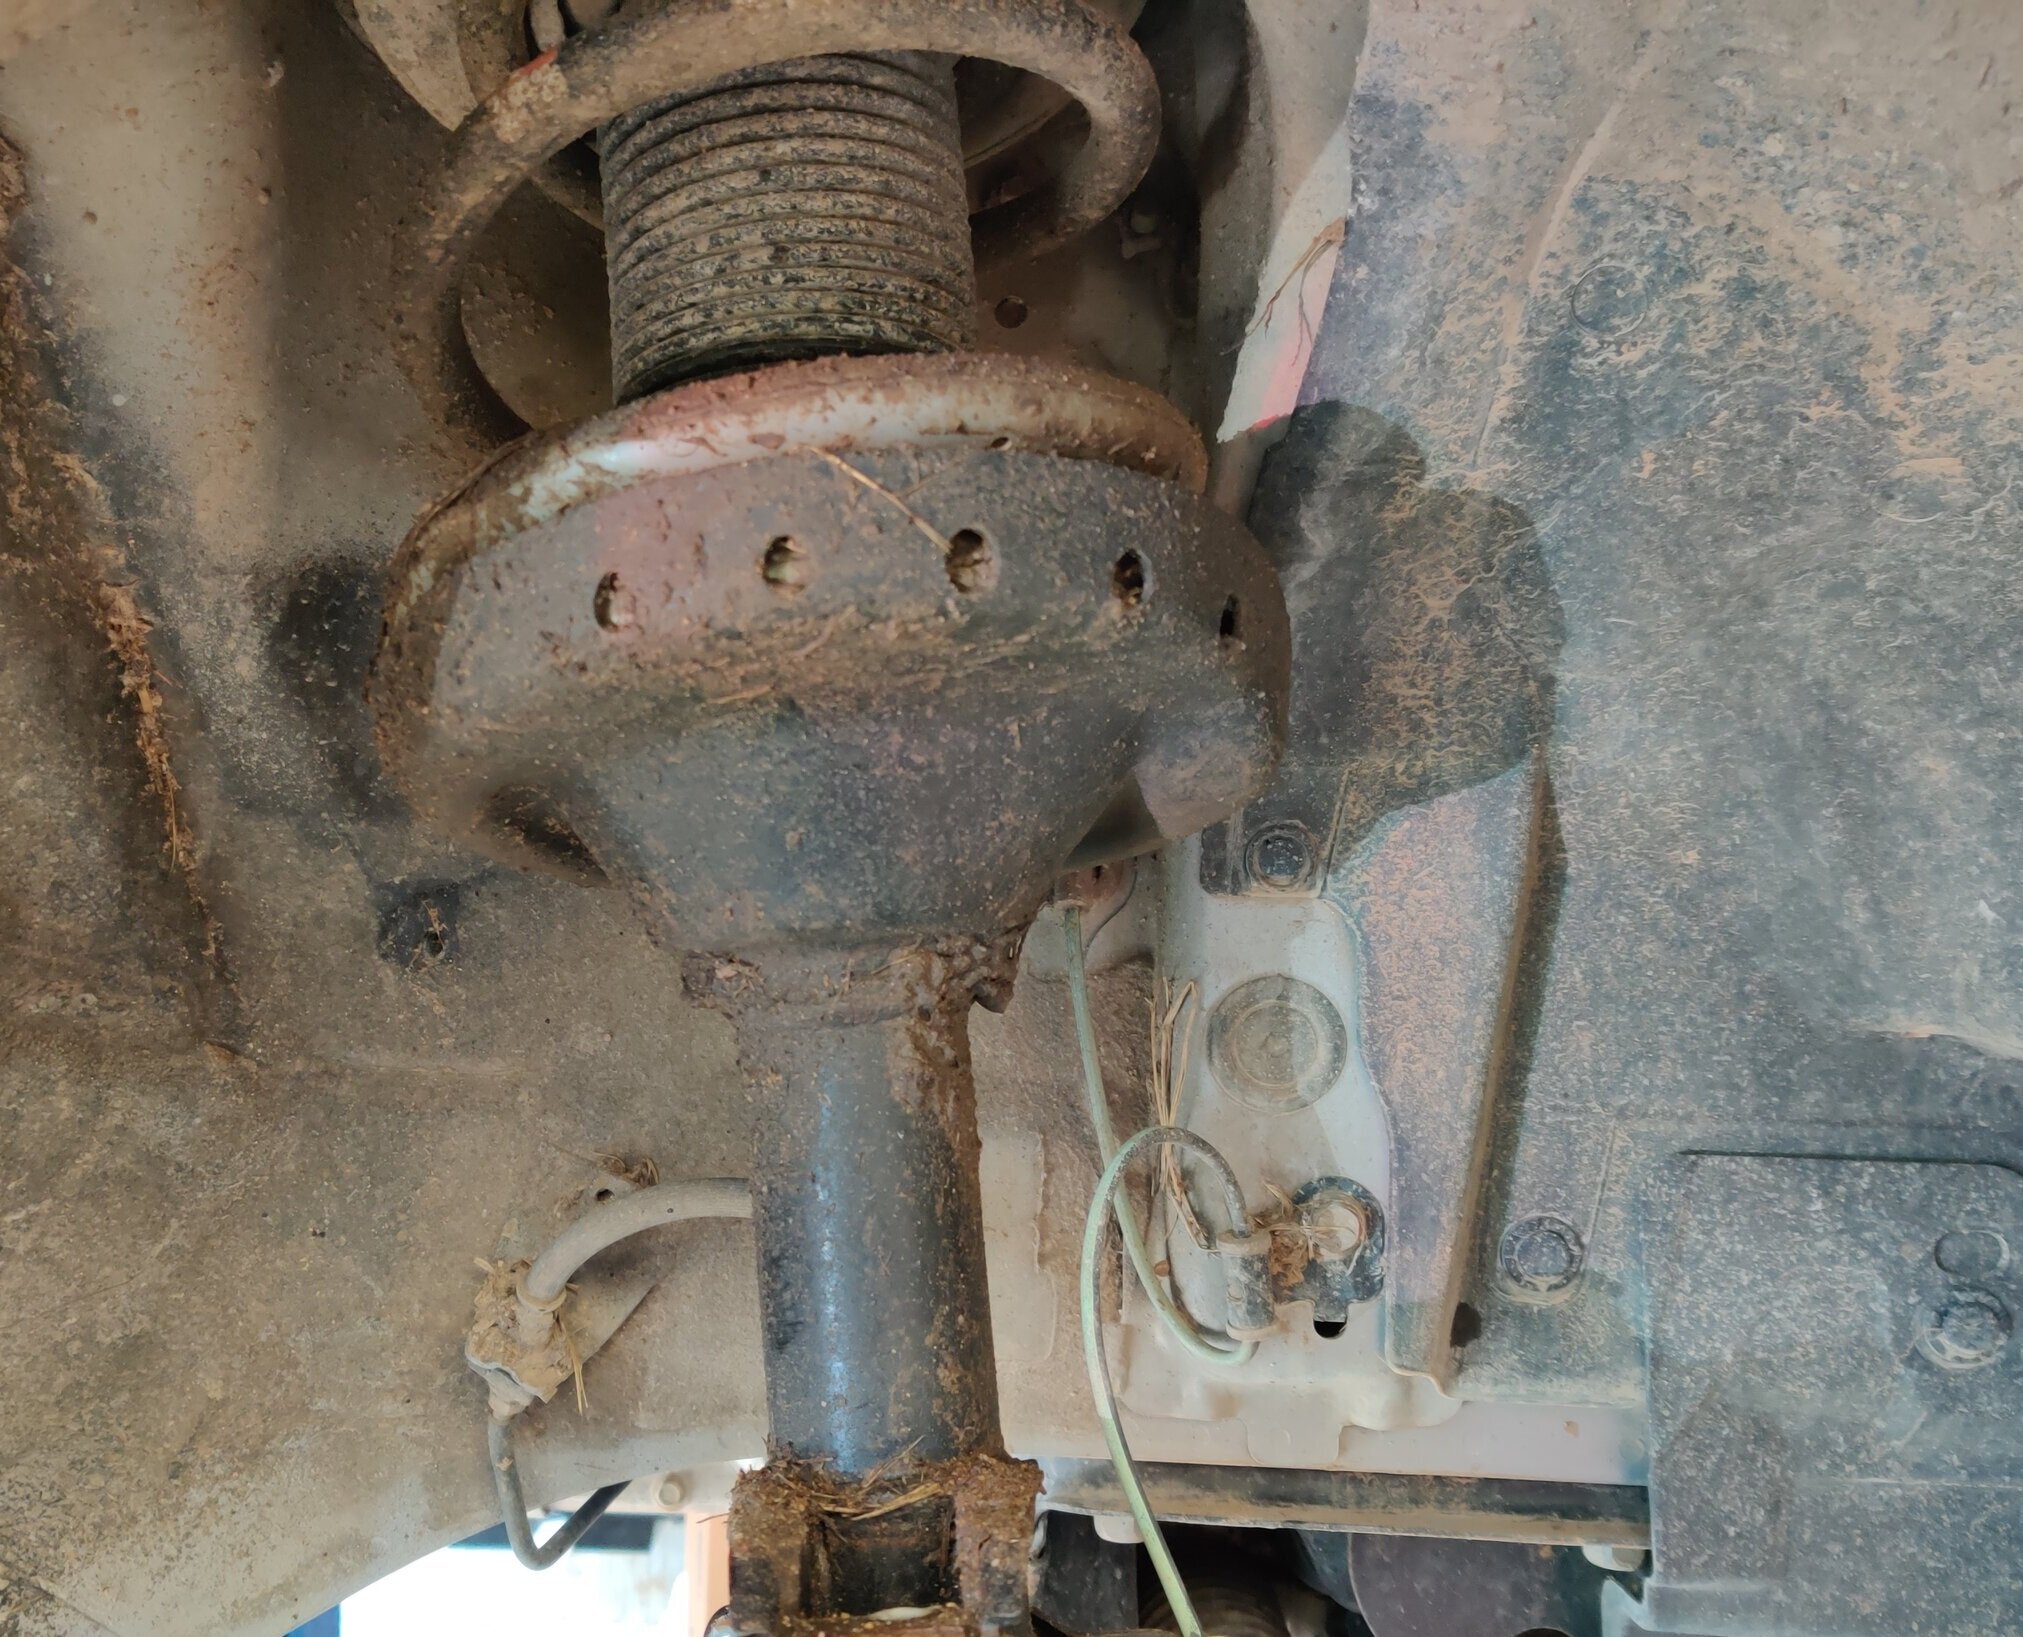
If your car has quite a few miles on it this is also a good time to swap out your top hat. This is the mount that bolts your strut to your unibody and houses a bearings that gives the front struts the ability to pivot and turn.
Installation
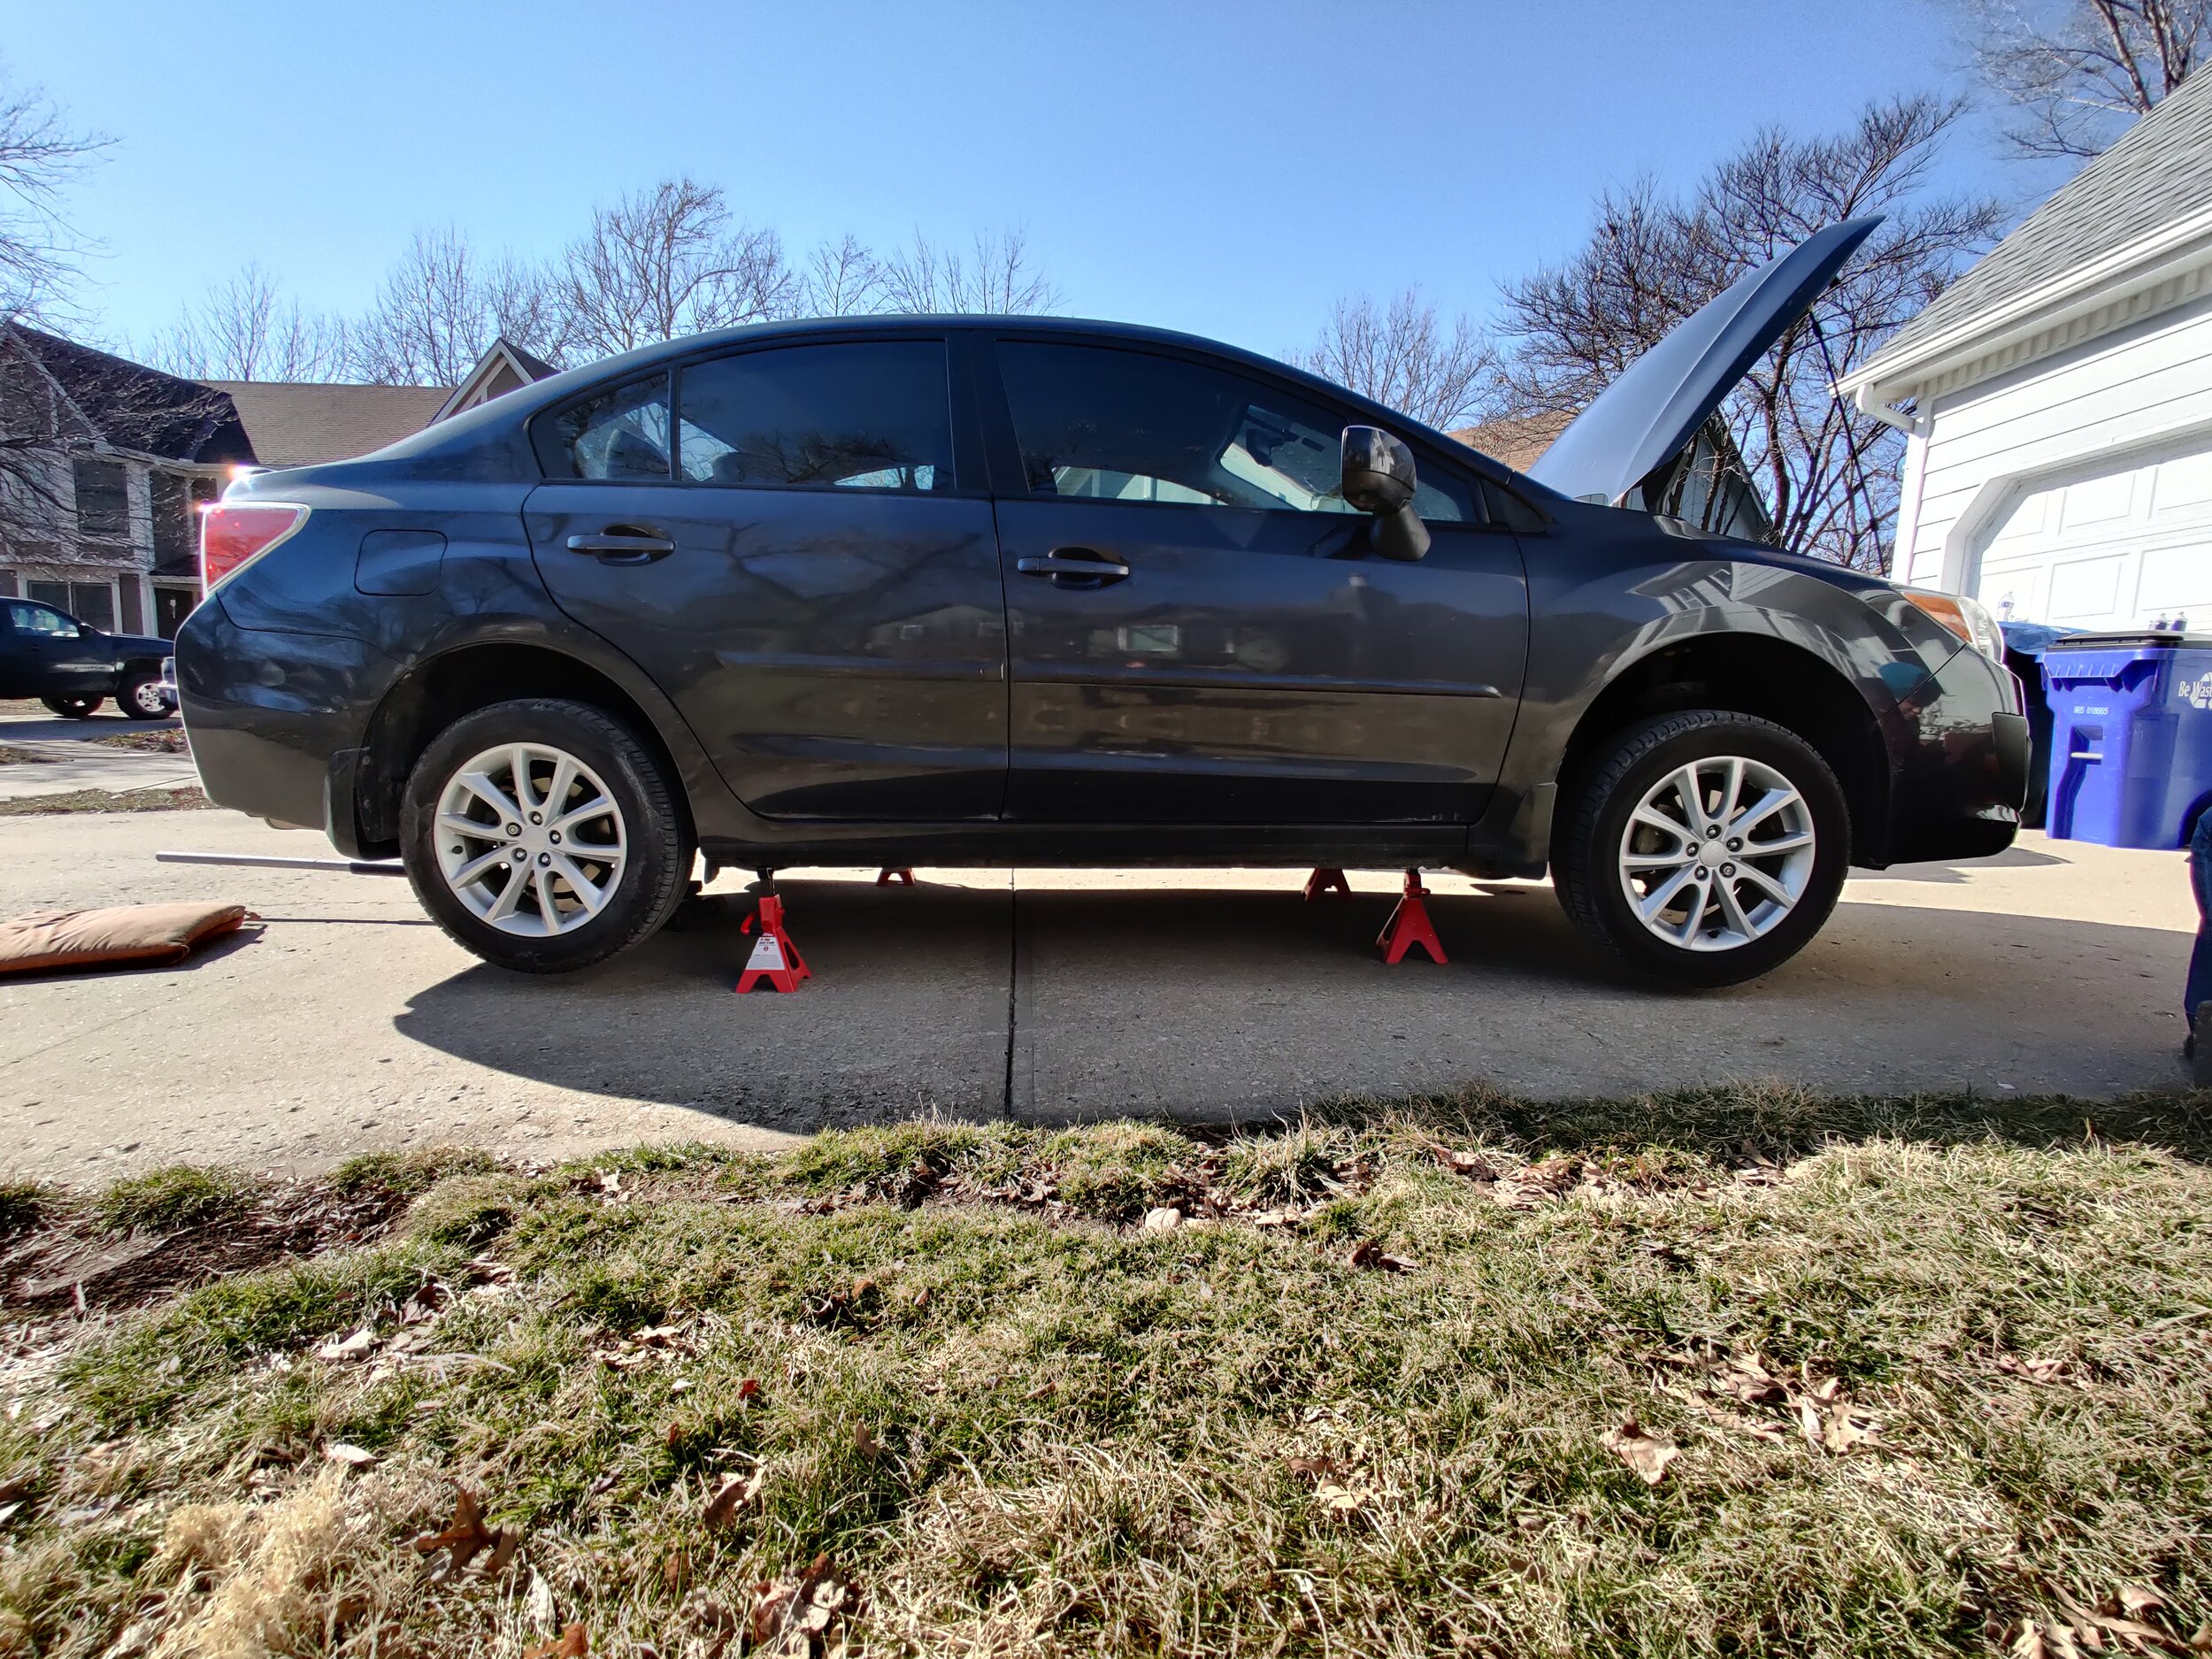
Like all of the other suspension repairs you need to get your vehicle into the air. If you need some help with that follow this link, Getting your Subaru on jack stands. Once it is stable on the jack stands we can begin by removing the wheels.
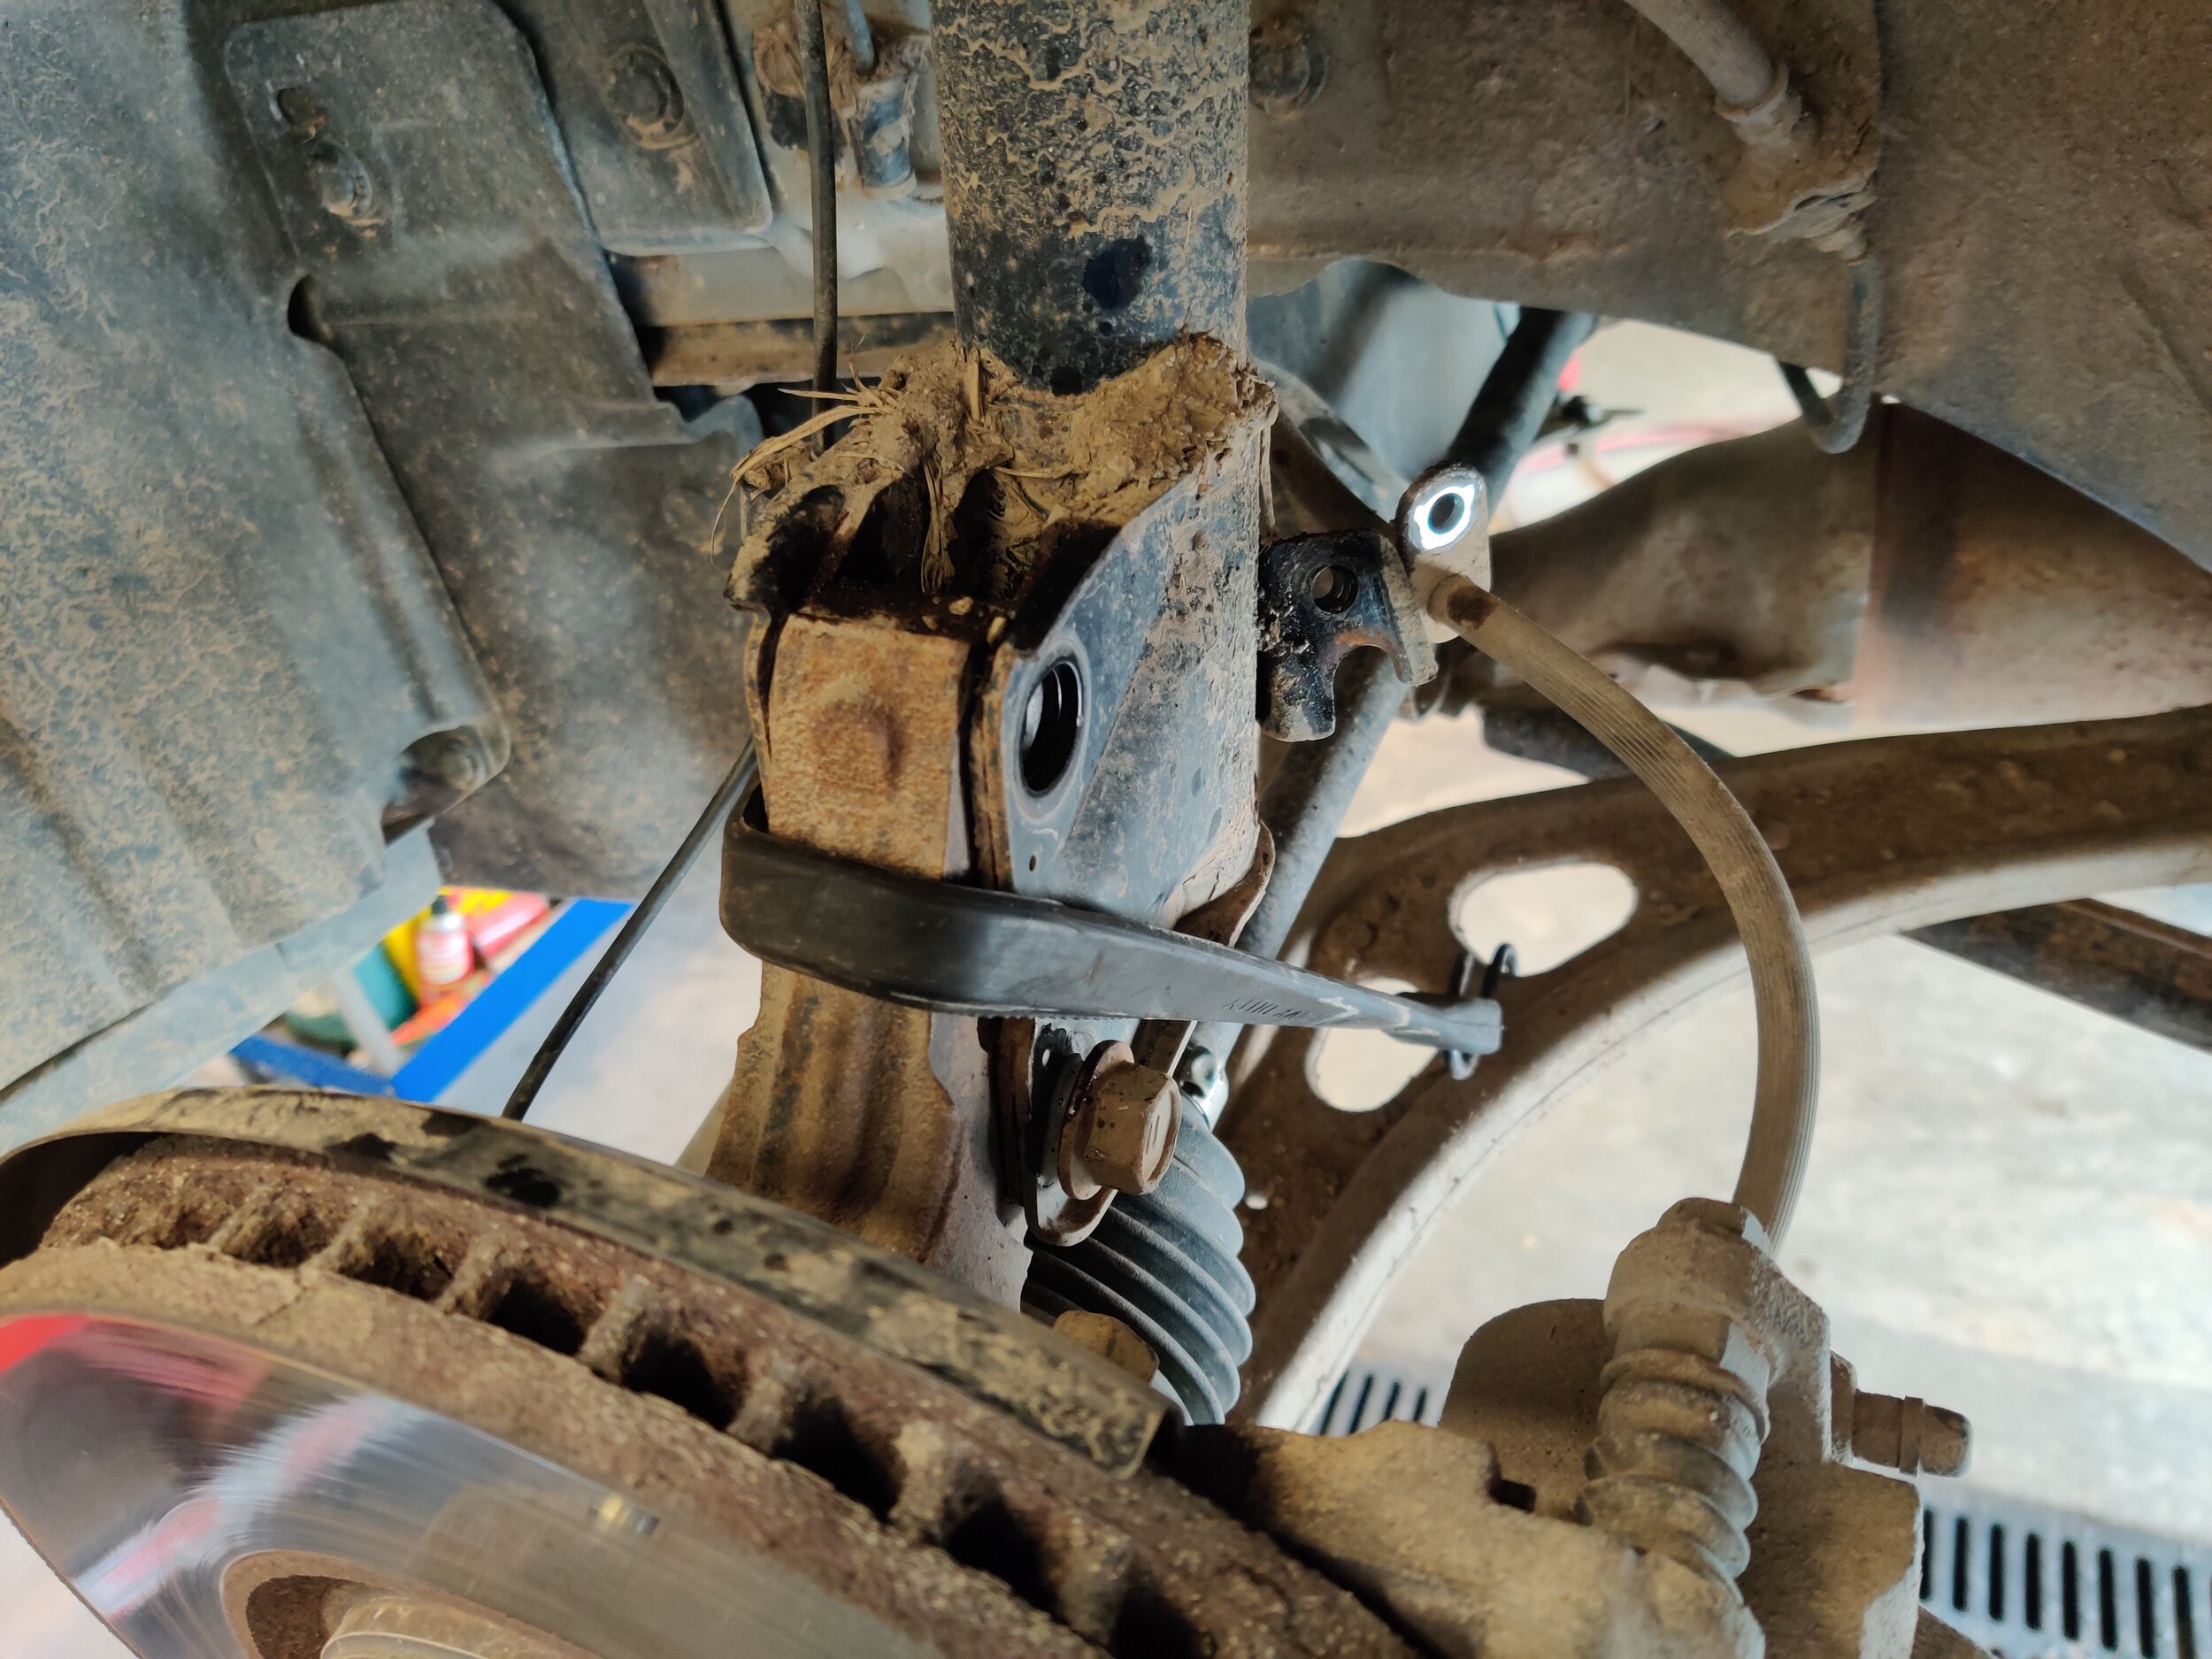
Having the wheels removed we can locate the top of the knuckle where the strut attaches to. To the right and left of these bolts we will see our first items to remove. The Abs wire and the brake line mounting bolt which allow us to move them away from the strut.


Next up we can mark the upper strut bolt to help keep our alignment close to spec. This can help minimize tire wear before you have your car aligned after replacing the struts.

After marking your bolt you can begin to break the nuts free on the strut. Take note that the washer is fitted on the upper bolt only.

Upper bolt is the cam bolt and utilizes the single washer on these two bolts.

Easy does it with a good impact wrench.
Now you can use your bungie cord to support the knuckle, this keeps the cv joint from becoming separated from the cup causing you even further work. Another method is to remove the axle nut, this will keep the axle from being pulled on, which causes the joint dislocation.

Find any location you can and support the knuckle to keep it from pulling the cv axle apart.
Having the proper precautions taken for the Cv axle, you can now pop out the strut bolts. You can rotate the upper bolt to make it easier to remove. If the lower bolt isn’t budging now you can bring out your punch and knock it through. Being careful to not damage the threads.

A little rust penetrant to help convince the lower bolt to move on out. Next up is the dead blow hammer and punch.
Separating the knuckle and spindle is the current task at hand. Using a a screwdriver or small pry bar you can pry the two apart.
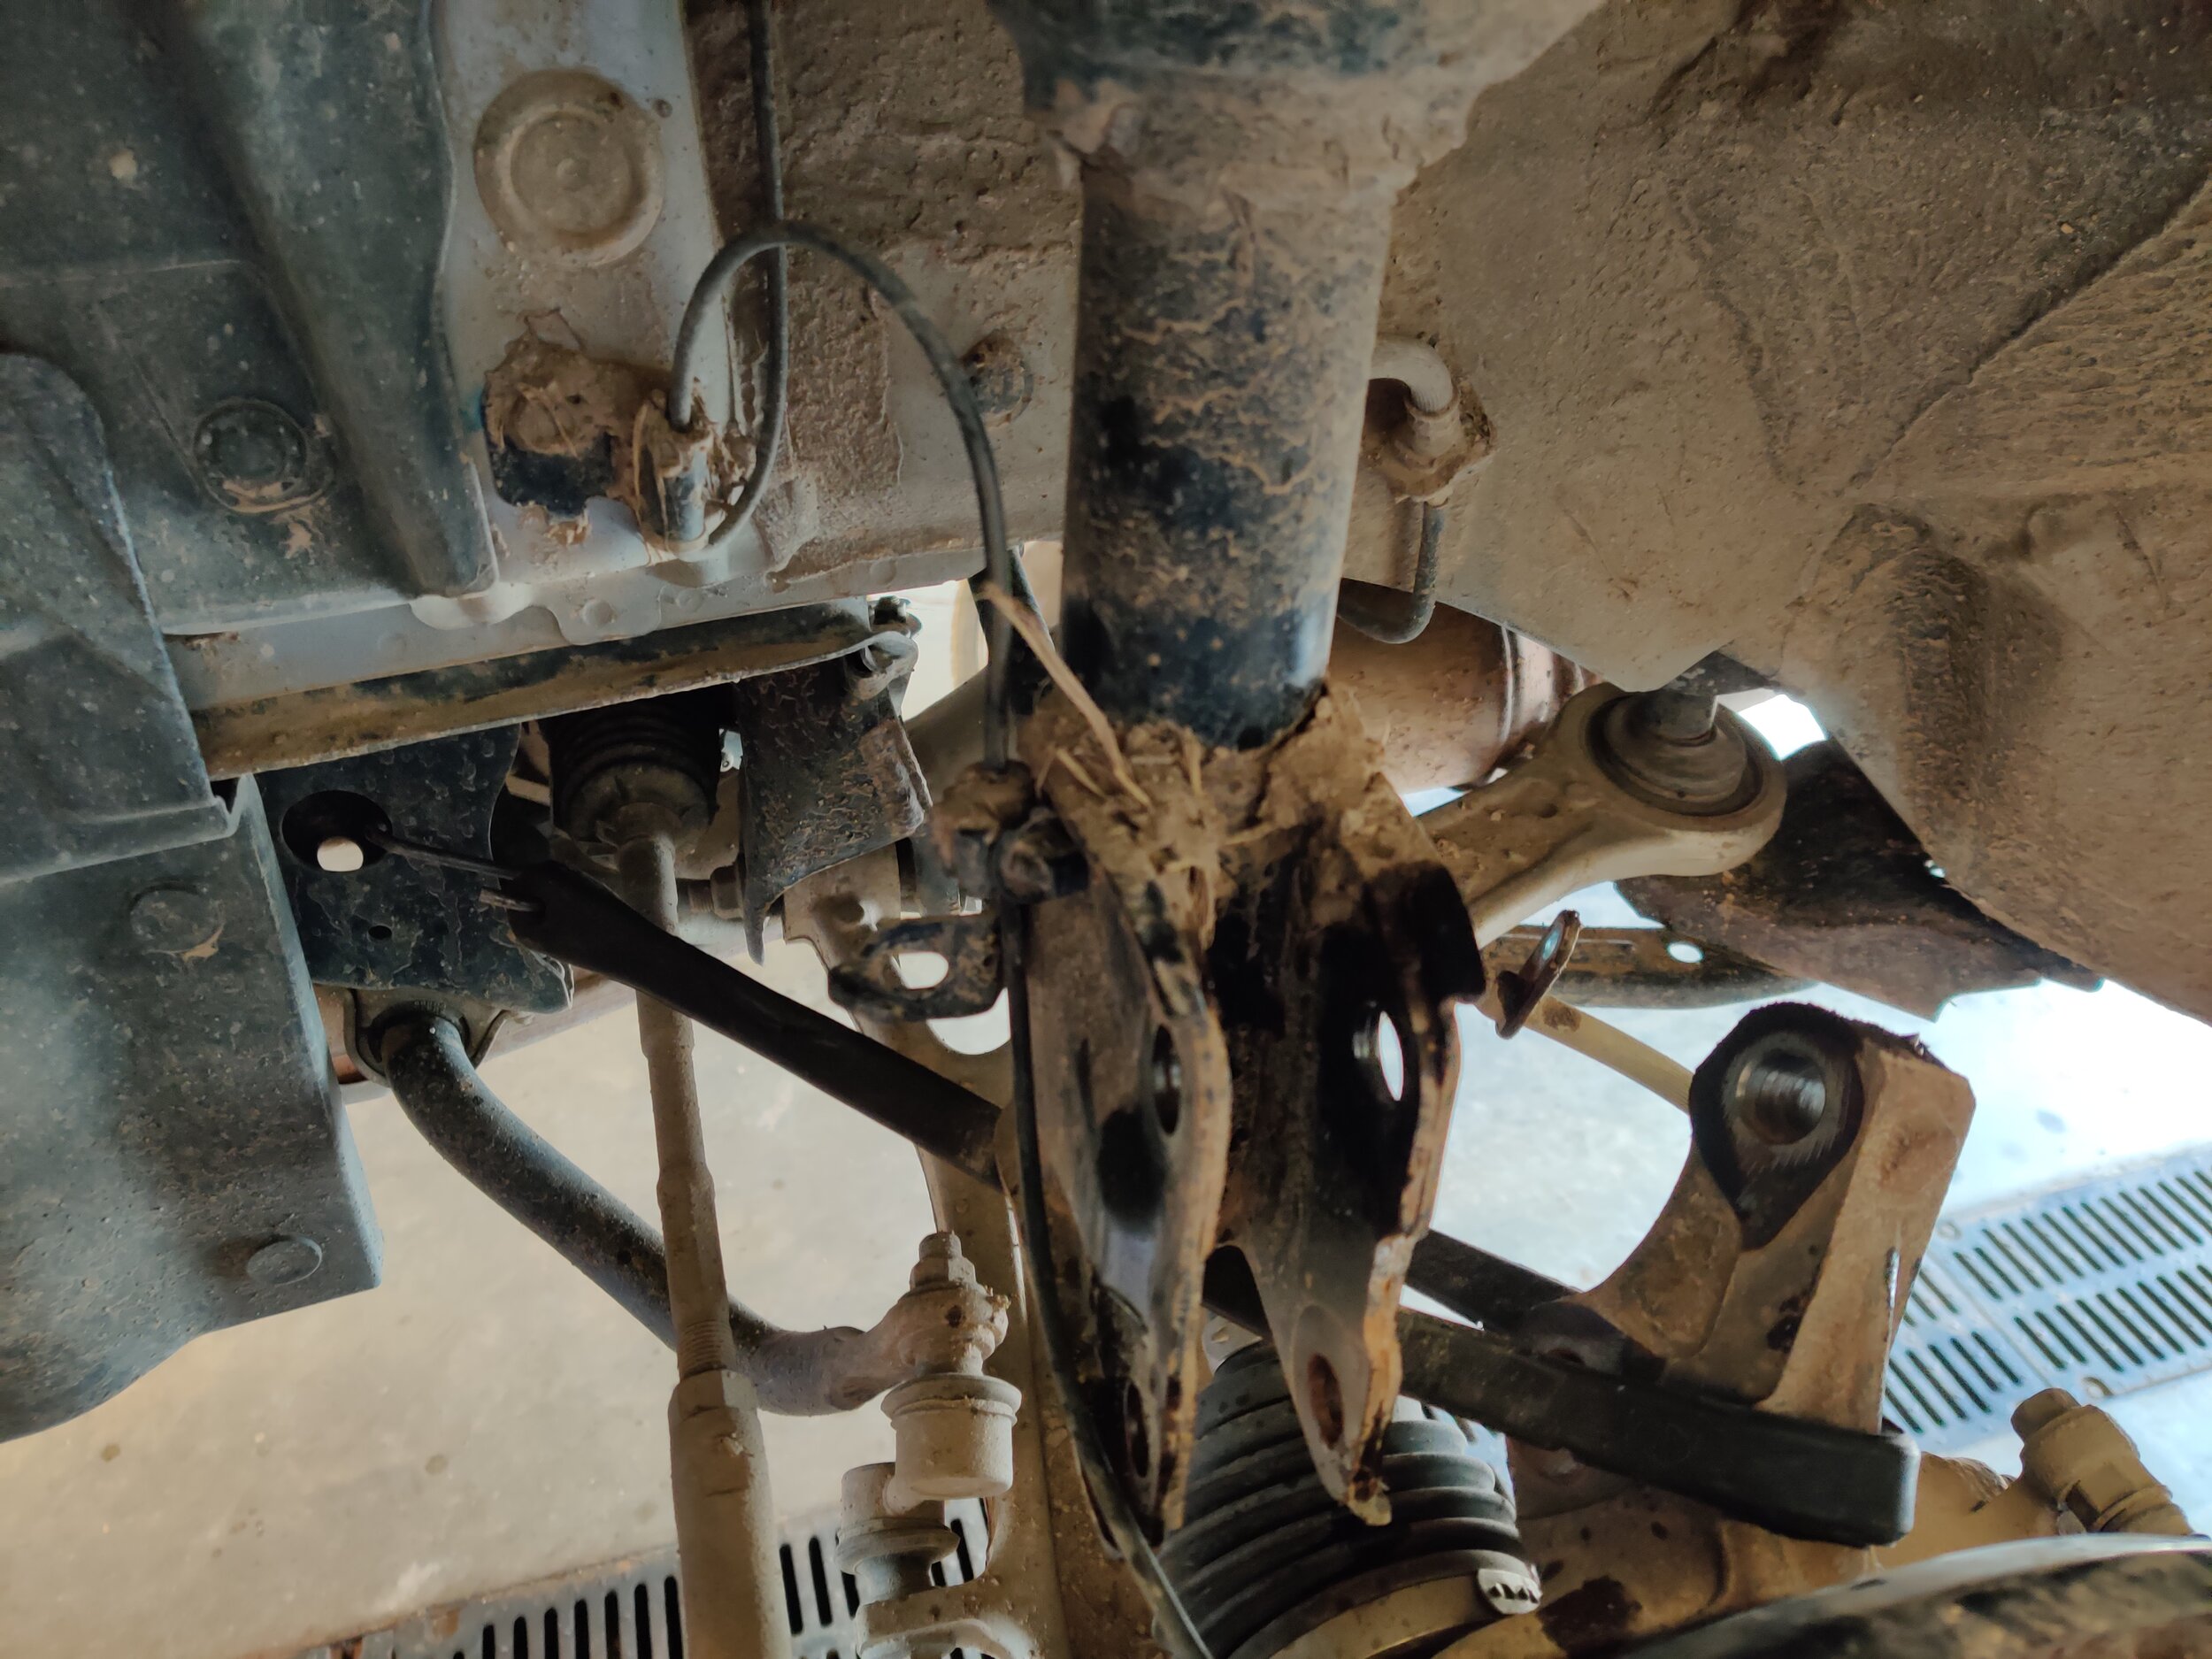
After the bolts are removed, you can pry and move the strut and knuckle to separate locations.
Moving up topside to under the hood we can locate the three nuts located on the strut tower. These are all that holds the strut to the car. Remove two of the three nuts and now find a way to keep the strut from falling down and damaging the cv axle. If you have a helper that can hold it up this is the best method.

These three nuts are all that is left.
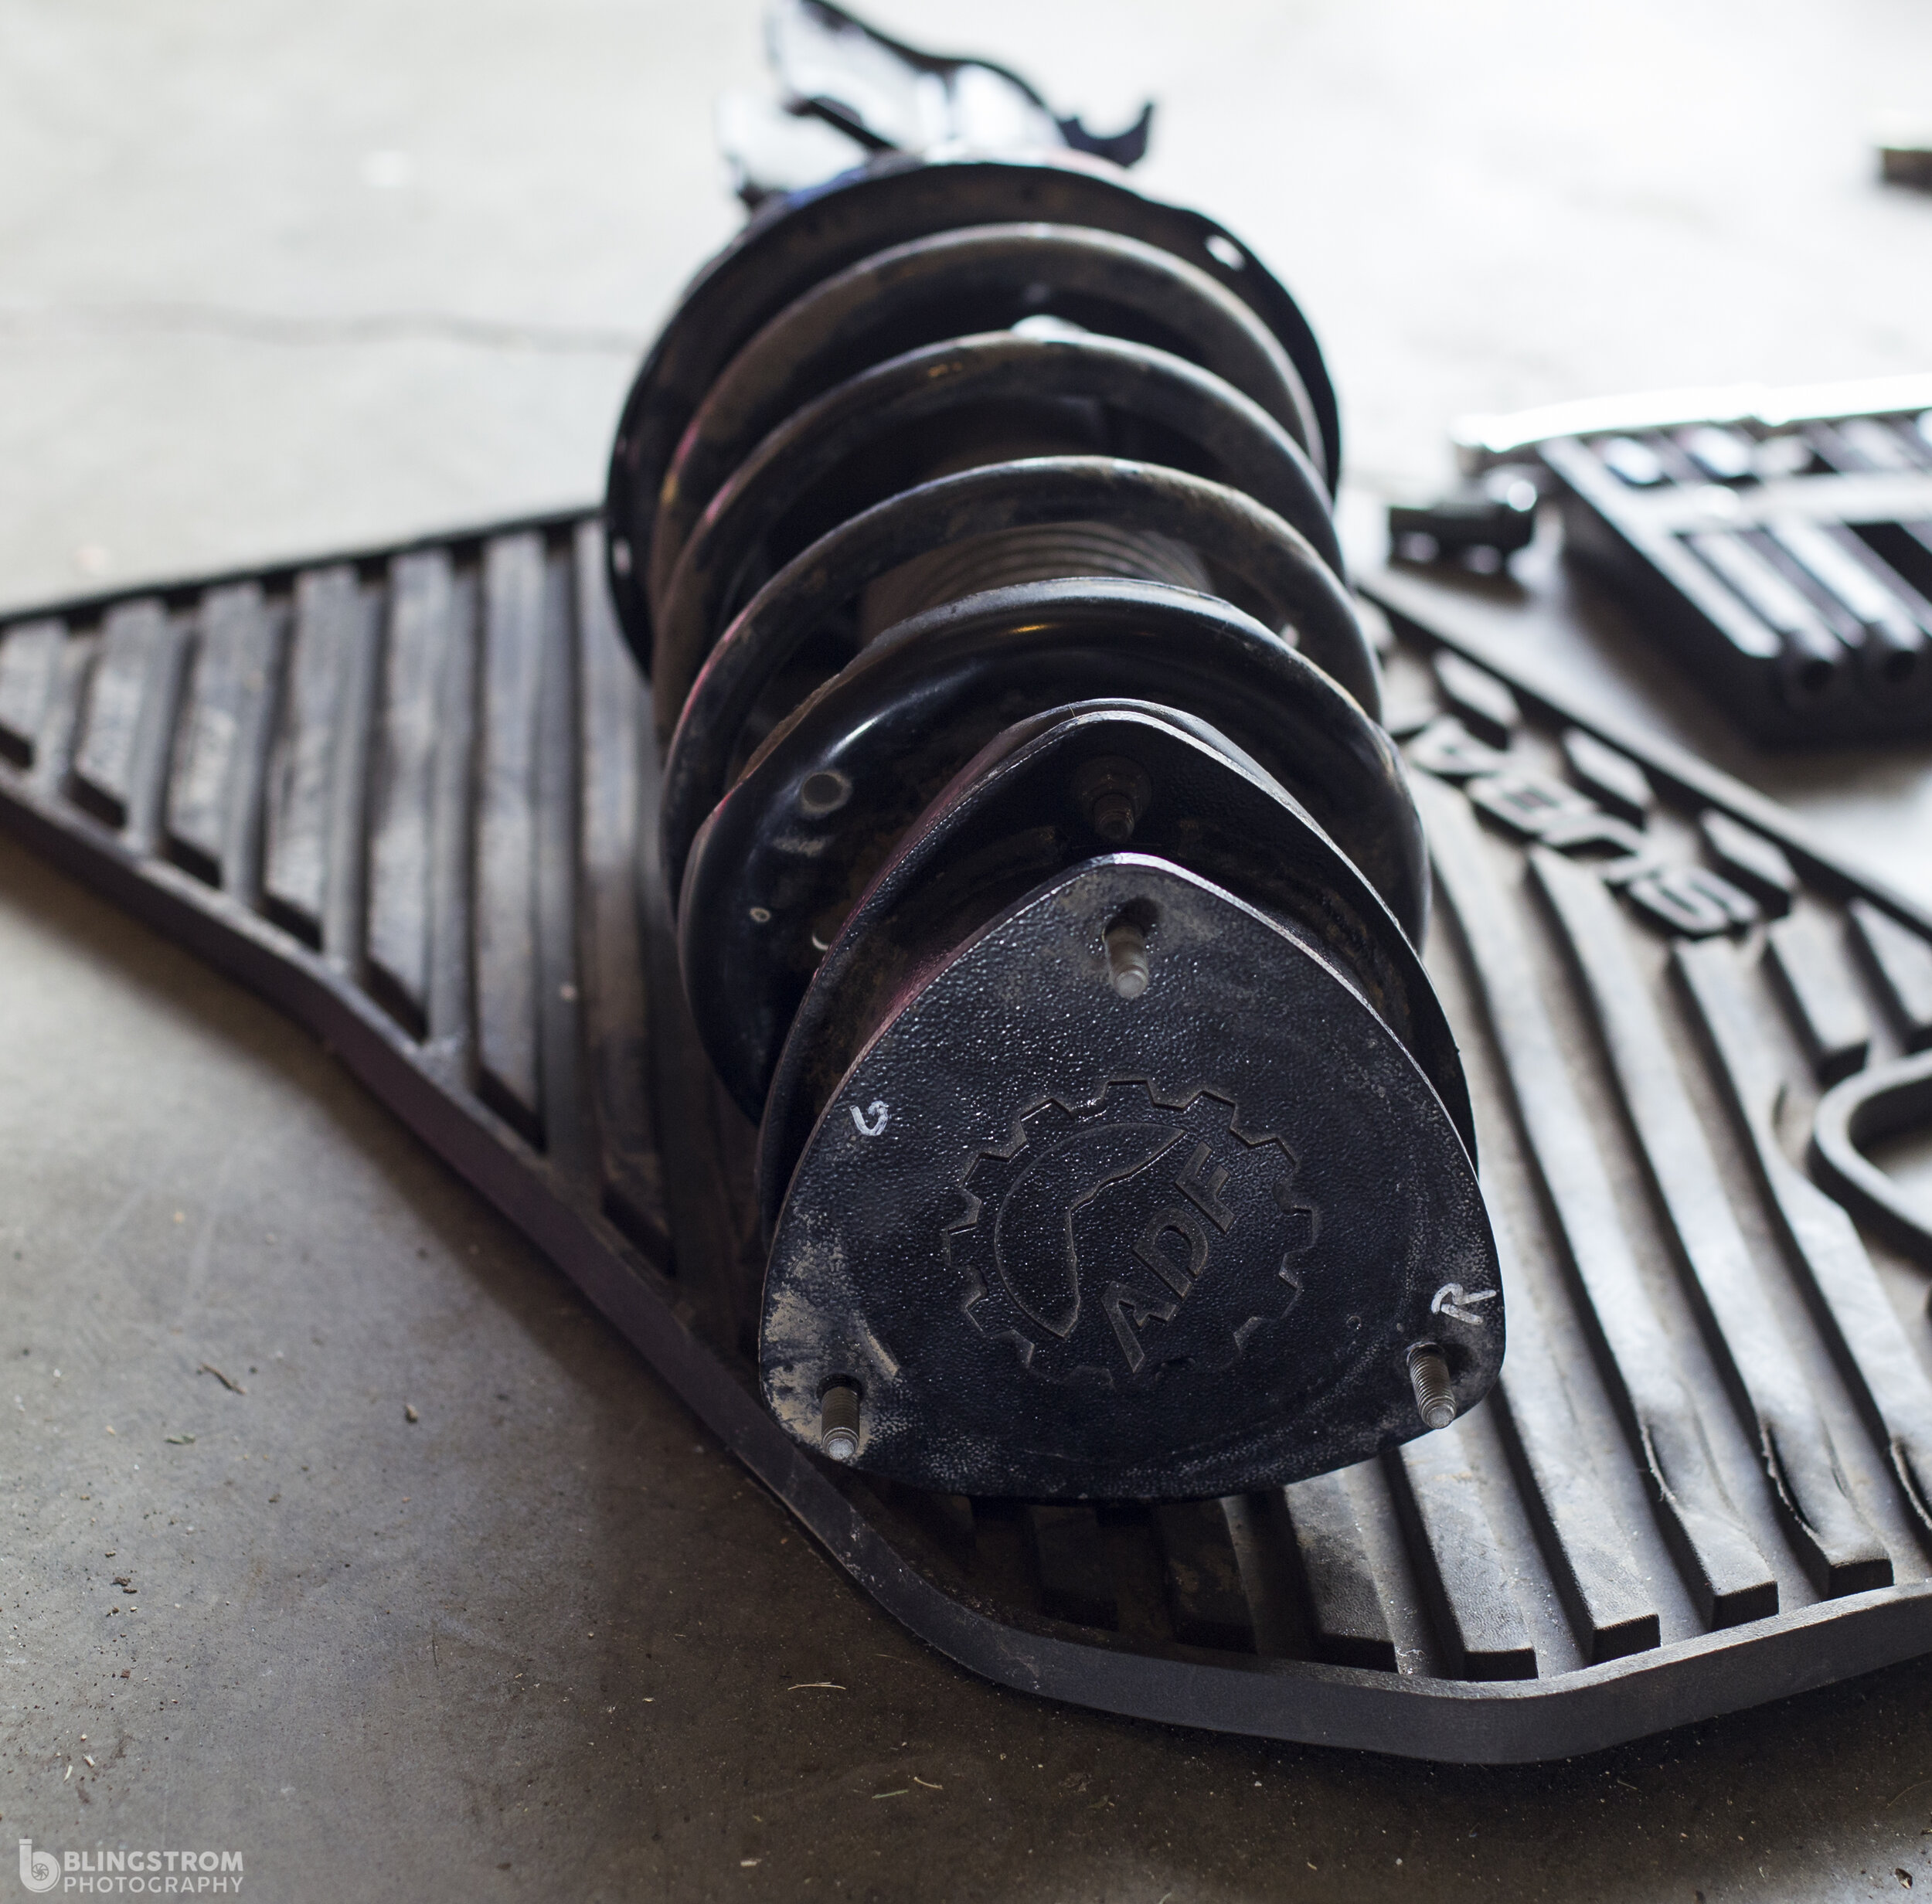
After releasing the strut from the car you will now be either adding lift spacers to the top, replacing them with coilovers/ fully assembled struts. If you are just replacing the struts you will need to find a way to compress the strut and place it on the new strut.

See ya strut!

Strut freshly removed from the car and ready for spring removal.
If you are just installing lift spacers, you are ready!

Or if coilovers are you bag, it’s as easy as just placing it back where the strut used to sit.
This next step is for those who are compressing the spring to just replace the strut. This is a dangerous task given the amount of energy and force in the spring and it can cause serious injury or even death. This may be a task you can drop off at an automotive shop to have them swap the springs over to your new units. If you are still going to take it on for yourself, be safe and smart.

Compressing the spring to remove the old strut.

Very leaky strut! Remove the dust covers and bump stop to transfer over to your new strut.
If you have a professional spring compressor on hand this is the best method I have found to removing them. You can also rent/borrow a set of spring compressors from your local automotive store, or purchase your own from Amazon. You will normally get two when buying or renting, but I would recommend finding a third for safety.
Having your new setup ready for installing you can follow this guide in reverse to reinstall. Making sure to place the proper strut on the correct side and putting your marker upper camber bolt back in the top location. After everything is reinstalled double check all your bolts and nuts before setting off a test drive around your block. Then listening for any new noises and making sure everything is working as it should!

If you are having trouble sliding a bolt in, a good trick is to slip a screwdriver in and hold it in place. Now you can use the screwdriver to move it around and install the top bolt.

The deed is done!
Congratulations! You have completed your front strut replacement and can back on the road. Unless you have rear suspension to install and which you are halfway completed!
Amazon tool links!
Milwaukee 3/8ths electric ratchet
Milwaukee 1/2” electric impact
Grey Pneumatic 3/8th socket set
Grey pnuematic wobble socket set
Oem tools dead blow hammer set
Amazon part links!