DIY: 06-07 WRX brakes for your 04-08 Forester! An OEM brake upgrade for your Rally wheels!
With all the newest performance and sport version cars being equipped with a Brembo brakes you can often feel left out with the Forester’s little two piston front brake and one piston rears. Well, why not do something about that and keep it oem while we are at it!
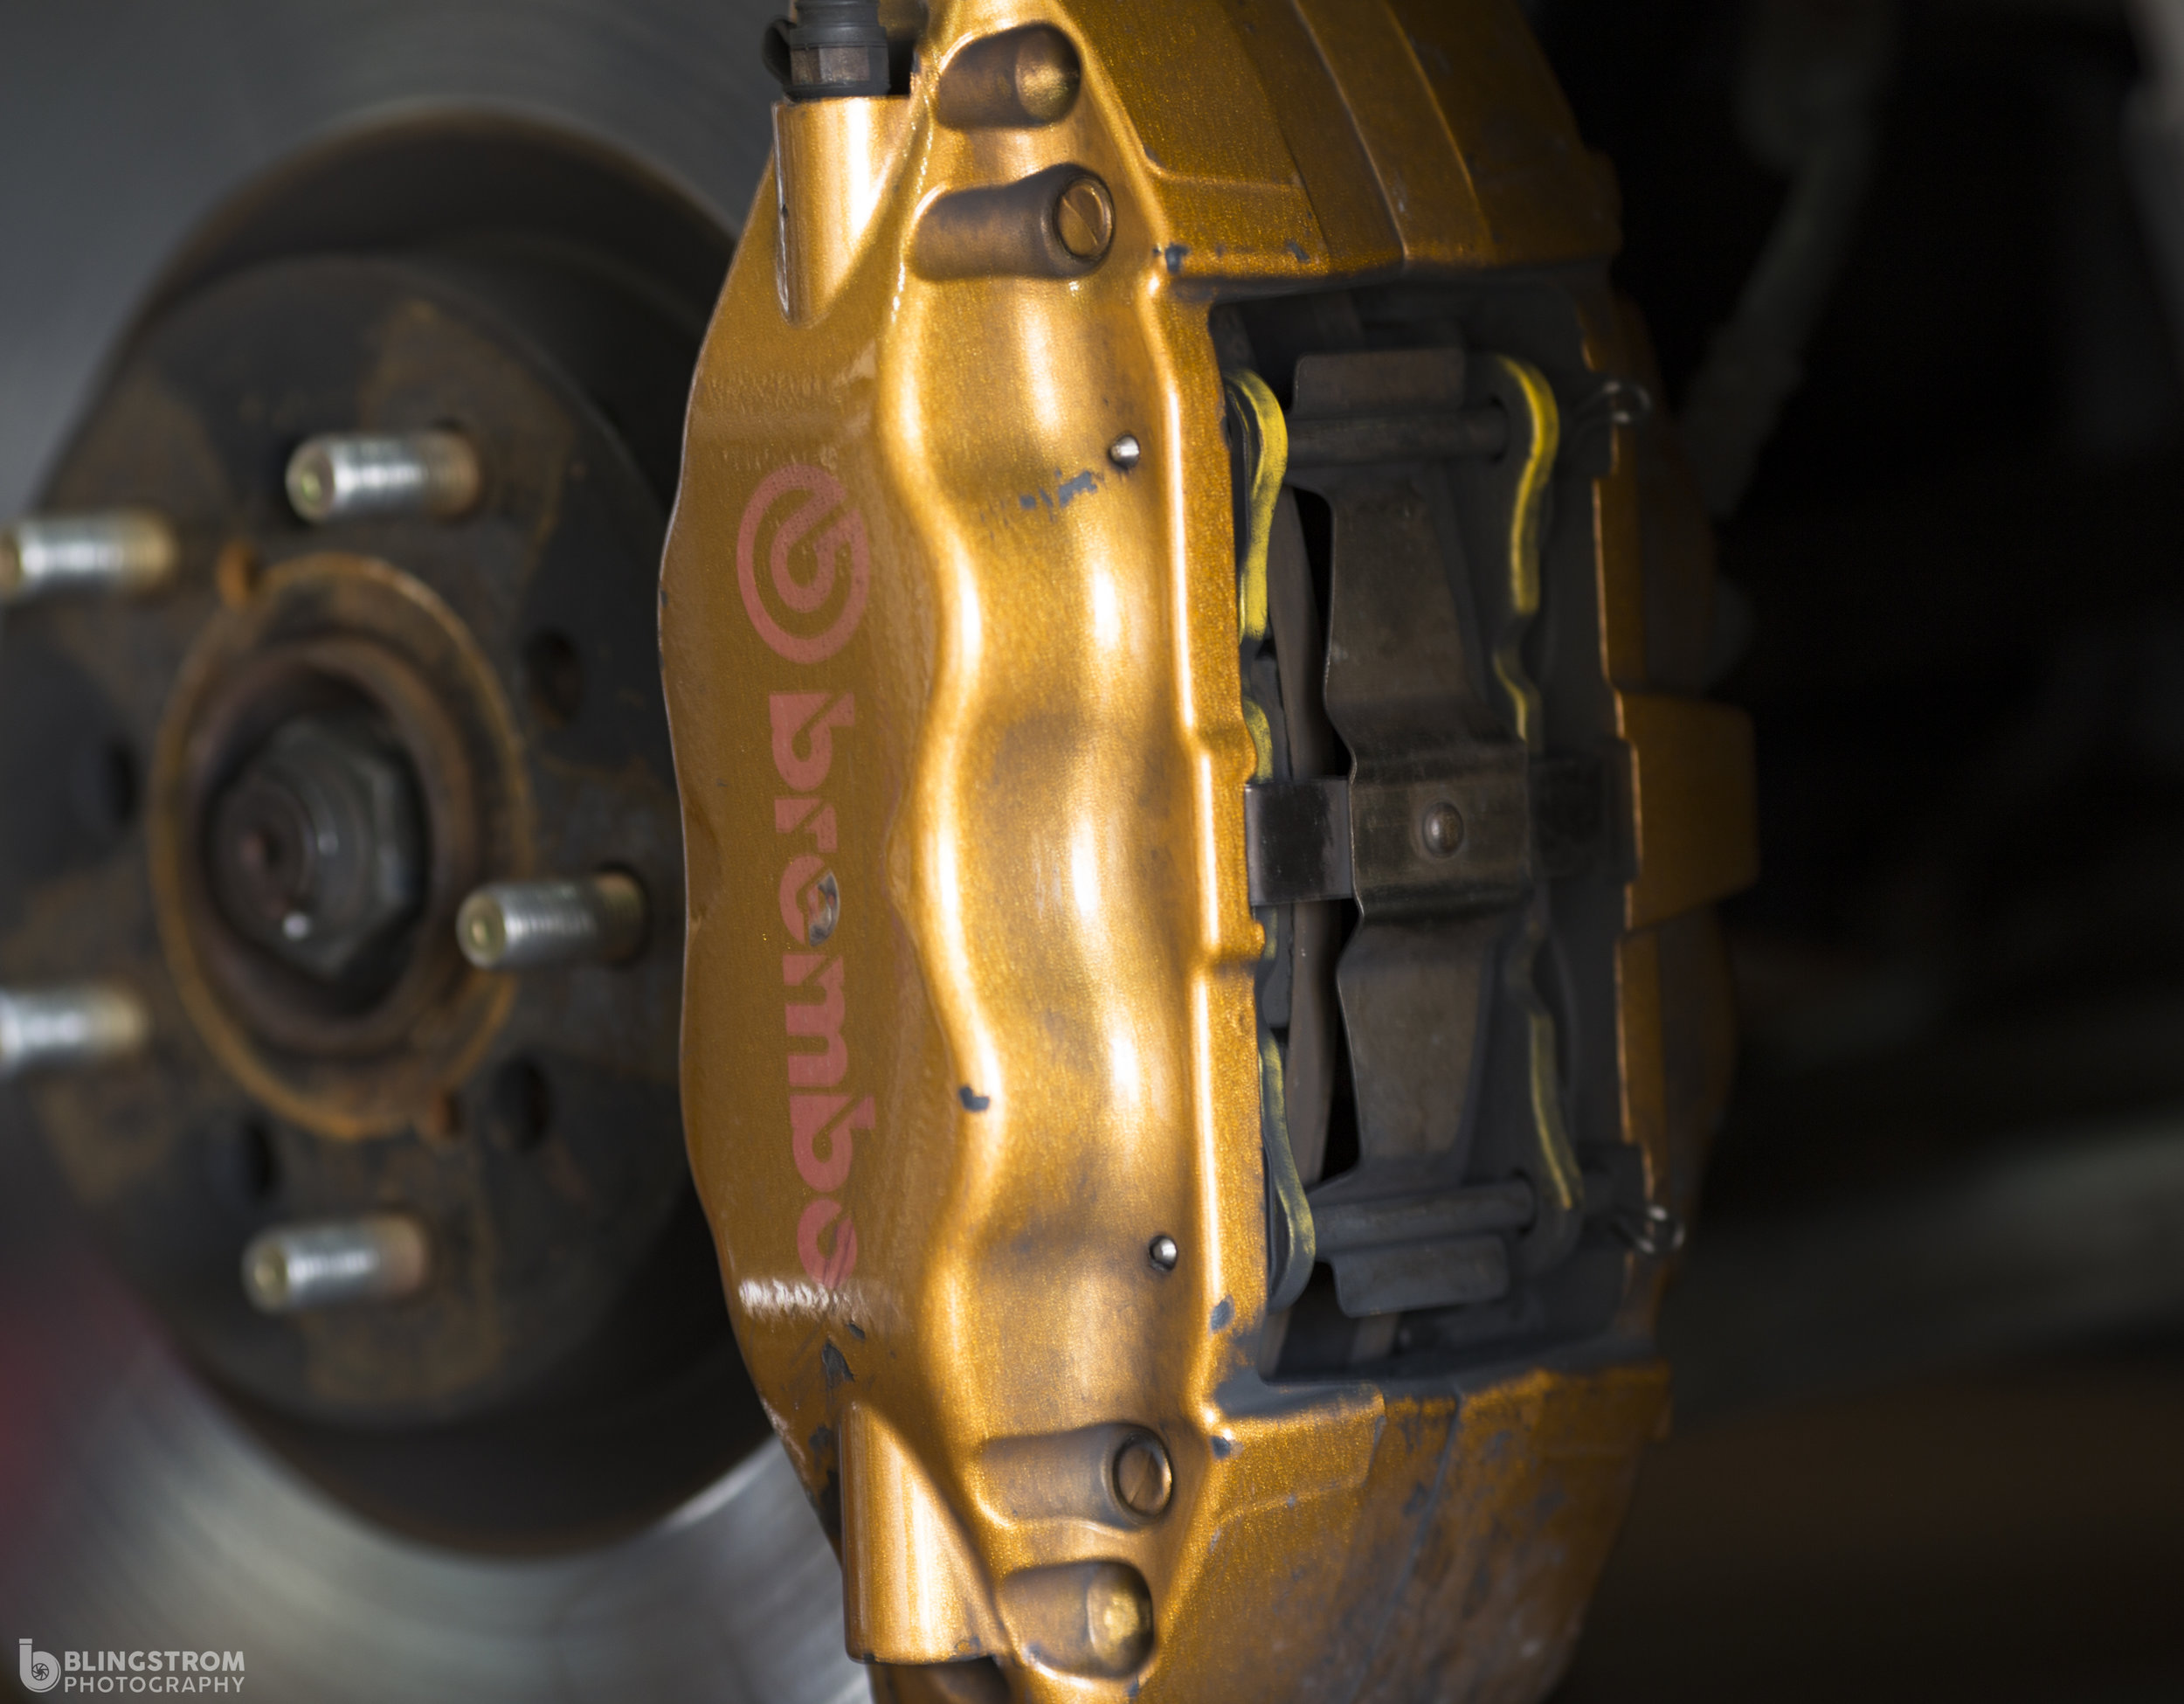
So many Brembos on cars these days… No only better stopping power but a nice quality finish that looks great behind a good set of wheels.
Subaru introduced the front 4 piston and rear 2 pistons with the 06-07 WRX in America. Why didn’t they add them to other performance models… Outback XT, Legacy GT, Forester XT, etc… who knows but they are quite a great upgrade to the factory Forester brakes. While the front brakes bolt right on, being a simple task for those versed in brake replacement. The rear set will need either a WRX rear knuckle or the proper brake adapter kit to situate them on the Forester knuckles, along with a bit of dust shield modification to fit the new larger rear rotors. One other bonus of these brakes are they work well with 15” gravel wheels to tear up the rally-x course.

An upgrade that doesn’t “brake” the bank… while giving your brakes a bit of style and more stopping power.
Tools
What tools will we need to complete this task? You will need a lug nut socket and ratchet/impact gun. A 14 mm and 17mm socket. Brake line wrenches 10, 12 14mm for the bleeders and lines/hoses. If you install the the hub adapter you will need a 10mm allen socket too.
These are my stand by hand tools. I have used these sockets for the last 6 years without breaking one. I really enjoy them. The wobble extensions will help you get into those hard to reach places where there are many on your Subaru. The pliers set will help remove those tricky stuck breather hoses.
Grey pneumatic 3/8 socket set Gear wrench 3/8 ratchet Neiko wobble extension set

Power tools I use to speed up the job! Milwaukee is my go to company with a long warranty and great tools these might out last your Subaru! I have used them for the last 4 years and they make everything that much easier.

Love these things! Making your job go by so much faster!
Parts
Parts we will need are front and rear brake pads for an 06-07 WRX, choose your favorite company and style of brake pad from street to track.
The factory Forester brake lines will fit, but you can replace them with the 06-07 WRX brake lines that have locating tabs to keep them in place when tightening down the banjo bolts. If you purchased 06-07 WRX rear knuckles you will bolt them straight on, if not have your adapters ready to go. 06-07 Wrx rear brake rotors are larger than the standard Forester units, so add those to the list.
A few quarts of your favorite brake fluid will be needed to purge the system of air and replace the lost brake fluid.

Subaru 4 piston brake calipers, the star of the show!

Factory lines will work, but if you want to spruce it all up. These stoptech lines can do it!

Subaru 2 piston rear calipers, your back up co-star in this wonderful show.
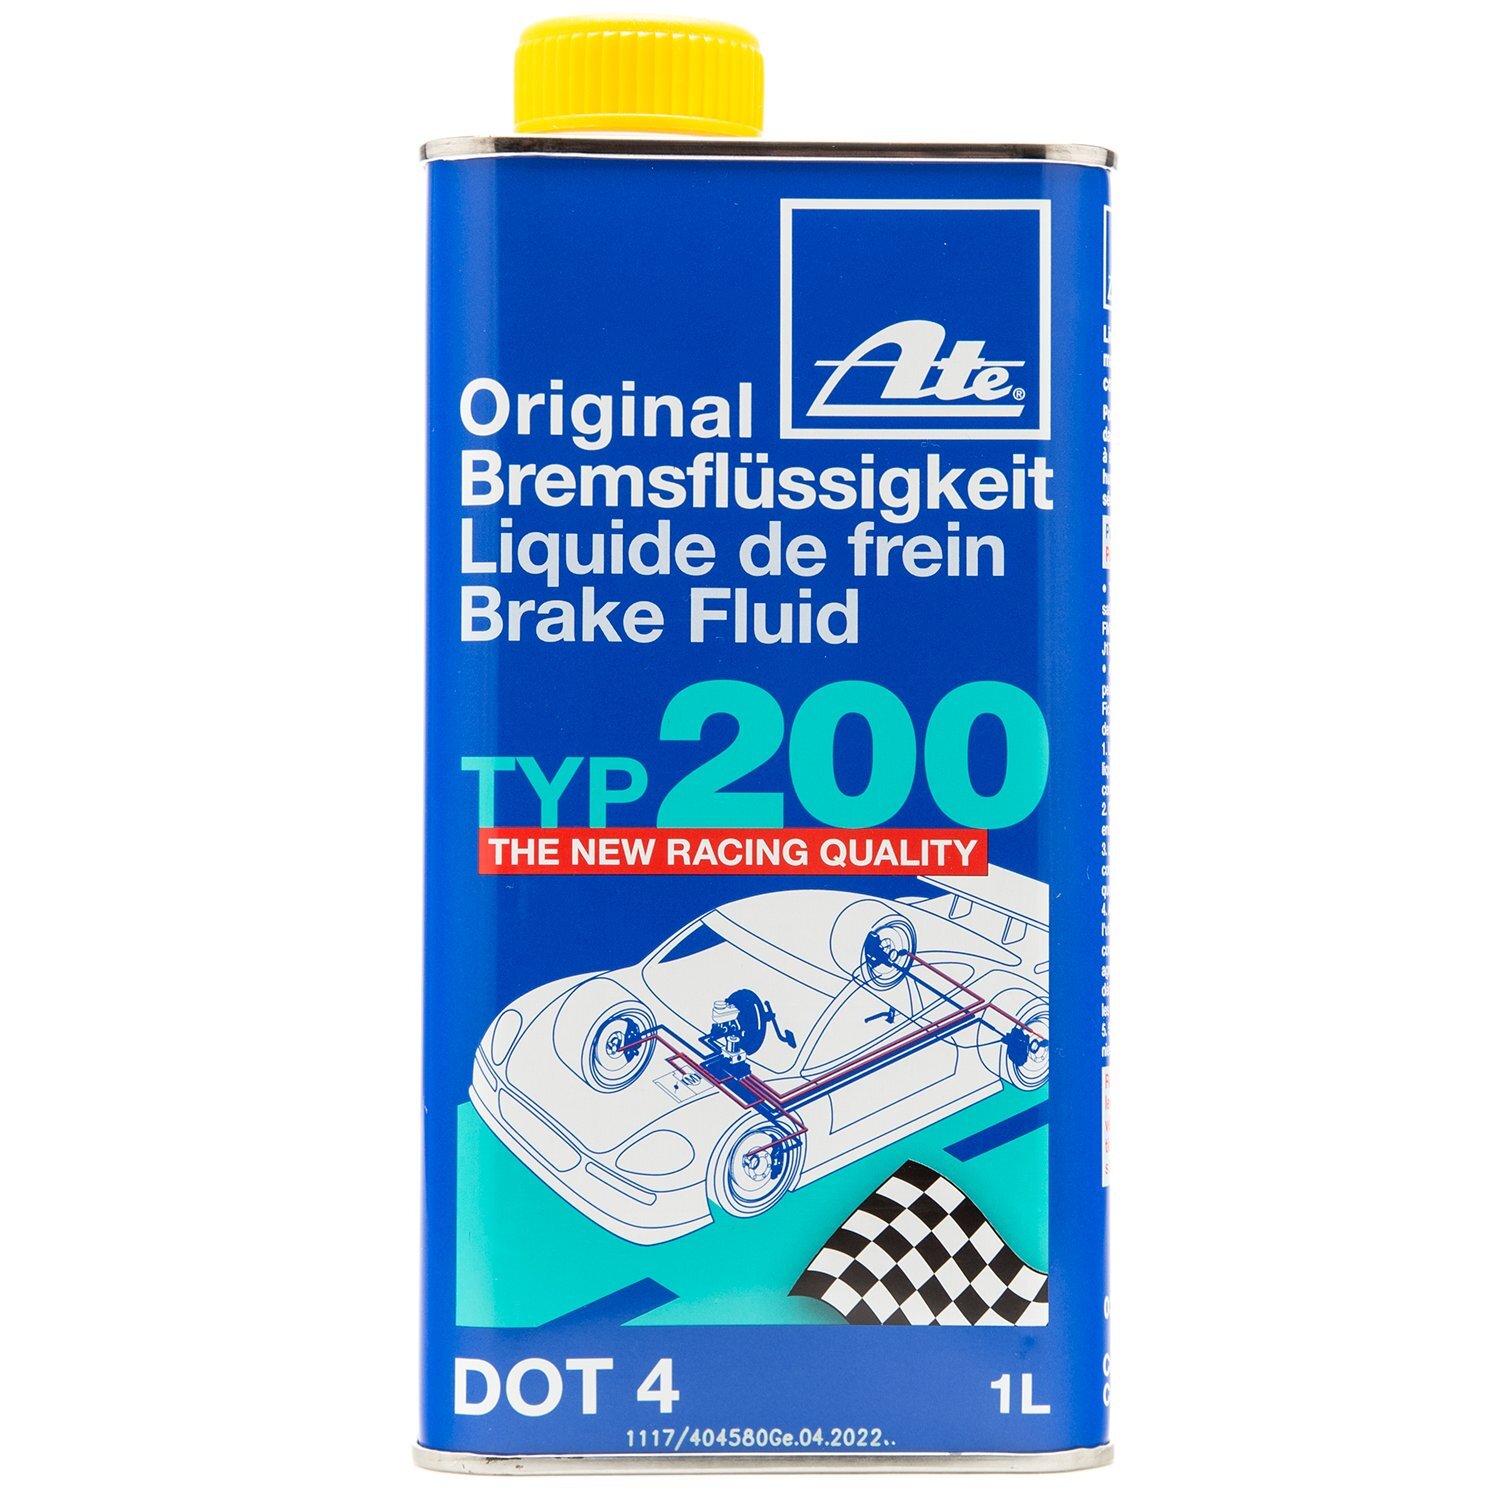
After ATE blue was outlawed this is my go to ATE brake fluid.

Front and rear rotors have been upgraded to EBCs

Front pads have been replaced for EBC red stuff.

Ebc red stuff (rear) gives you a bit more bite for those new calipers.
Installation
As with most projects we will start by lifting the vehicle off the ground and remove the wheels. Set the wheels aside and in a safe place for you to work on the car.

Up and away we go.
Now you can began at either end of the car you like, I generally start on the front as it is a bit less work and gets your project off on the right foot. The only difficulty on the front brakes are the lower strut bolt, it can hinder the removal of the upper brake caliper bolt. Sometimes you can sneak it by and other times it is just worth removing right away so we don’t struggle with it.

Lower strut bolt shown above. As you can see, the upper caliper bracket bolt will have a tough time sneaking by without it removed.
With that dealt with we can loosen the brake hose banjo bolt. You will thank your future self for breaking those loose prior to removing the brake caliper, otherwise prep yourself for a struggle! Now you can break the two caliper bracket bolts loose and free them from their brake caliper prison. Now you can pull the caliper away and remove the banjo bolt.

The banjo bolt resides on the backside of the brake calipers. Make sure if you are reusing your banjo bolts that the old copper crush washers are removed and two new washers are used to keep it from leaking.
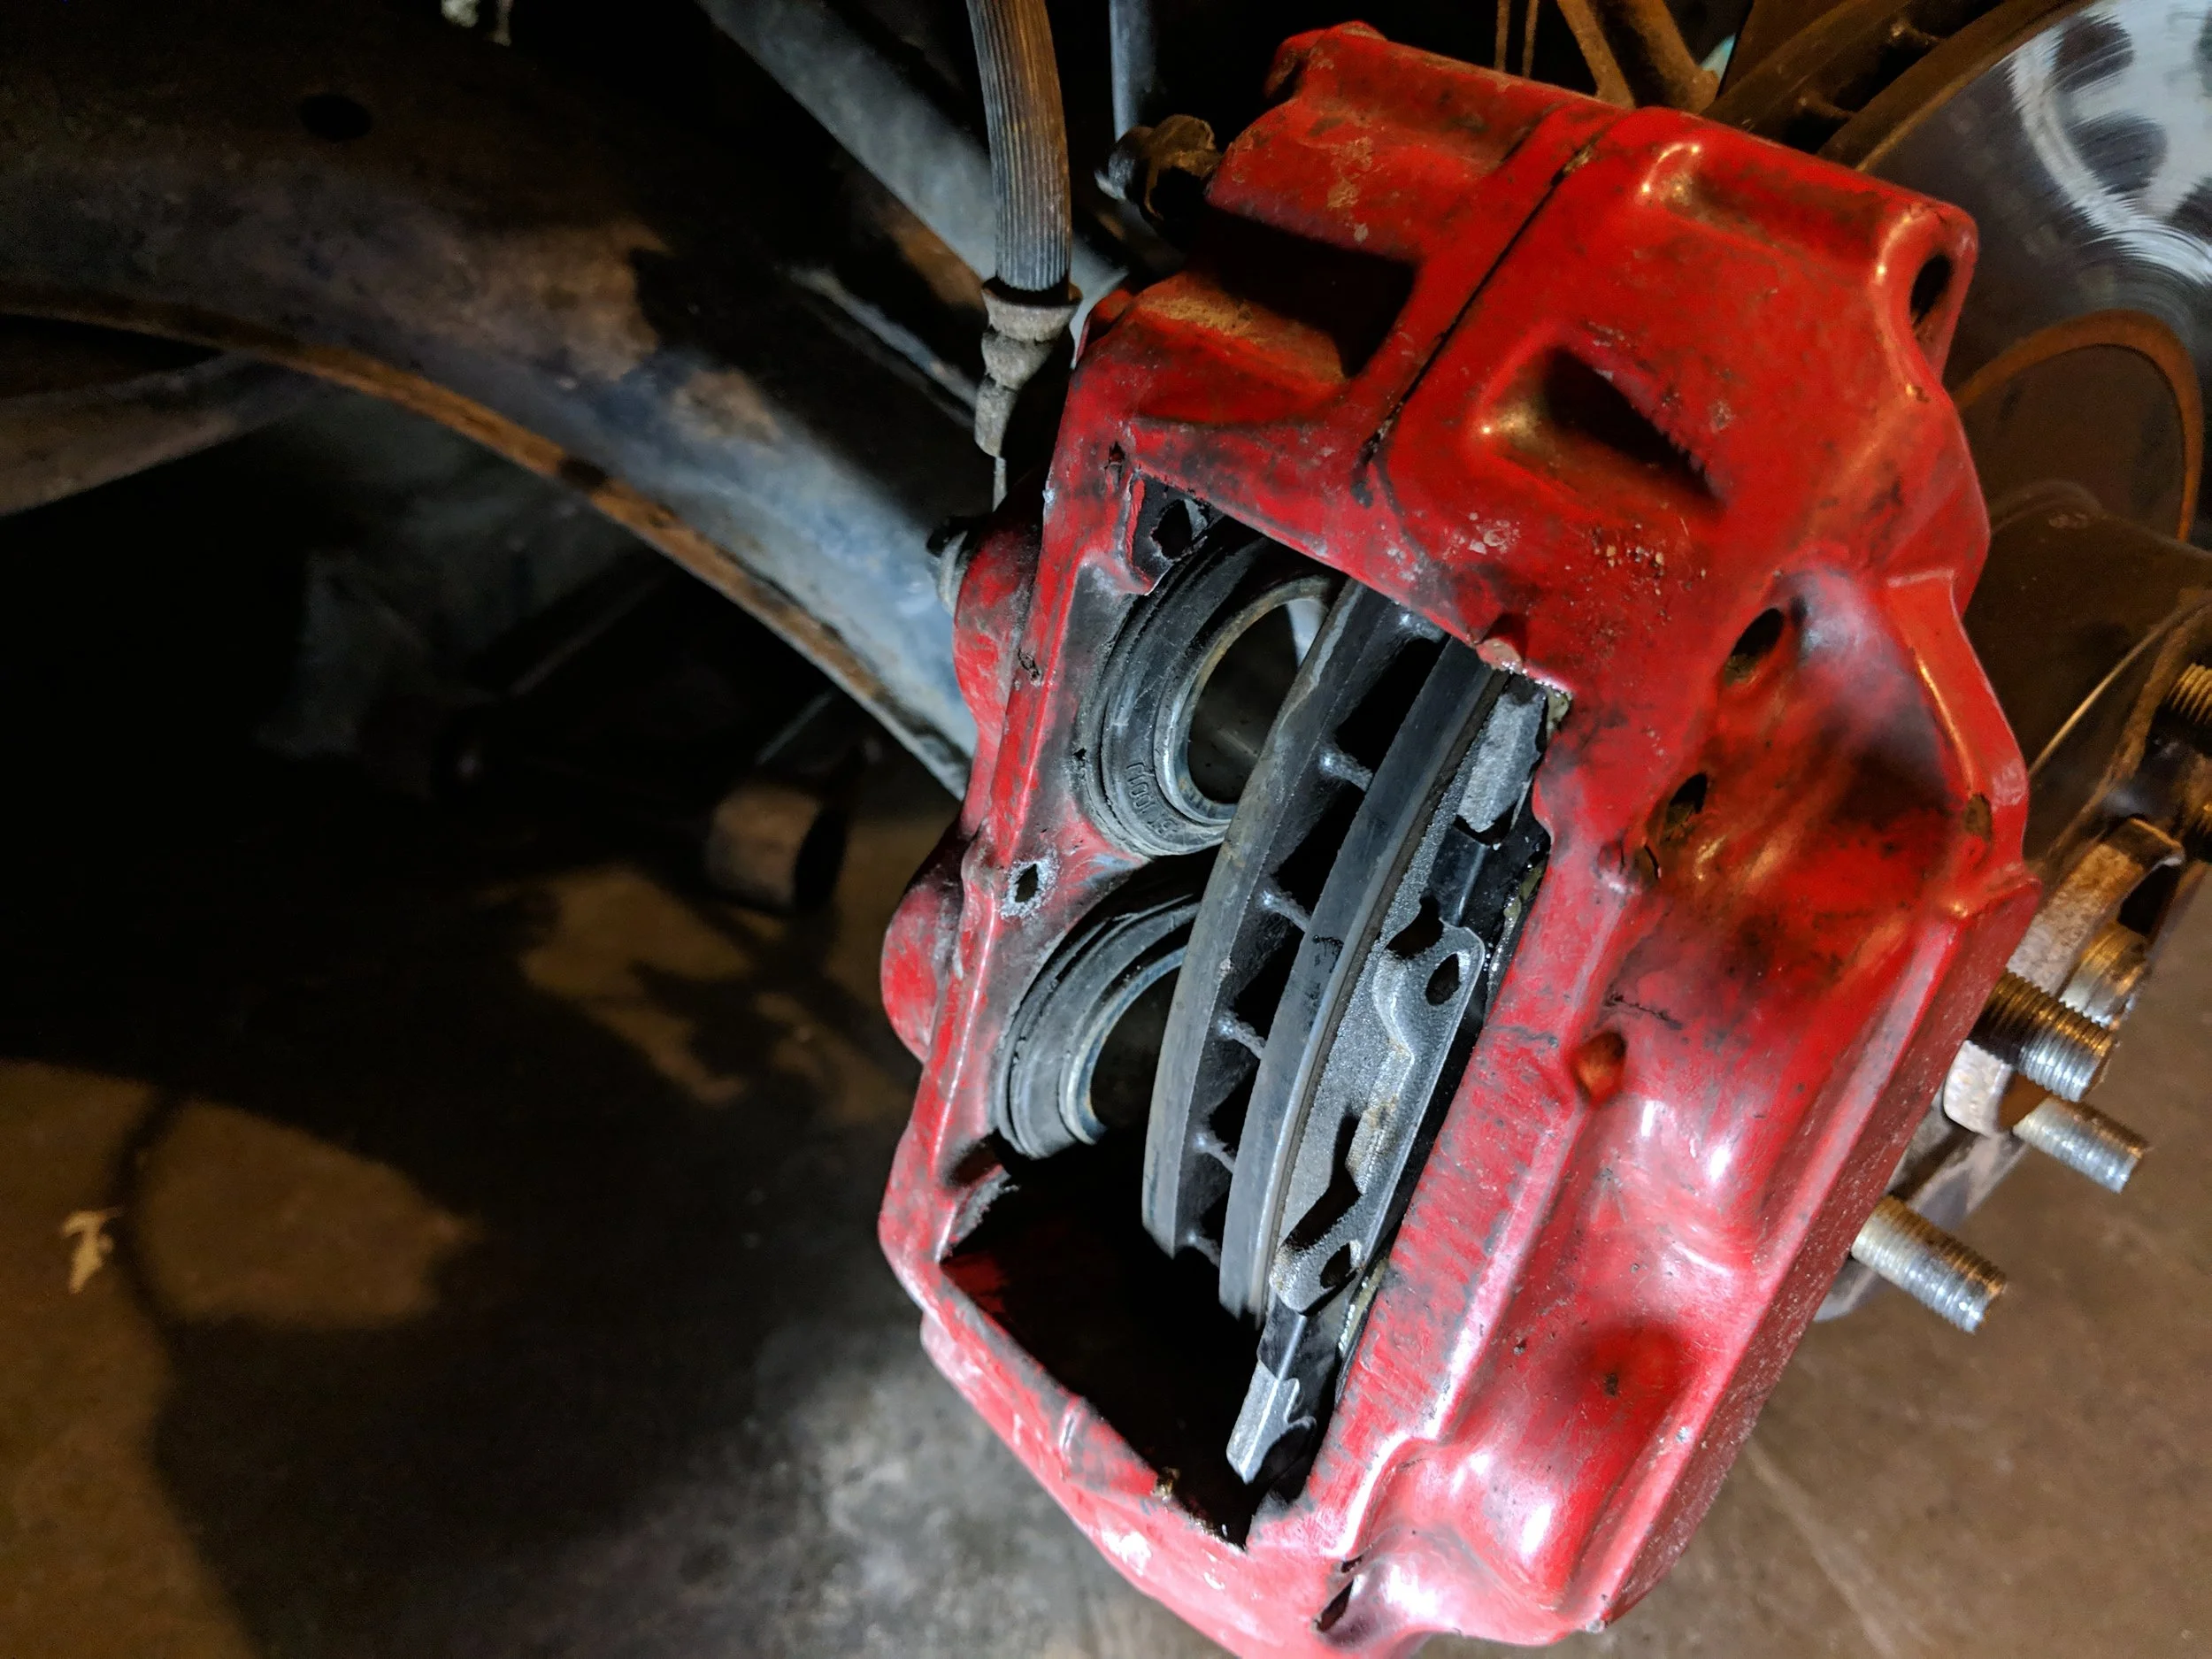
Next the brake rotor will need to be removed. I generally bust out the BFH or big flippin’ hammer to smack that guy right off. If yu are trying to save the rotors for another project or a back up. You can use bolts to drive it out that are located in between the lug studs. Otherwise you can bring out your brass hammer or rubber mallet to give it a few good strikes and remove it.

The oldness. Trusty and still working but when replacing parts there is nothing like an upgrade to make the job more enjoyable.
The front rotors are up next and you can place them on the hub. Next the brand new flashy caliper is ready to go on. You will easily slide it over the rotor and place the two caliper bolts in. With it held in place you may now install the brake hose with two new crush washers and The banjo bolt. The brake pads can slide right in and get cozy in their new home.

Nothing like new shiny parts to keep your motivation through the project.

Quite visual change from the stock brakes.

Shiny and new! This is the moment you have been waiting for. new rotors and caliper making their home.
Having installed the pads you can now attach the supplied hardware. Slide the two caliper pins through the set of brake pads and you are now able to snap the anti rattle bracket in place. These helps hold the pads from sliding back and forth while in the caliper. With all those equipped, you may now slide in the rear brake pad pins, these will keep the caliper pins from sliding out. Using you favorite brake bleeding technique comes next, I usually work alone and find gravity bleeding to get the job done. One corner done! Now do this on the other side to finish one end of the car! Repeat the same steps on the other side and the front half of the car is completed!
Here is where the brake pads hang out.

Pads and the attaching hardware. Keeping everything The two gold pins allow the brakes to move back and forth inside the brake caliper. While the larger shaped piece of metal (anti-rattle hardware) keeps them in place to stop unwanted brake noise. Lastly, the small silver pin keeps the slide pins locked into the caliper and holds all three of them to the pad. Below is the installed photo.

Hardware and brake pads ready for some stopping!
With the front brakes finished you can head to the rear of the car. The rear of the car can go many different ways as was previously touched on, replacing the rear knuckles with 06-07 Wrx knuckles or rear knuckle adapters for your 04-08 Forester knuckles. When I picked up my brake calipers used they included the adapters and with that my mind was made up to try them out.

There are many companies out there that sell these brackets. I forgot to take a photo of mine but they were used and what I assume are Kartboy adapters.
The adapters simply bolt to the standard caliper bracket mounting points and relocates the caliper. This is by far the easiest way to install the rear two piston calipers. Otherwise you will need to remove the rear knuckle by breaking it free of the CV axle, rear lateral links, strut and trailing arm. With an older higher mileage vehicle this could be quite a daunting task given that once rust takes hold of the lower lateral link bolt, drilling, cutting, destruction could be your only means of removing it. With that being said, we will follow along with the adapter kit install.

Not my Forester, but this is the assorted bolts that hold the lateral links and trailing arm on. You would need to remove the axle nut, caliper bolts, abs line, and strut bolts if you wanted to remove the knuckle assembly.
Starting with once again breaking the banjo bolt free before the caliper bolts will allow for easy removal. Up next are the caliper bracket bolts, with those removed the pulling the caliper off the brake rotor will finish the uninstallation process.

From my prior brake install, but here is the caliper and removed and the banjo bolt/brake hose connection point.
Removal of the rotors is the same as the fronts, using bolts in the rotor holes located near the lug studs. If you are tossing the rotors you can use your favorite hammer to dislodge the rotor from the hub. Without a rotor on the hub you can start your dust shield modifications. This is a necessary step to clear the larger rear rotors when you use the 04-08 Forester knuckles. There are a few ways to modify the dust shield, you can remove it completely or take a cut off wheel to take off about an inch to the outer edge of the shield. You can also remove the bearing, hub, and parking brake assembly to replace it with the Wrx version, plenty of work for very little improvement. Then place the rotor back on and check that everything clears, if not continue to cut away.

Once the caliper and bracket are off you can now take off the rotor. Make sure to take it off in an even fashion. The parking brake resides inside the rotor.
I wanted to try a different technique to leave more of the dust shield intact. I went about cutting notches in it a few inches apart to and then pulled the sections away from the rotor. If you have access to a welder you could even cut a few pieces of metal and cover these cuts to make it less of an eye sore.

Cutting into the dust shield. The rear brake rotors are much larger than the factory units and thus need their space. This is a technique I utilized to keep a bit of protection for the backside of the rotor without removal. Wrx knuckles are another fix to this problem and you won’t need those adapter brackets either.

Another angle of the cutting that goes into modifying the dust shields.
Having completed your dust shield mods you can return to your brake adapters, these will install in the old caliper mounting holes. Brakes calipers can now be slid over the rotors and bolt them down, slipping in the brake pads. Now you can attach the caliper hardware to keep the pads in place and quiet. Double check all your fasteners and banjo bolts and begin your brake bleeding process. This completes the rear brakes and you can pump up the brake pedal to make sure it is at a proper height.

I seem to have forgotten to take photos during this part of the install. But here is the aftermath. Brackets bolted in and calipers connected.

Another angle of the brake adapters. Showing the connection between the hub, adapter and brake caliper.

Lower photo of the adapter.

Installed and ready to bleed.
If you are still having issues with brake pedal height, stopping power or anything around these issues please take extreme care with your car and troubleshoot in an open area without people, vehicles, obstacles. If it is over your troubleshooting capabilities I'd recommend your favorite local auto shop. Personally, I had issues with my brake pedal after installation with a low inconsistent brake pedal while in the air. When I put the vehicle on the gorund the pedal was fine… my best guess is the factory hill assist was not happy with my jacks not being of equally set on the vehicle.

I was a bit concerned and ended up replacing the master cylinder… A little master cylinder bleeding here.

Don’t get too aggressive when bleeding the brakes it can ruin your master cylinder. I thought I did, but in the end I believe it was my hill assist engaging during the bleeding procedure. Make sure you car is very flat on your jack stands to hopefully prevent this issue.
Lastly, if there are any break in procedures for your brake pads find an appropriate area and follow the manufacturers guidelines and steps.

Easily fits behind a set of 15” wheels with a rally style barrel. These actually have more clearance than the stock front brakes.
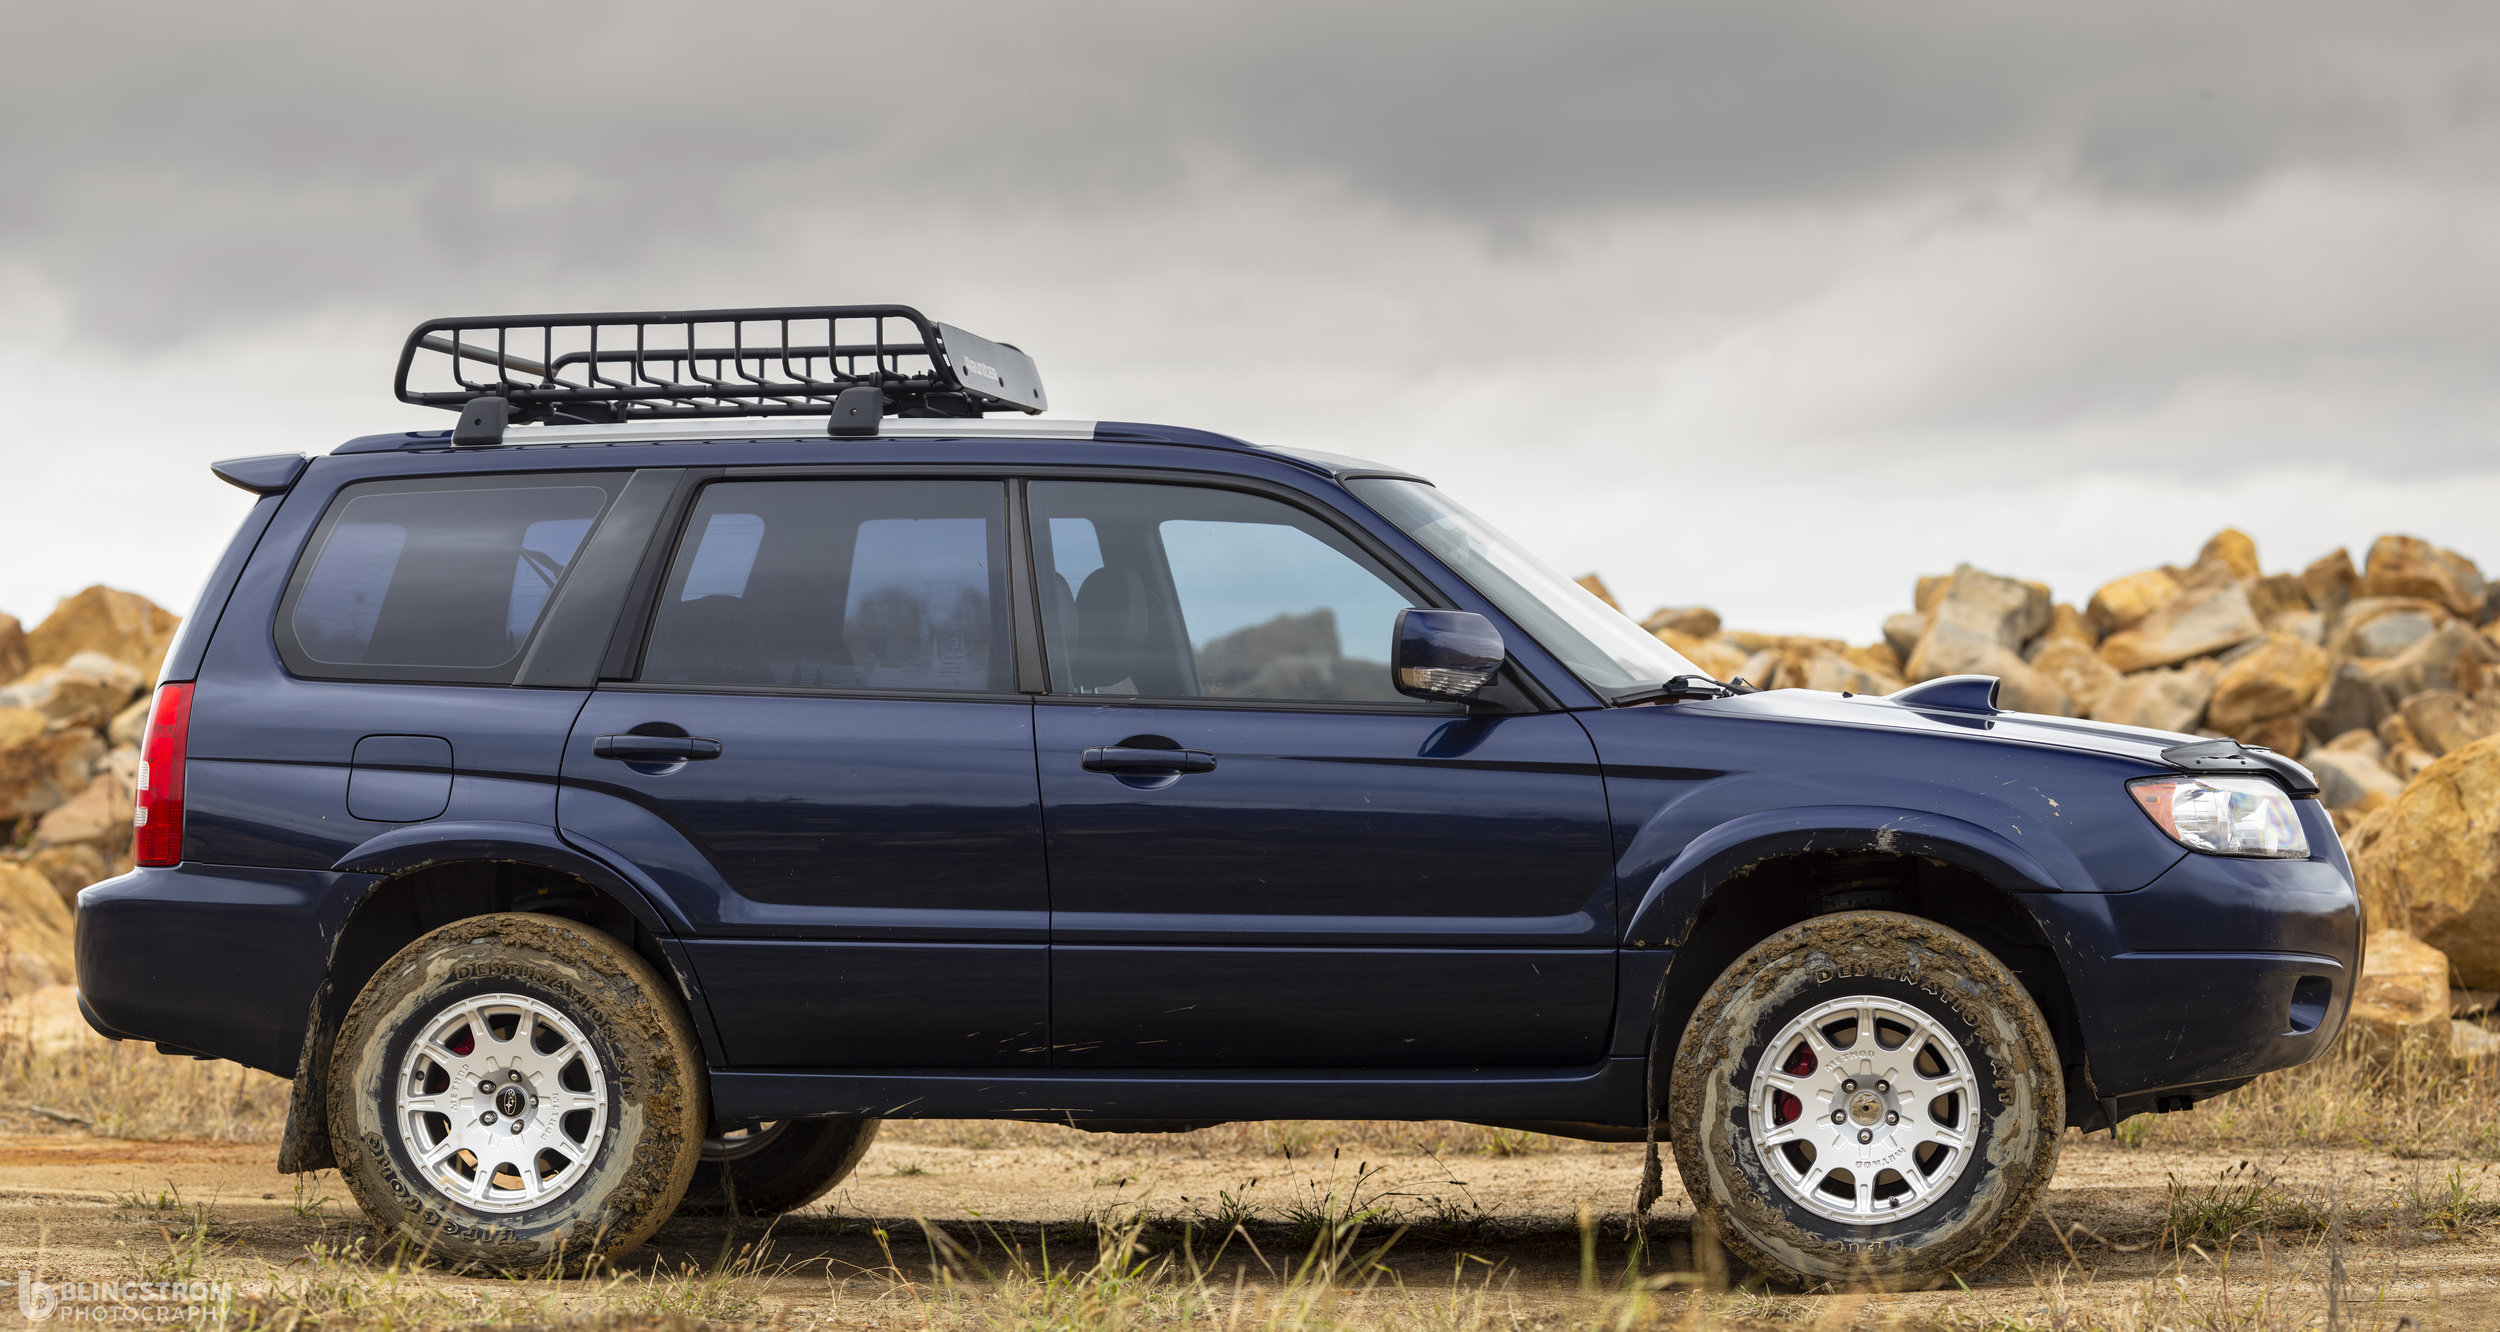
The Method wheels cover them up but they still manage to peek out.
Congrats! You have completed your “big brake” upgrade on your Forester! Now shine up the wheels and enjoy the view through the spokes of them staring back at you and your improved braking feel and performance!
Amazon links:
Subaru front four piston calipers
Subaru rear two piston caliper
Kartboy two piston adapter brackets
Maxpeeding two piston caliper adapter
06-07 Wrx stainless braided lines (front)
06 Forester master cylinder A1 cardone
Amazon tool links!
Grey pneumatic socket set 3/8ths