Automotive stud installation/removal. Feat: Grimmspeed's uppipe!
There are many things that come with Subaru ownership some fun and some that are less fun. Studs are an integral part of this ownership if you are working on the exhaust system, they are found on engine heads that allow the manifold to mount up, the uppipe to turbo connection and they allow the downpipe to mate to the turbo.

Sometimes it’s time to remove studs or add studs, below we will learn about how to do it with just a few tools we have on hand.
With new parts and removal of old parts come challenges and one of those is either installing or removing studs. Unless you live in a particularly dry area of the world rust will find it’s way to your vehicle, which for studs and nuts can be a nightmare. Where the nut won’t seizes to it or even worse breaks off when trying to be removed. Today we will show you how to tackle those pesky studs for removal or installation.
I also own a decent stud remover and installer, but have found that it often will damage the studs. Then you either need to spend time buying new studs or cleaning the threads up. This guide below has yet to fail me, unless a stud is so seized that nothing will remove it.
If you are interested in a full uppipe install, follow this link right here!
Time frame
If you are installing fresh studs with a new uppipe, turbo, heads this can be done in about 5-15 mins. On the other hand if we are removing the crustiest and seized studs you will just need to set aside a good afternoon or evening, as these will test your patience and then some.
Tools
What kind of tools will make this job less of an annoyance? The most necessary tools will be a good wrench set. If you don’t have two of the same sized wrenches a good socket an ratchet can take one of the places.

My favorite ratchets. Gearwrench long ratchet 3/8ths
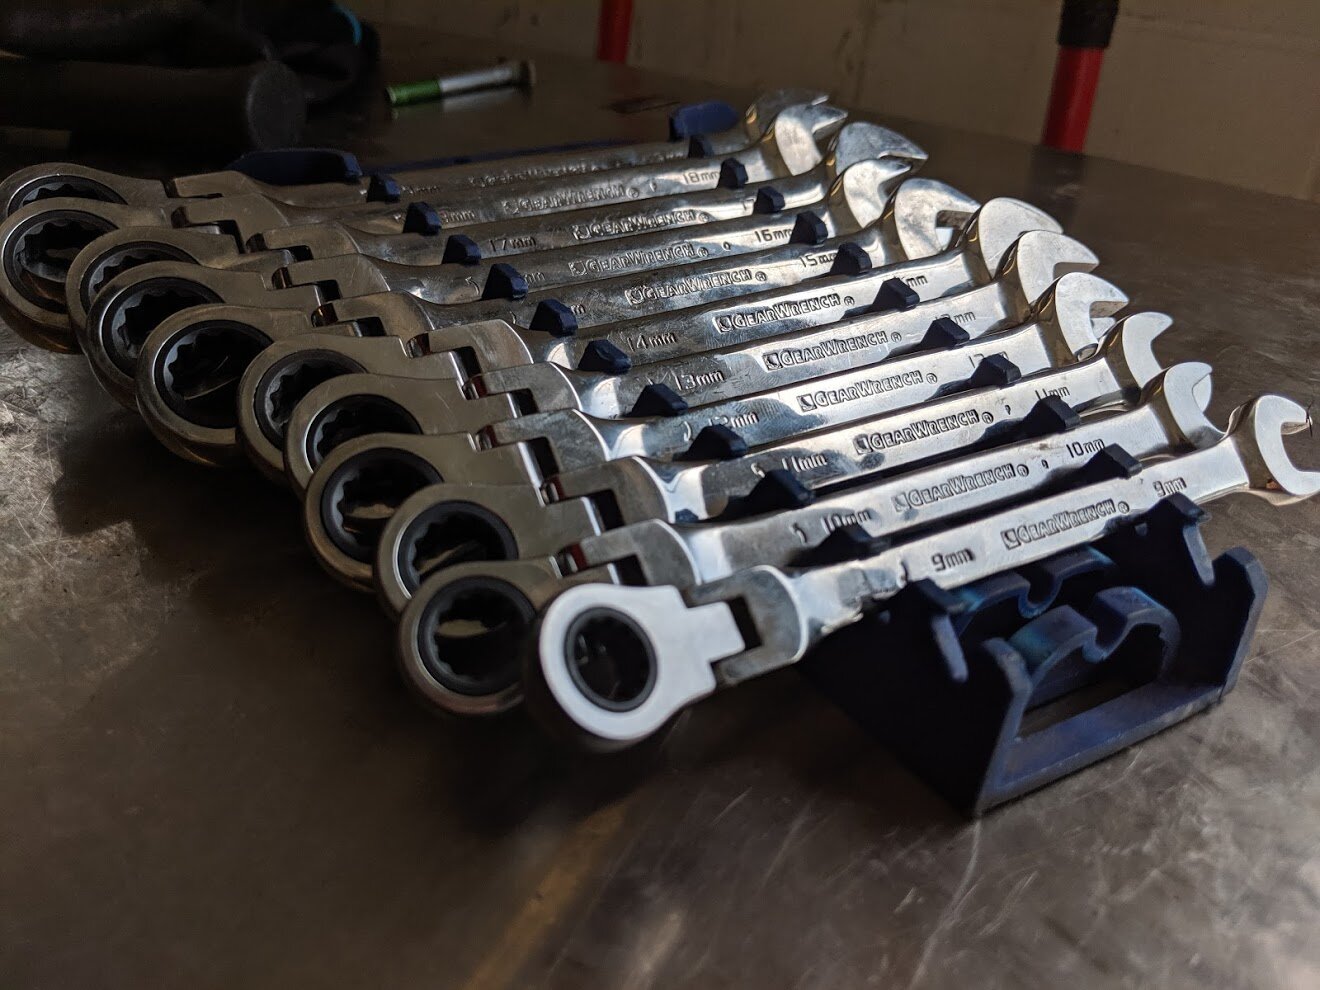
These Gearwrench ratcheting wrenches are an amazing tool to have on your side. I use them just about everyday.

Given that I turn wrenches on a daily basis my next choice is from my Milwaukee set. I love using these to keep my projects moving along quicker and with less stress on my body.
Lastly I like to use a dab of anti-seize to make everything a bit easier for future me.

Whatever your favorite brand go for it! Permatex has always worked well for me.
Parts
As outlined in the title we will be working with the Grimmspeed uppipe kit. This guide should help you with any uppipe that you choose. Or if you are just trying to replace a broken or seized stud on any part.
If you are just in need of studs for a turbo. This kit will have them for your turbo Subaru.


Installation
As stated above my installation will start with the Grimmspeed uppipe and assorted hardware. Everything that you need is included and ready for you to start your project.

With everything accounted for we will take our studs and dab each one in anti-seize. Then start to hand thread them into the uppipe.

A little dab goes a long way.
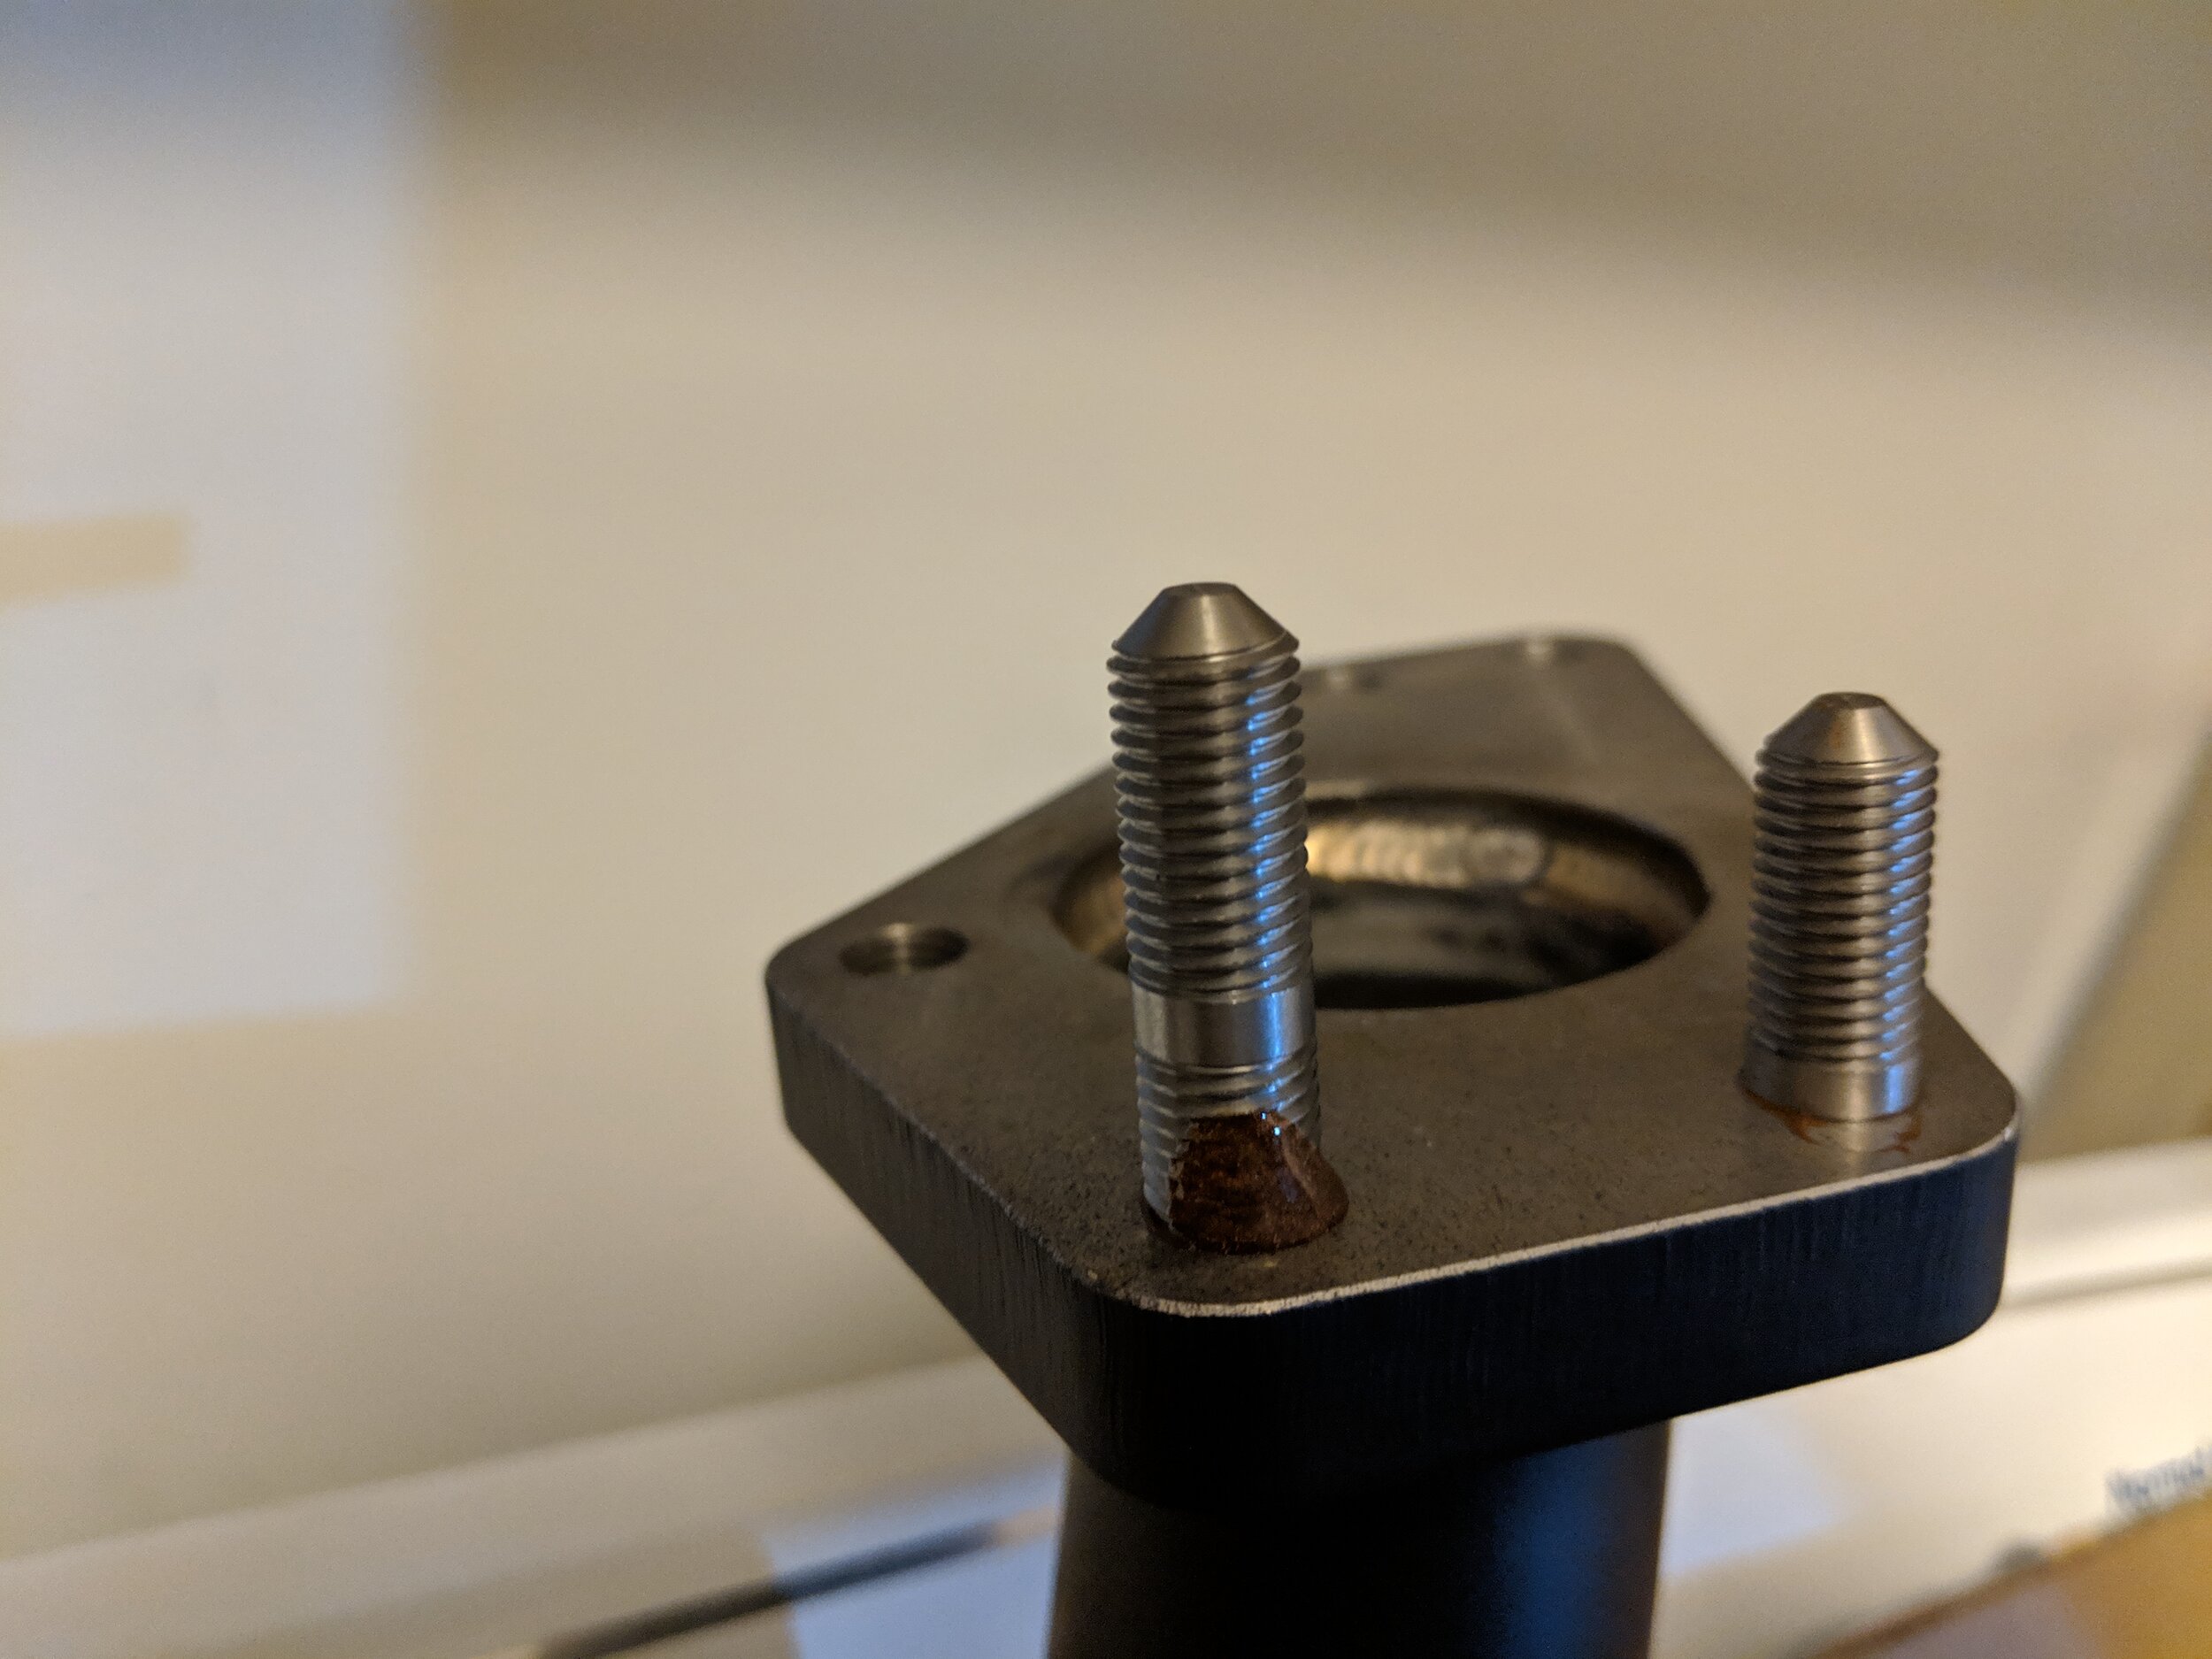
Front and center is the ready to thread in stud. To the right is the threaded in and ready to be fully fastened stud.
Once they are full engaged into the uppipe you will take a nut and thread it into the center of the stud or as my images show pretty close to the bottom.

Placing the lower nut on the stud.
With these in place you will take a second nut and thread it down til they are resting against one another. Now we will hold the lower nut tight with out wrench and use a ratchet, power tool, or another wrench to tighten the nuts to one another.

Both nuts set together. It is now time to tighten them together.

Hold the lower wrench tight and use the top wrench to lock the nuts together.
With the nuts fully tightened down upon one another you can now start tightening down the stud by turning the nut clockwise. I usually cinch it down and turn around a quarter turn or less to finish it. This is also the method for removing a stud, but turning it counterclockwise to remove the stud from it’s home.

If you are removing the stud you will use a wrench on the bottom nut to spin it counterclockwise and out. Setting a stud in will use the upper nut to spin it in clockwise.

Once the stud is set, removing the nuts is the reverse of locking them together. Then you can spin them off and install your part!
Having completed installing the stud you can now place your wrench on the lower nut and use your favorite tool to break them loose of each other. You can now move to the next to complete the rest of your task!

Ready to feed that turbo some hot exhaust gases!
Congratulations! You have set all your studs, you can now bask in the studly work you have just completed! Whether it was replacing an old damaged stud or installing a new set, you can now reassemble or replace your parts.
Amazon part links
Amazon tool links
Gearwrench ratcheting wrenches
Gearwrench long ratchet 3/8ths